How to Wire and Use a Switch-mode Power Supply
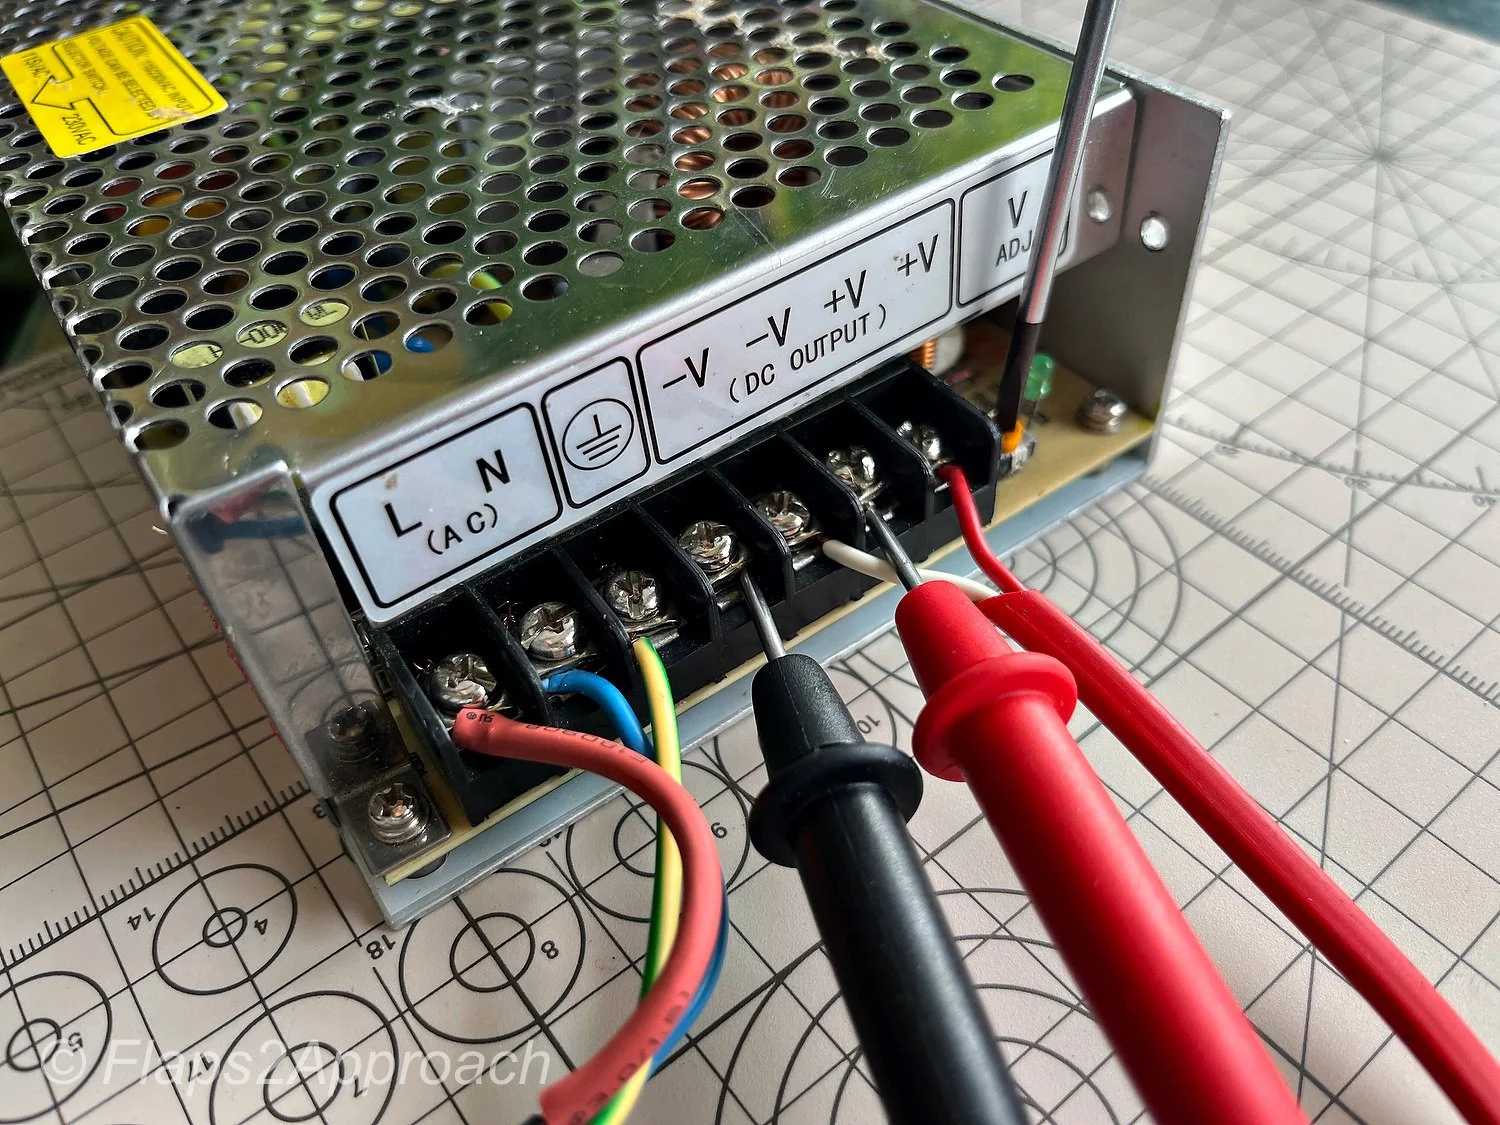
/Red and black probes are connected to +V and -V to determine the correct voltage of the PSU
Power supply units (PSUs) are essential components in all but the most basic flight simulator setups. While simpler systems may use standard computer power supplies modified to deliver multiple voltage levels, these often lack sufficient amperage output. As a result, they are inadequate for more advanced configurations, which require power supplies that can be customised to meet specific system needs, provide multiple voltage outputs, and deliver higher amperage.
This need becomes particularly evident when using OEM components, which often require power sources capable of providing 5, 12, 24, and 28 volts, typically at high amperage.
In this article, I will address the use of switch-mode power supply units (SMPS) and explain how to connect several Mean Well power supplies (or similar models) to mains power using a single power cable. Additionally, there is a discussion on how to protect power supplies and connected components from short circuits.
I use the term PSU (power supply unit) interchangeably with SMPS (switch-mode power supply).
Mean Well Switch-mode Power Supplies
Mean Well power supplies are a popular and reliable choice in various industries, including flight simulation. Known for their high quality construction, durability, efficiency and versatility, Mean Well offers power supplies that can meet the demanding requirements of advanced flight simulators. These units are designed to deliver stable and efficient power across multiple voltages, making them suitable for complex setups that require precise voltage control and high amperage.
Establishing a Power Supply Unit System - A Systems Based Approach
In my simulator, I apply the concept of aircraft systems, assigning individual or grouped systems to dedicated power supplies. This system-oriented approach offers several benefits, most important being simplified troubleshooting; there is no need to trace which wires connect to which PSU - this makes troubleshooting simpler, faster and more intuitive.
Additionally, using a systems base approach ensures the power supplies are not running at their maximum amperage, as each system rarely requires the full amperage of the power supply. Typically, I aim to operate a power supply at no greater than 80% of its full load capacity. This results in a longer lifespan for the PSU, less heat generation, and the ability for the power supply to provide more amperage if and when additional components are connected.
A major advantage in using Mean Well switch-mode power supplies is that they have been designed to provide a constant source of clean power rated at 20% above the certification provided. Therefore, if you run the power supply at 100% it has a further 20% before the unit will automatically turn off to avoid being damaged.
The downside of this dedicated approach is that you probably will need additional power supplies that wouldn’t be necessary with a more generic setup. While the benefits of tailored power management are clear, the added complexity and cost of additional units can be a trade-off. There is no definitive right or wrong way.
Parallel or Series
A PSU can be connected to another PSU either in series or in parallel. While each method has its pros and cons, unless there is a specific need for parallel connection, I recommend connecting them in series (also known as daisy chaining), as it is by far the easier option.
The primary reason for connecting PSUs in series is to enable multiple units to operate using a single power cord connected to the mains supply. This process will be explained in more detail later in the article.
Connecting PSUs in parallel, on the other hand, is used when additional amperage is needed at the same voltage, but the amperage cannot be generated solely by one PSU. To connect power supplies in parallel, they must have identical voltage and amperage ratings and ideally be identical units. For example, two 28 volt, 6-amp power supplies can be connected in parallel to produce 28 volts at 12 amps.
Safety
It's crucial to emphasise the importance of safety when working with any power supply. Regardless of voltage or current levels, electricity demands respect. Proper precautions and safety protocols must always be followed.
Important Points:
Be vigilant to what you are doing at all times.
Turn off mains power (and remove the plug) at the mains whenever working with a power supply unit (do not work on ‘live’ equipment).
Always cover or secure any AC terminals to avoid accidental contact.
Never leave any system in its ‘live’ state (for instance, if leaving the room).
No matter how skilled you are, it is very easy to accidentally touch a live terminal or wire when working in a confined space.
Note that after using a power supply, there will be resident power in the unit after it has been disconnected from mains power. Allow this power to dissipate before touching any terminals. Mean Well power supplies have a LED light that slowly decreases in illumination as the power drains from the unit.
Voltage and Amperage – What Power Supply Do I Need
Power supplies have differing voltage and amperage.
Voltage is the output of a power supply. For example, 5 volts output is required to illuminate the backlighting on an OEM panel and 28 volts is required to illuminate OEM Korrys, while 12 volts may be required to power a small 12 volt motor.
Volts represent the potential difference between two points, or the pressure driving the current. To relate it to a more tangible concept, it's like water pressure in a pipe.
Amperage (Amps), on the other hand, measures the current flow or how many electrons are flowing through a conductor per second. In other words, Amps is a measurement of how strong the water is that travels through the pipe.
For example, illuminating the backlighting on an OEM panel with five bulbs requires a 5 volt power supply that provides sufficient amperage to illuminate the bulbs. However, if you have twenty panels, each with five bulbs, you'll still need a 5 volt power supply, but it must deliver significantly higher amperage to illuminate all the bulbs simultaneously at the correct intensity.
Determining the required amperage for a particular panel should not be guesswork; it can be a time consuming process to measure the current draw for each component.
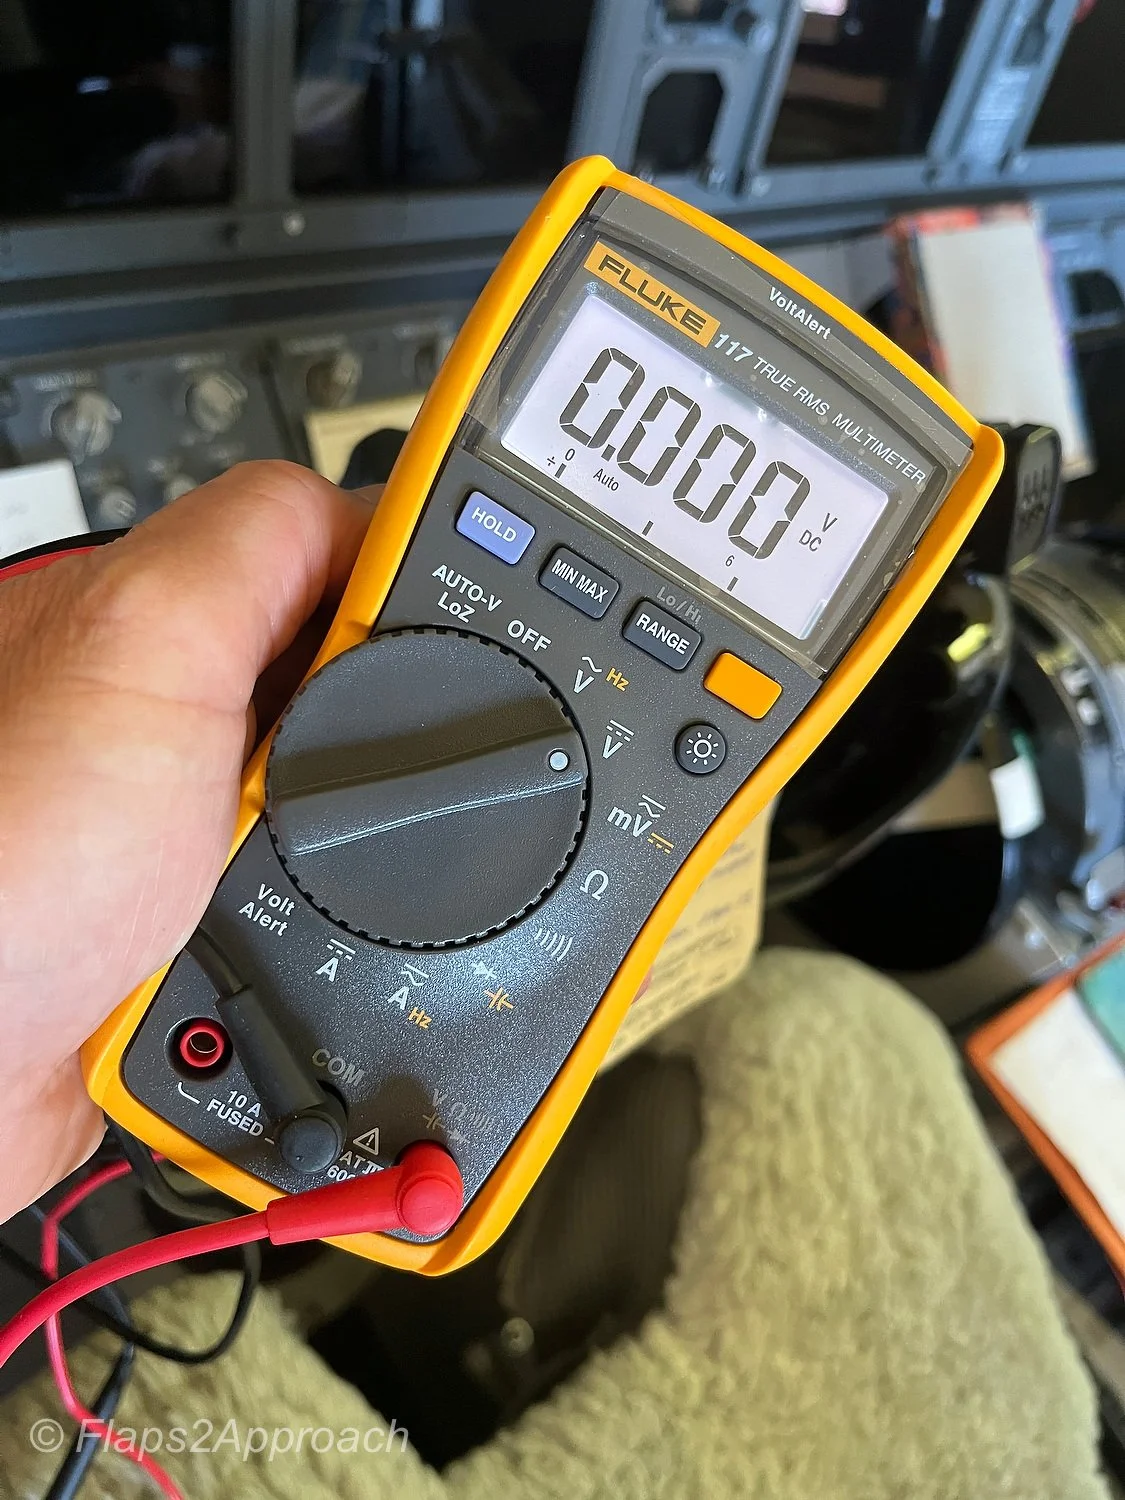
fluke multimeter is a high-end brand, however, for basic electronics such as determining amperage draw, a fluke is probably overkill
Measuring Amperage
By far the easiest way to measure amperage is to use a portable multimeter.
First, the multimeter is set to measure current (amperage). Next, the red probe is removed from the black COM jack and inserted into the red AMP jack.
Second, the connection between the power source and the component to be measured is broken and the two probes from the multimeter connected inline.
When the PSU is turned on, the current that is used by the component will be displayed on the screen of the multimeter.
Important Point:
If you are connecting the multimeter's probe directly to the PSU, it is recommended to use a small alligator clip and a separate piece of wire. This will minimise damage to the tip of the probe. Connect the wire to the terminal on the PSU and the probe to the alligator clip.
The video ( bottom of page beneath photo gallery) demonstrates how to use a multimeter. Amperage measurement is towards the end of the video.
Wiring a Power Supply Unit
There are several different types of switch-mode power supplies on the market. Generally speaking, all will have at one end of the unit a collection of terminals. Each terminal will be protected from the adjacent terminal by a vertical barrier (usually made from solid plastic). Some units may also have a plastic cover that folds down and clips into place to protect the terminals.
The terminals (from left to right) are as follows:
L (AC) – Line in (positive) - LIVE;
N (AC) – Neutral (common) - usually zero volts or close to;
Earth – 3 horizontal lines and 1 vertical line (or similar);
DC Output – +V and -V; and,
V ADJ – Voltage adjustment.
It’s important to realize that there are a variety of symbols (called iconography conventions) that are used to represent Earth; most have a circle as part of the design (although Mean Well do not use a circle).
rear of psu showing nomenclature and colour coding for wires
In short, AC is mains power (115 Volts or 240 Volts). DC is output voltage (5, 12, 28 Volts, etc)
L is the terminal that you must be wary of. NEVER touch this terminal unless the PSU is disconnected from the mains power; this terminal has mains power connected and is LIVE and ACTIVE.
Following the connection of the wires, I make it a point to not touch anything on the AC side (L or N). Furthermore, these terminals should always be protected by a cover or piece of insulation tape (see below).
+V and -V are the terminals used to connect your components. For example, you may want to power a panel’s backlighting. The positive wire from the component is connected to the terminal marked +V and the negative wire is connected to the terminal marked -V. The output of these terminals is at whatever voltage the power supply is rated at.
Terminal Busbar
You will notice that most power supplies have only four output terminals. While it’s feasible to piggyback wires from multiple components that use identical voltage onto these terminals, I wouldn’t recommend doing so. Instead, I suggest connecting a terminal busbar to the +V and -V terminals. The wires from each component can then be connected directly to the busbar. This approach allows you to connect multiple components without the need for piggybacking directly to the terminals on the PSU.
The advantages of using a busbar are as follows;
One busbar can be dedicated to a specific aircraft system;
Enables additional components to be added to the busbar (depending on busbar size);
Minimizes the need to touch the PSU as the busbar is where components are connected; and,
If wanted, the busbars can be segregated neatly in an area that is easier to reach for maintenance;
Protective Covers
After connecting any wires to the terminals, either close the plastic protective cover (if supplied), cover the terminals with red or yellow coloured tape (if temporary), or if the connection is to be semi-permanent, apply a dab of silicon sealant to the terminal. This will provide an additional layer of protection (from accidentally touching the terminals). Although covering the terminals on the DC side is not required, it's highly recommended. When working on the simulator, it's surprisingly easy to drop a screw, washer, or other small item onto exposed terminals. If +V and –V are accidentally bridged, it will cause a short circuit, potentially damaging components.
Another good working option is to use a hot glue on all live terminals. The hot glue will seal around the terminal creating an effective barrier to electrical current. To remove the hot glue, use 100% alcohol which will cause the glue to loose its adhesive ability.
unless you have a spare set of probes, it’s best to attach a wire to the terminal and then connect the probe to the wire with an alligator clip. This will minimise potential damage to the probes
Voltage Adjustment (V-ADJ)
Located on the far right of the PSU is a screw labeled V-ADJ, short for voltage adjustment. This feature is standard on all switch-mode power supplies and allows the output voltage to be fine-tuned slightly above or below the unit’s nominal rating. For instance, a 28 Volt PSU can typically be adjusted to deliver between 24 and 32 Volts. The V-ADJ screw provides precise control, enabling you to tailor the output voltage to meet the specific requirements of your application.
It is safe to use a small Philips head screwdriver on the V-ADJ screw, but be very careful to not touch any of the terminals. If you are concerned that this may occur, apply shrink tubing to the shaft of the screwdriver. The tubing will act as an insulator shield.
To measure the voltage adjustment, connect the two probes of a multimeter to the +V and -V terminals on the power supply. Ensure the multimeter is set to DC voltage (Volts DC). Once the power supply is turned on, the multimeter will display the output voltage being generated. You can then adjust the voltage by turning the V-ADJ screw clockwise or counter clockwise, depending on whether you want to increase or decrease the voltage.
The video ( bottom of page beneath photo gallery) demonstrates how to use the voltage adjustment screw.
Important Point:
To avoid damage to the probes of the multimeter, connect a short wire from the terminal of the PSU and connect the probe to the end of this wire with an alligator clip.
How to reduce the Number of Power Cables
Depending on your setup, you may be using six or more power supplies. To reduce the number of required power cables and corresponding mains outlets, each PSU can be connected in series, also known as daisy-chaining, to share a single power source. This approach streamlines cable management and simplifies the overall electrical layout.
To do this, connect a wire from each of the three AC terminals on one power supply to the corresponding terminals on the next power supply: L to L, N to N, and earth to earth. This can be done for any number of power supply units.
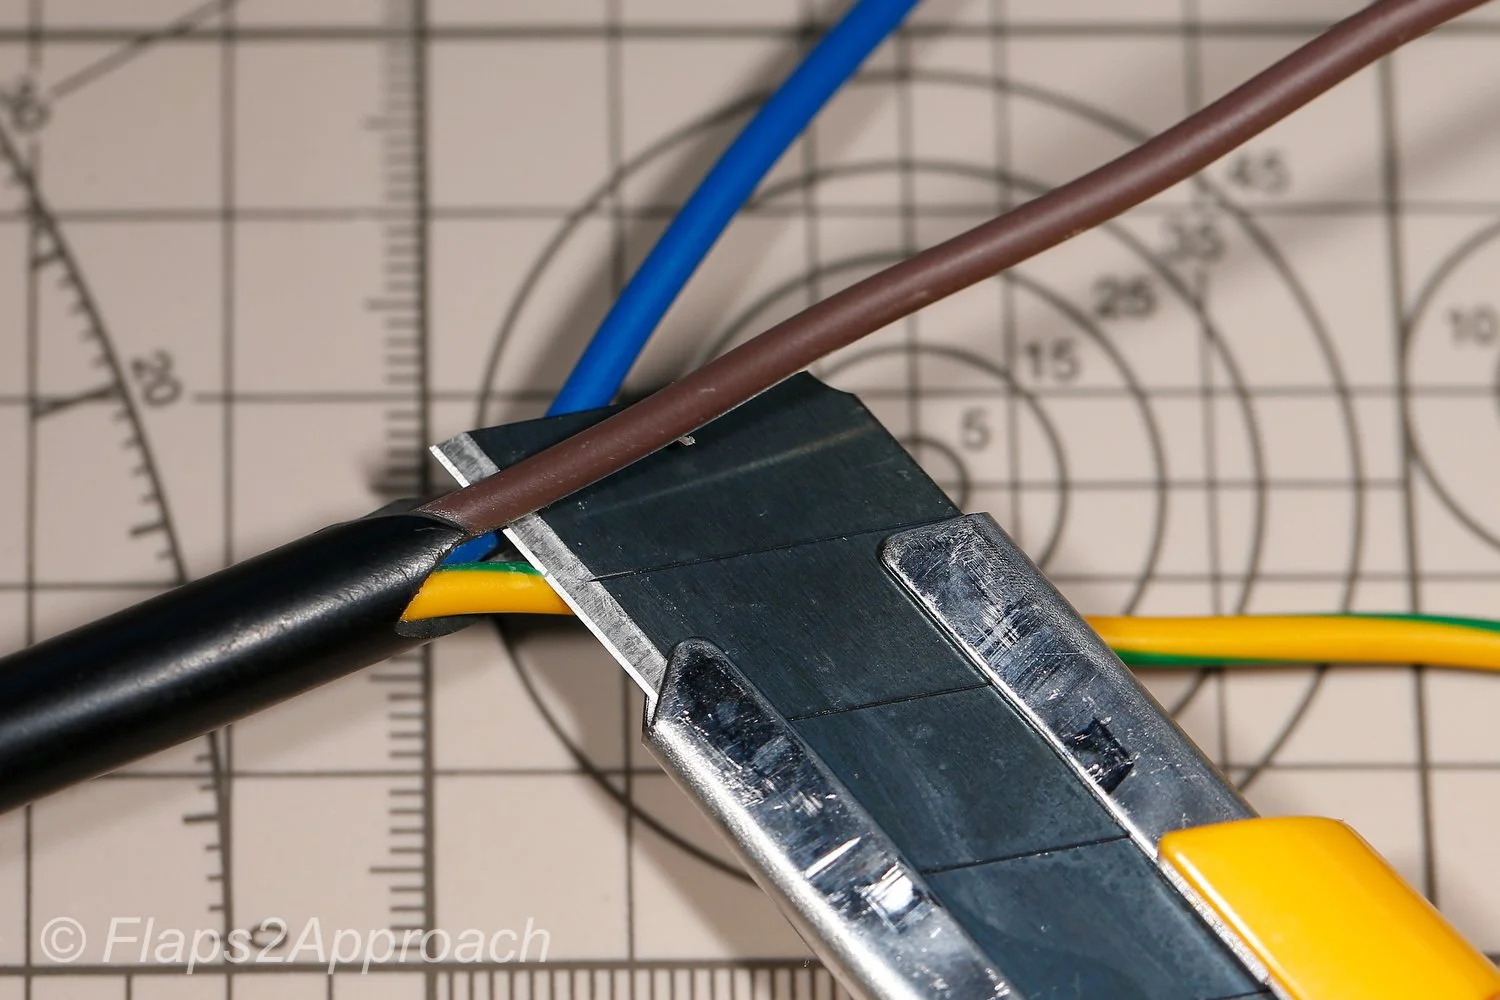
If you're unsure what size wire to use, I recommend repurposing a disused electrical power cable (most of the wires bundled in these cables is 14 gauge wire (AWG) rated at 15 Amps). Carefully slice open the outer PVC insulation, taking care not to damage the internal wires, and use one or more of these wires. In general, 14-16 gauge wires (AWG) is recommended.
However, make sure the wire is made from 100% copper, not aluminium-coated copper. To verify this, use a blunt knife to gently scratch the wire. If it sheds silvery or aluminium-like fragments, discard it and use a wire that shows solid copper throughout.
The reason for this is that copper is a very good conductor of electricity, whereby, aluminium, brass, and other composite metals is not.
Terminal Connectors and Colour
While terminal connectors can enhance the professional appearance of the project, they may introduce reliability issues if not properly crimped or connected, potentially resulting in poor contact. To minimise intermittent faults, the bare end of the wire should be attached directly to the terminal and secured beneath the flat clamping plate using the screw.
Whenever bare wires are used, their ends should be ‘flow soldered’. This will eliminate any loose wire strands and make the connection more reliable. Additionally, apply appropriately coloured heat shrink tubing to the end of each wire. This not only helps with wire identification but also minimises the amount of bare metal exposed at the terminal, improving both safety and neatness.
Many countries follow different color coding standards for electrical wiring. In general:
Red is positive;
Black is negative (which is the same as common in simple DC systems); and,
Brown is earth (ground).
If a different colour is used outside the norm, use red, black or brown heat shrink to colour code the end of the wire that is secured to the terminal on the PSU. Colour consistency is important to avoid future confusion. If an unusual colour combination is used, ensure that the colours and voltages are documented, and a label is adhered to the side of the power supply or other visible area.
If you look carefully at the photographs, you will notice that I have used three colours on the AC side; Red for AC L, Blue for N, and yellow for earth. +V and -V use red and white wires respectively. In my simulator, I use this colour standard for all wires attached to the AC side of the PSU. Other wires may use different colours depending upon the aircraft system and the wire’s use.
Circuit Protection (Discussion)
Back-flow current, also known as reverse conventional current (in some circles), refers to the flow of electrical current back to the source via the negative (common) wire in a circuit. This can happen when a circuit is accidentally short-circuited.
Short circuits can occur for a variety of reasons. For example, accidentally bridging two terminals on an interface card with a screwdriver, dropping a metallic object (such as screw) onto exposed terminals causing an arc, or a wire coming loose and making contact with the incorrect polarity.
When a short circuit occurs, the current can flow back to the switch-mode power supply through the negative wire. This often results in damage to the power supply and may also affect any other interface cards or components connected to the same ground path.
Many enthusiasts in an attempt to minimise such a problem occurring, use an inline fuse installed to the earth (ground) wire. Typically the fuse, which is rated at approximately 15% less the amperage of the power supply, is connected as close as possible to the PSU. The theory is that the fuse will protect the circuit and any components connected to that circuit should a short circuit occur.
However, blade and glass cartridge pencil fuses are designed to break only when an electrical surge flows through them at a high amperage, such as when a short circuit occurs across a 12 volt vehicle battery (12 volt automotive batteries usually have a very high amperage). The amperage, in this case, that reaches the fuse is very high and breaks the fuse's metal connection bridge.
In a simulator environment, if a problem occurs, the amperage flowing back to the PSU is probably not going to be high enough to break the metal bridge in the fuse. The fuse will become warm, but not be warm enough to cause the fuse to break. Whilst this may not damage components outright, it may cause incremental damage.
If additional protection is required, inline automotive fuses are probably not beneficial. Circuit breakers, which are more sensitive to low amperage electrical surges, can be used.
However, at some point the cost and complexity outweighs the advantages. Rather than provide protection that is not absolutely necessary, it is a better practice to enforce strict guidelines when dealing with circuits:
Ensure that all terminals are protected by a cover, hot glue, or in case of busbars a protective cover. A cover if need be can be made from modelling plastic;
Use heat shrink on all wires; thereby, minimising the exposure of metal; and,
Only work on wiring, interface cards, etc when the power is turned off at the mains.
Mean Well Power Supplies
I contacted Mean Well directly, and they confirmed that their power supplies are equipped with internal protection against short circuits. In the event of a short circuit, the unit will shut down to prevent damage (see short circuit protection in next section). However, if high voltage is fed back into the power supply, beyond its designed protection capacity, the internal safeguards will probably be compromised, resulting in permanent damage to the power supply.
Short Circuit Protection (SCP):
Most Mean Well power supplies include SCP as a standard feature. When a short circuit occurs at the output, the PSU usually enters a hiccup mode (repeatedly attempts to restart) or it latches off (requiring a manual restart). Which type of protection is triggered will depend on the model of the power supply. Either way, the use of SCP will help prevent damage to both the PSU and downstream components should a short circuit occur.
It's also worth noting that Mean Well PSU's are internally protected against electrical surges (from the mains).
Documentation and Labelling
Many enthusiasts overlook the importance of documenting and labeling components, assuming they'll remember everything. However, memory fades over time - especially in simulator projects with extensive wiring. Without clear labels and records, troubleshooting or upgrading later can become a frustrating and time-consuming task.
Power supply units must be labelled clearly with their voltage and amperage for easy identification. Similarly, all wires should be correctly tagged with their voltage and function.
If it’s not possible to record the function on the actual wire, consider implementing a labelling code. For example, an output wire from a PSU could be labelled 28V/A1, 28V/A2, and so forth, where A1 and A2 identify the wire's function. A small cheat sheet can be made and kept nearby for reference.
There are many labelling options available, ranging from inexpensive plastic tie tags to professional labelling systems that use labelled heat shrink. However, keep in mind that solid plastic tags (or flags), while cost-effective, can cause issues during maintenance. These tags will often snag when wires are accessed and are pulled through - often causing more hassle than what they are worth.
I use an assortment of label types (heat shrink, flexible laminate and flags) to label all wires, power supplies, and related components. I use a Brother E-560 BTVP labelling machine.
Mounting and Securing Power Supplies
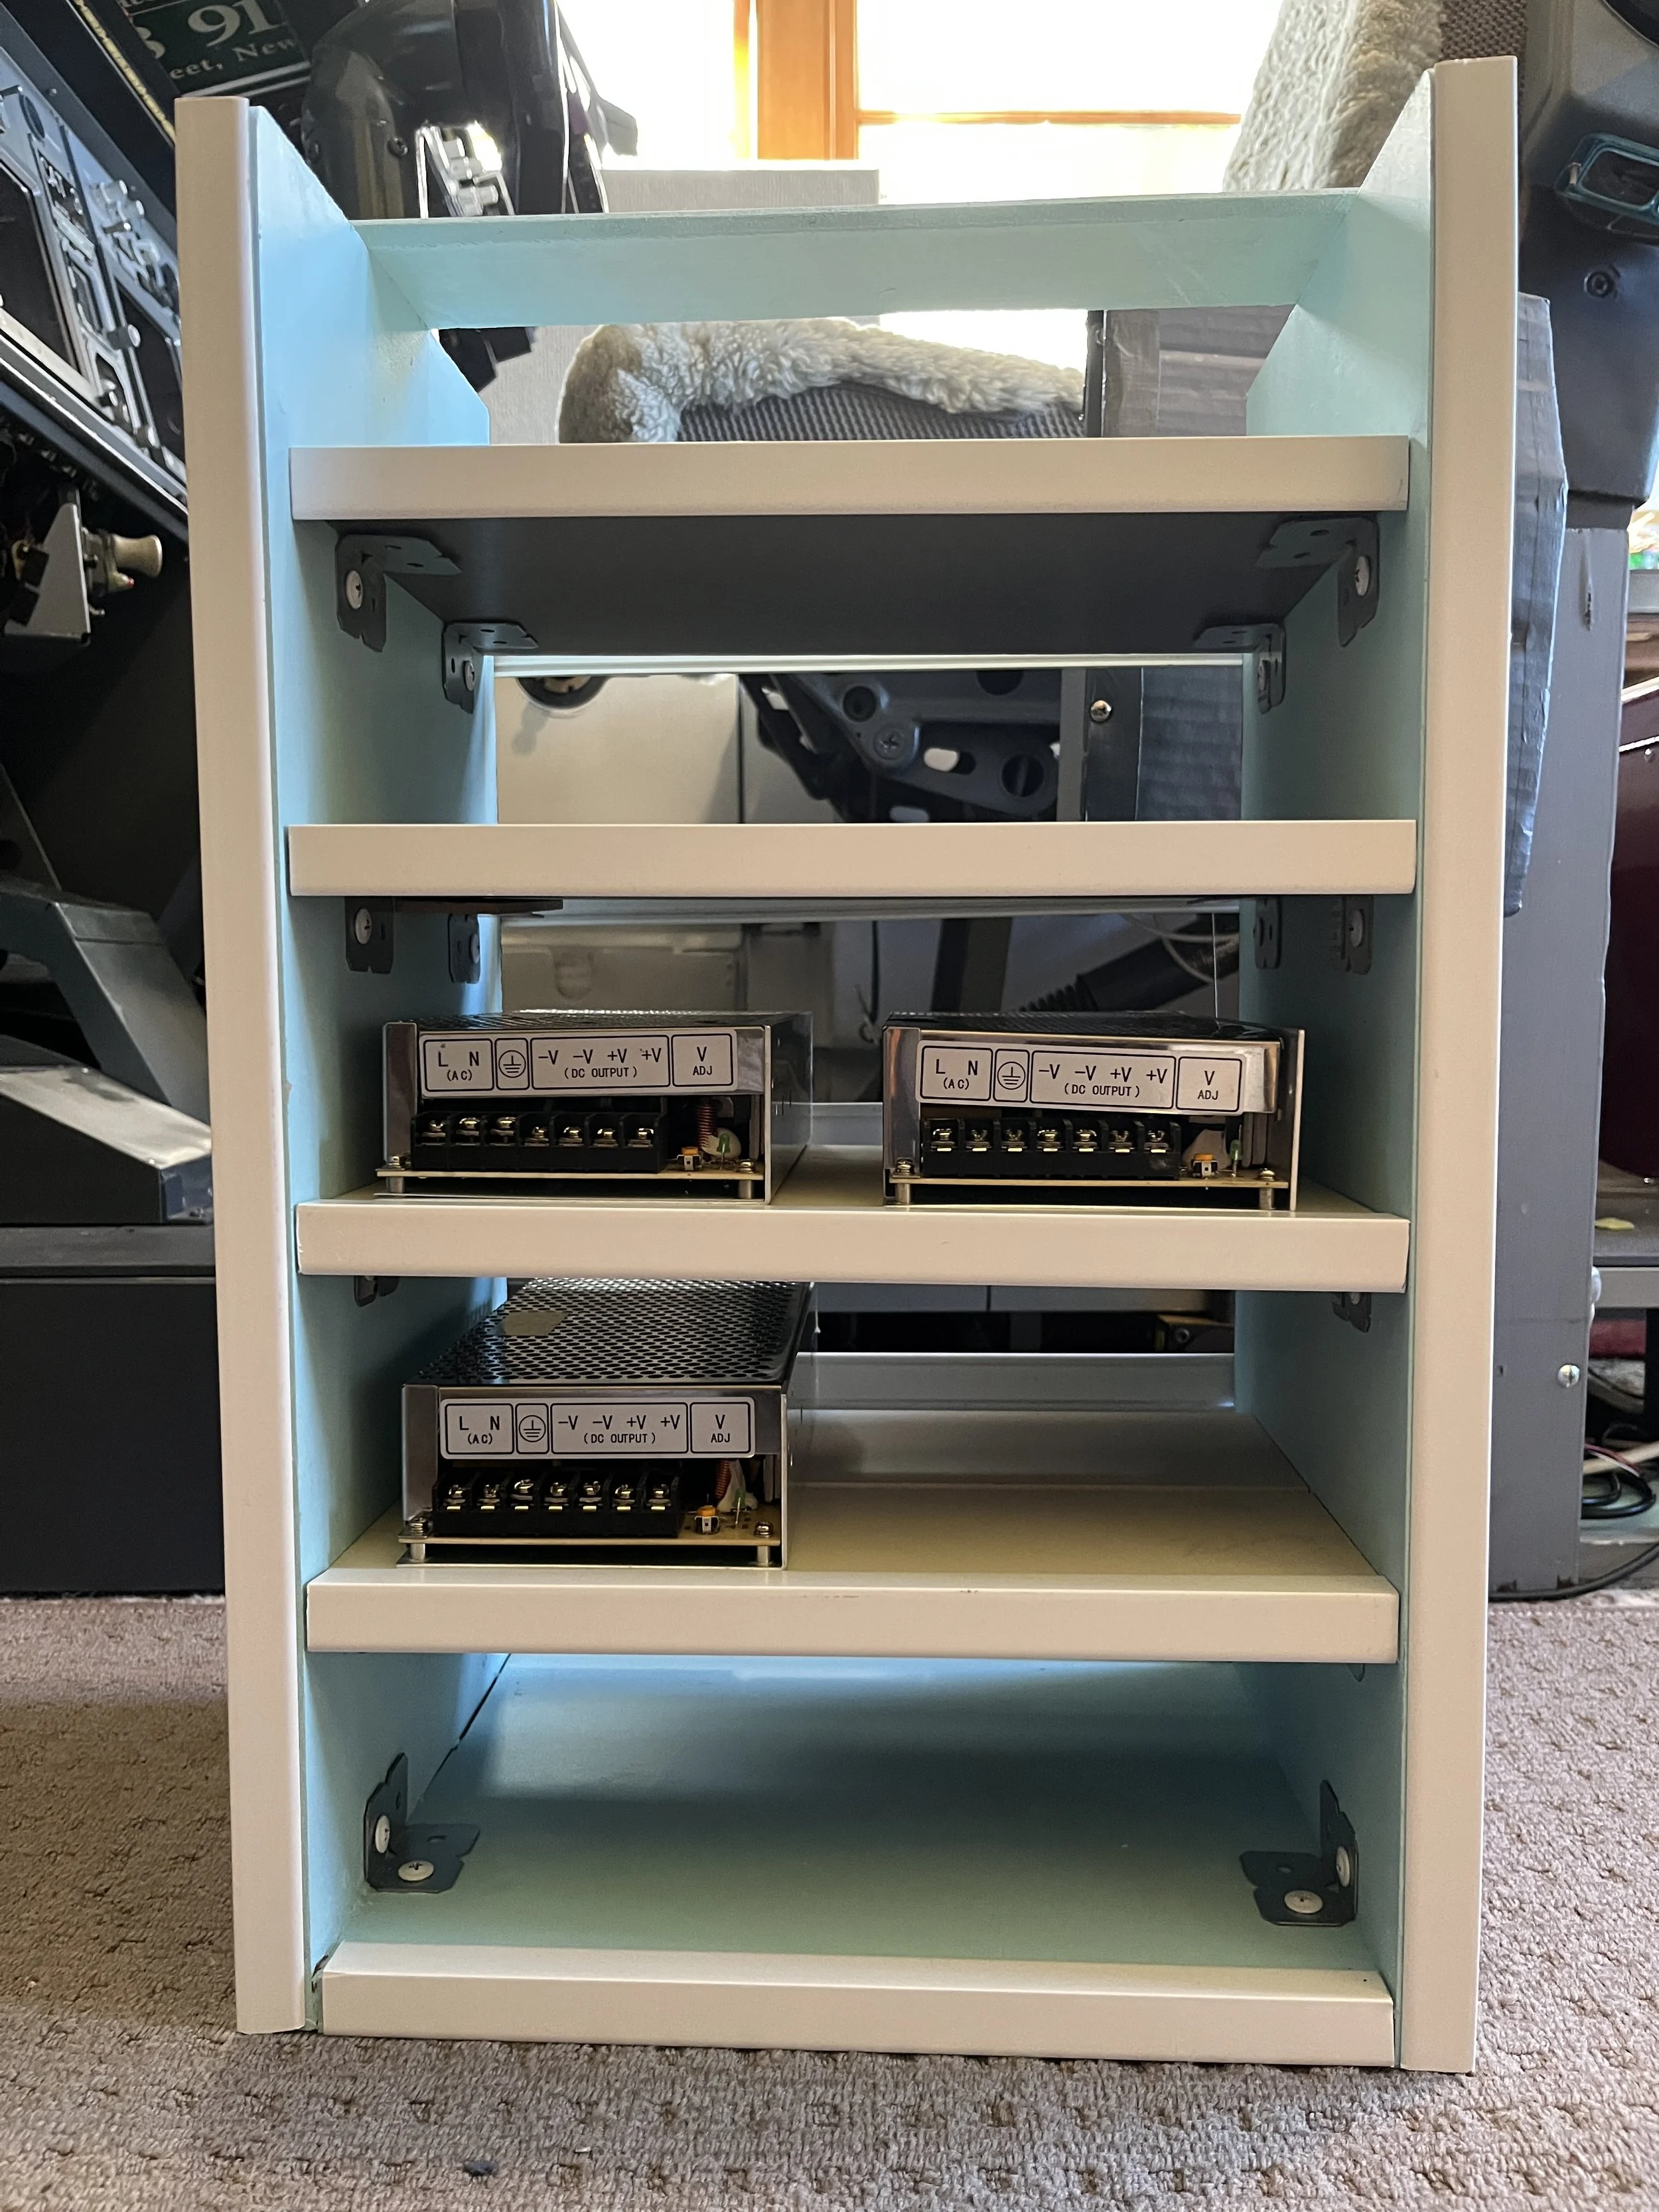
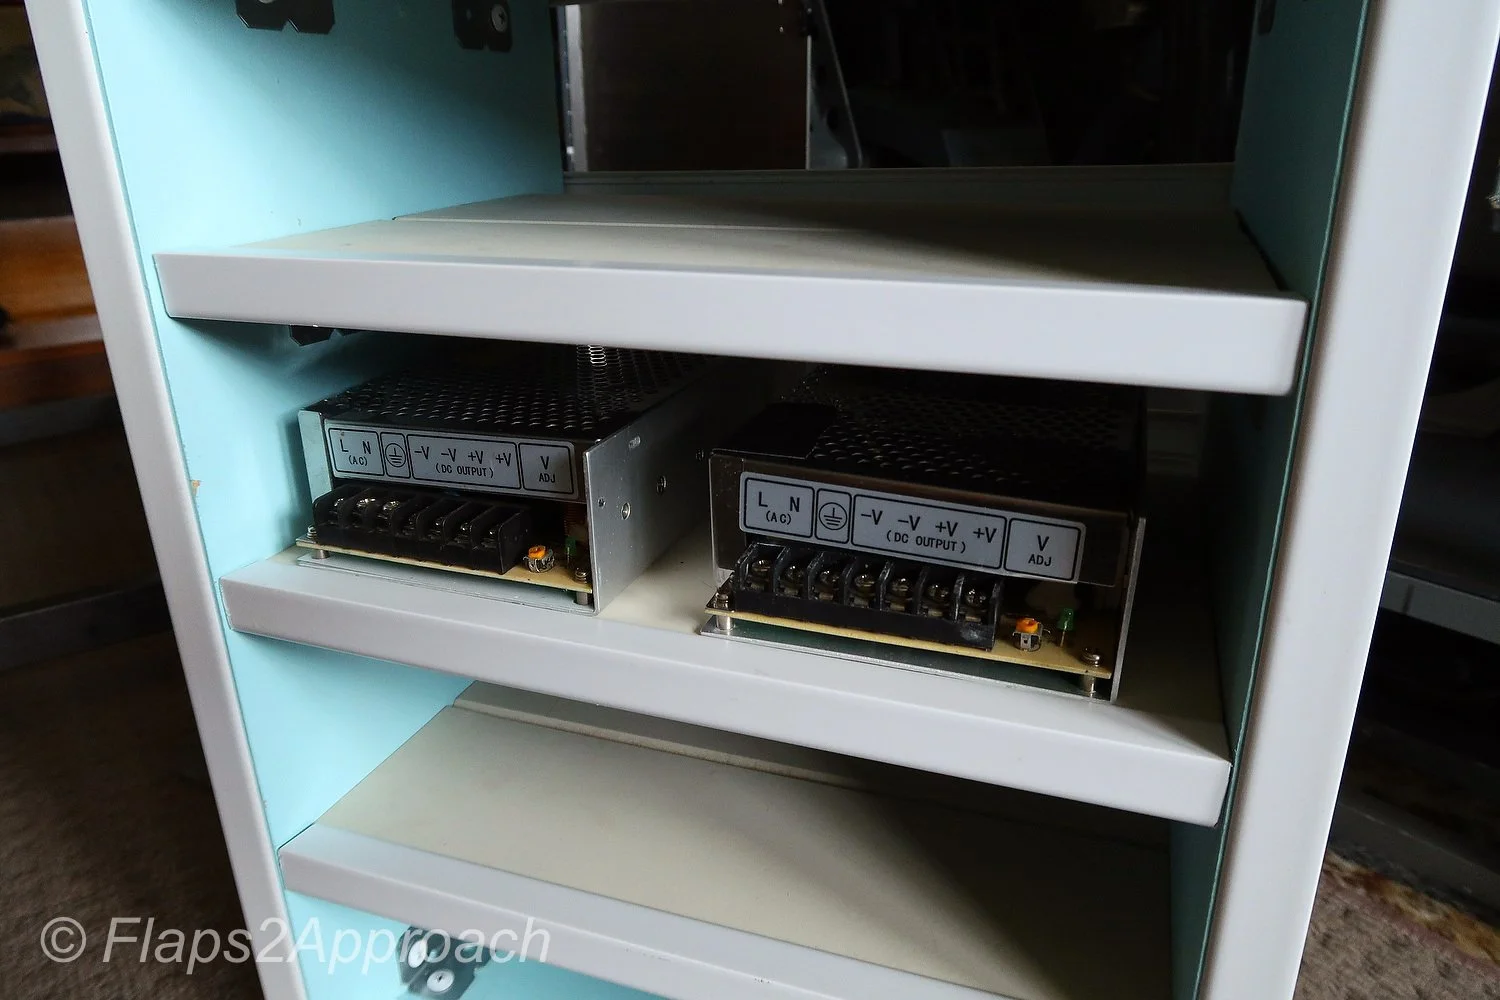
Power supplies can be mounted more or less anywhere, but preference should be given to keeping all the supplies close together in a location that is readily accessible. Furthermore, the power supplies should be attached to something solid and must not be placed loosely under the platform. If so inclined, Mean Well markets a rail that enables each PSU to be attached.
In my setup. I have fabricated a wooden cabinet with several shelves; each shelf can accommodate two switch-mode power supplies. The cabinet is open at both ends enabling cross-flow ventilation to minimise heat build-up. If you install the power supplies in a confined area then it is wise to also install a cooling fan.
Maintenance
Power supplies, for the most part, do not require maintenance. However, dust build-up can be an issue if operating in a dusty environment. This is especially evident if the power supply being used has an external fan; over time the fan can cause dust ingress.
If thick dust accumulates on a power supply, it can cause the unit to operate at elevated temperatures, potentially shortening its lifespan. Accumulated dust can also burn easily when the power supply heats up causing an unwanted burning odour.
It is an easy matter to remove the casing from the power supply, and using a small vacuum, remove any accumulated dust. Before doing this, turn off the mains power and remove the cable from the mains outlet. Furthermore, ensure there is no residual power in the power supply; capacitors can hold power for a considerable period.
Important Point:
Avoid touching a power supply unit or any components connected to it immediately after shutdown. Enable any residual charge to dissipate.
Mean Well Power Supplies
Some of the advantages of using Mean Well power supplies are summarised below:
Constant source of clean power rated at 20% above the certification provided;
Protection from short circuit, overload and over voltage;
Fixed switching at 25 kHz (produces a cleaner and better regulated power);
Two or three year replacement warranty (model dependent);
Internal cooling fan (model dependent);
Fan operation is temperature controlled;
Audible alarm that sounds if operating temperature is exceeded (model dependent);
Adjustable voltage (the voltage can be manually adjusted up or down (-+) to ensure correct voltage);
Wide range of operating conditions (-25 Celsius to 70 Celsius);
Solid enclosure with perforated holes (efficient heat sink and cooling); and,
Easy screw attachment point or ability to use a rail system.
Mean Well power supplies are manufactured in Taiwan (ROC) - not to be confused with China.
In this article, I have focused on Mean Well power supplies, however, there are several other brands available. For the most part these 'other' brands function identically to Mean Well, however, some do not have the quality assurance (QA) and features that Mean Well is renown for.
Final Call
Wiring and connecting power supplies is generally a straightforward process, as is connecting components to the positive and negative terminals. However, the most critical aspect of this task is electrical safety. Proper documentation and clear labeling must take precedence over speed or convenience. Rushing through the process without thorough documentation can result in significant confusion during future troubleshooting and fault-finding, particularly in complex systems where accurate traceability is important.
Additional Information
Switch-mode Power Supplies (earlier article - with some information overlap).
Gallery