Throttle Quadrant Rebuild - New Wiring Design and Rewiring of Center Pedestal
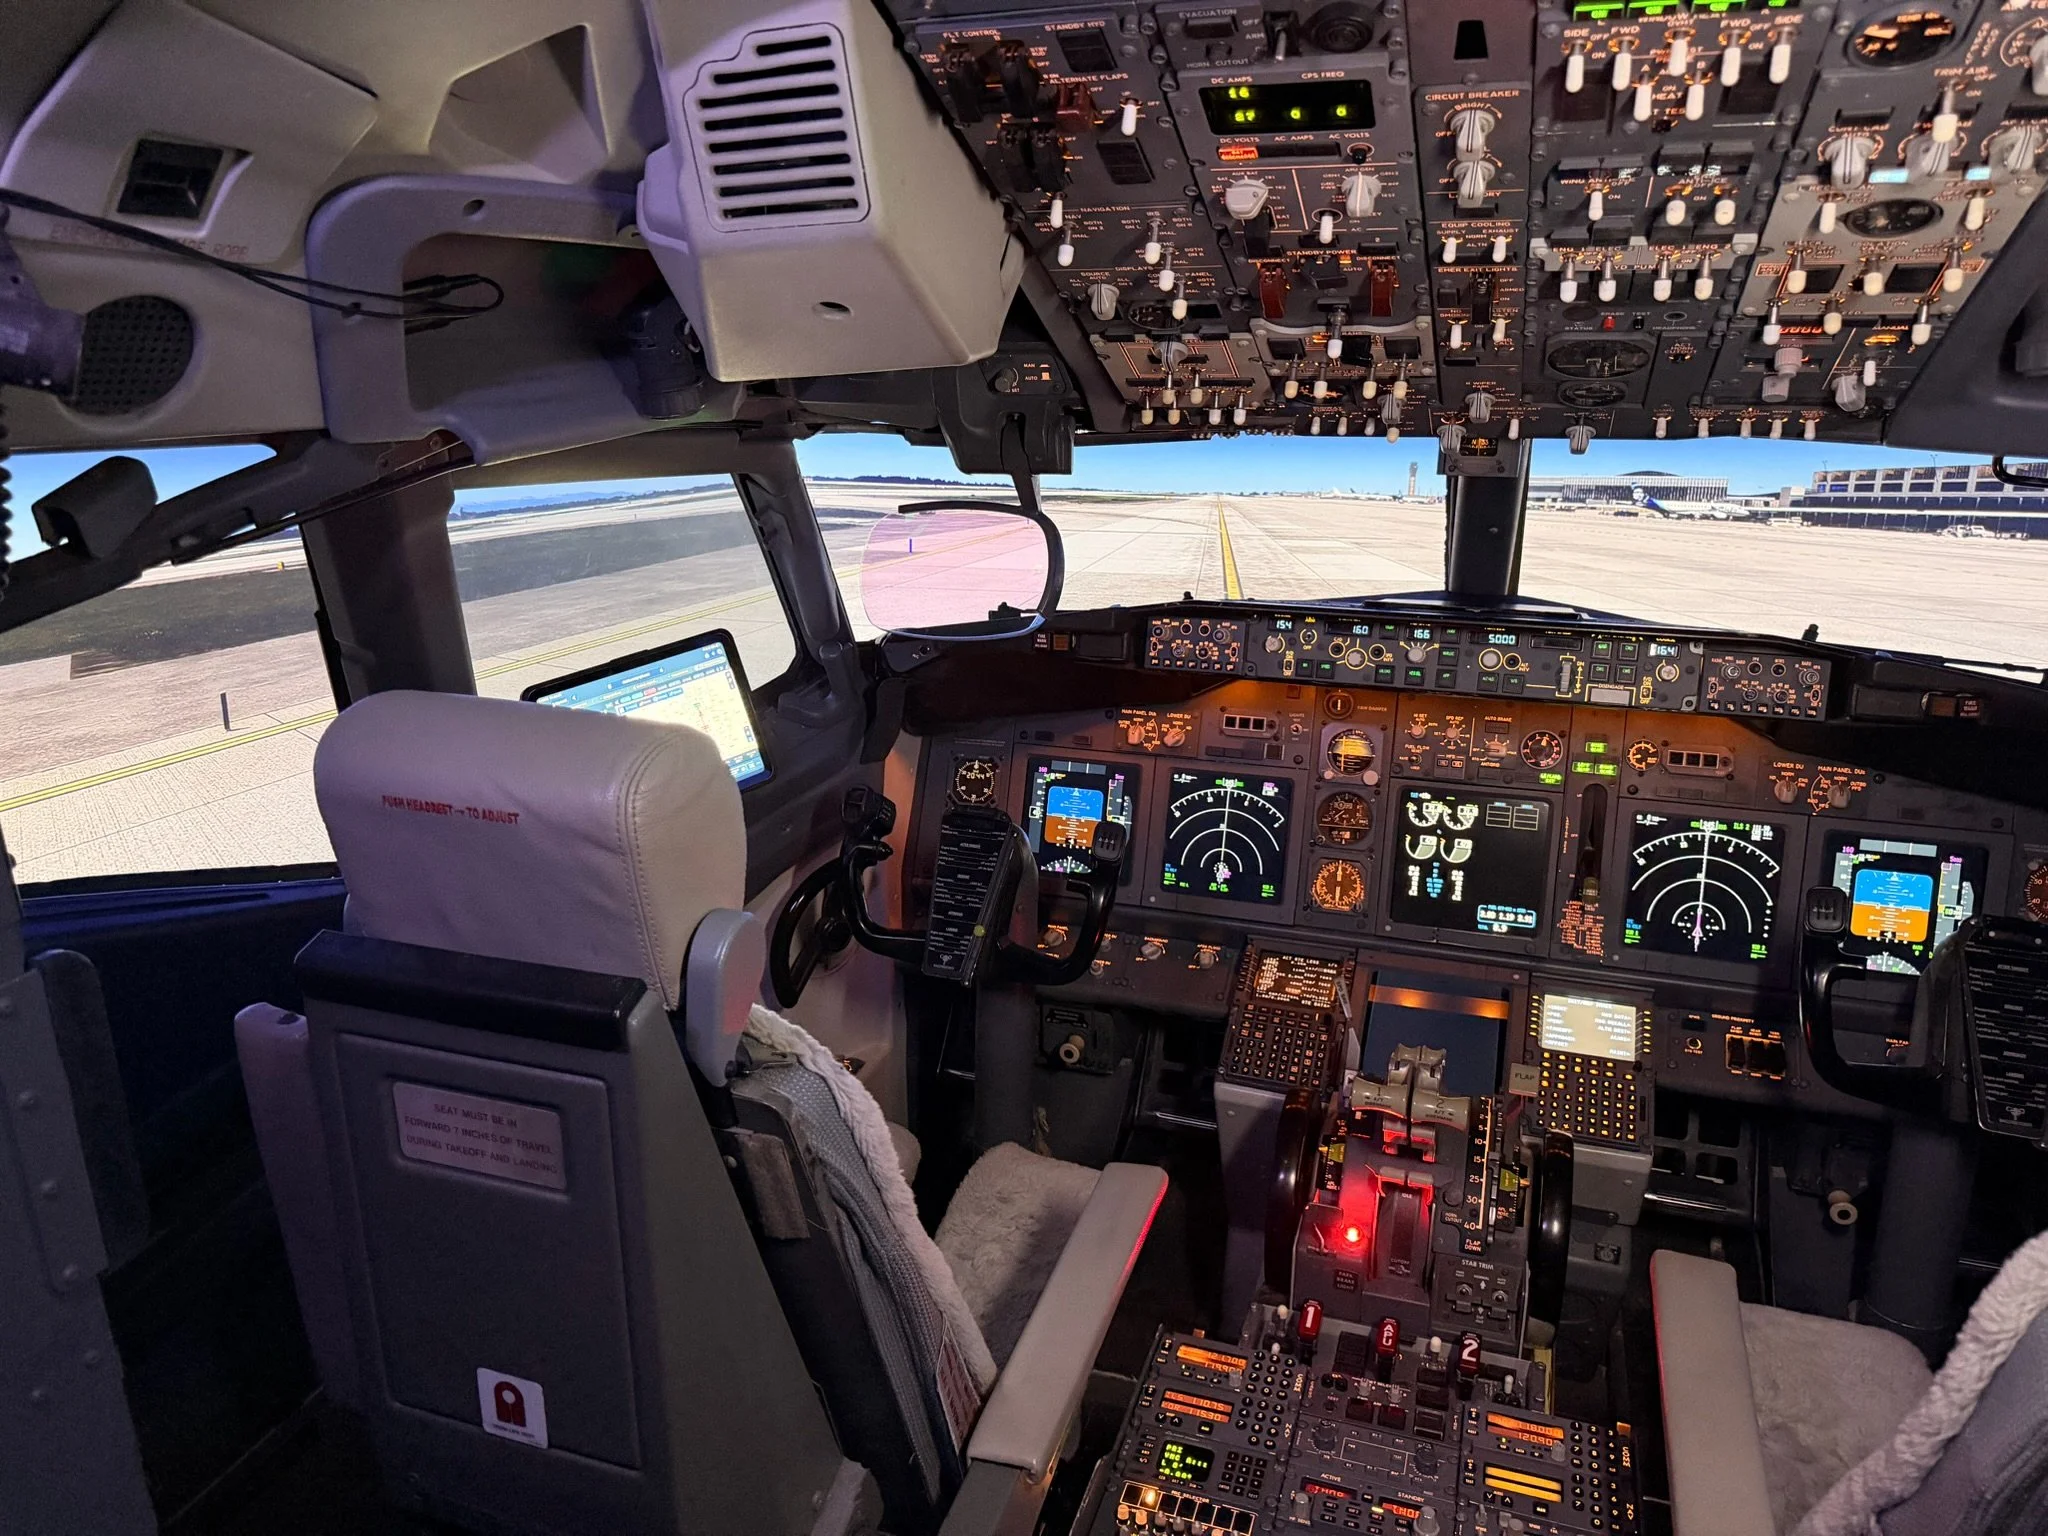
/oem 737-500 center pedestal. the panels change as oem components are purchased and converted
Put bluntly, the wiring in the center pedestal was not to a satisfactory standard. Several panels were daisy chained together, the wires were not colour coded, and the pedestal looked like a rat’s nest of wires. Likewise, the wiring of the Master Caution System (MCS) required upgrading as several of the original wires showed signs of fraying.
A word of thanks goes to a friend (you know who you are...) who helped wade through the labyrinth of wires!
This post shares several links to other pages in the website.
Wiring Redesign (pedestal and panels)
The set-out of the inside of the center pedestal was redesigned from the ground up, and several of the pedestal panels re-wired to ensure conformity to the new design standard, which was neater and more logical than its predecessor. Additionally, the MCS was rewired using colour-coded wire and the wires labeled accordingly.
New Design (panels must be stand-alone)
The new design called for each panel (module) that was installed into the pedestal to be stand-alone. Stand-alone means that if removal of a panel was necessary, it would be a simple process of unscrewing the DZUS fasteners, lifting the panel out and disconnecting a D-Sub plug and/or 5 volt backlighting wire. Doing this with panels that were daisy chained together was impossible.
The following panels have been re-wired:
(i) EVAC panel;
(ii) Phone panel;
(iii) ACP units (2);
(iv) On/off lighting/flood panel; and,
v) Radar panel.
737-800 EVAC panel, although not a panel that resides in the pedestal, it demonstrates the 'stand-alone' panel philosophy. One D-Sub plug with labelled and colour-coded wire. The mate of the D-sub resides inside the pedestal with the wires connected to the appropriate busbar
All the panels have been retrofitted with colour-coded and labelled D-Sub connections. Removing a panel is a simple as unfastening a DZUS connector, disconnecting a D-Sub connector, and unscrewing the 5 volt backlighting wire from the 5 volt terminal block (if used). If a USB cable is needed for the panel, then this must also be disconnected.
A word concerning the ACP units, which were converted some time ago with an interface card located on a separate board outside of the unit. As part of the rebuild, the two ACP units were completely re-wired to include the interface card within the unit. Similar to the fire suppression panel, the ACP units are now stand-alone, and only have one USB cable which is used to connect to the computer. The First Officer side ACP is daisy chained to the Captain-side unit.
Center Pedestal Flat Board
A flat board 1 cm in thickness and constructed from wood was cut to the same dimensions of the pedestal base. The board was then attached to the inside bottom of the pedestal by screws. The wood floor has been installed only to the rear two thirds of the pedestal, leaving the forward third open to allow easy access to the platform floor and area beneath the floor structure..
Attached to the flat board are the following items:
(i) FDS 5 Volt IBL-DIST panel power card (backlighting for FDS panels);
(ii) 28 Volt busbar;
(iii) 5 Volt busbar (backlighting);
(iv) 12 Volt relay (controls on and off backlighting for the panel knob);
(v) Terminal block (lights test only);
(vi) Light Test busbar;
(vii) OEM aircraft relay; and a,
(viii) Powered USB hub (NAV, M-COM, ACP & Fire Suppression Panel connection).
The 5, 12 and 28 volt busbars (mounted on the flat board) receive power continuously from the power supplies, mounted in the Power Supply Rack (PSR) via the System Interface Module (SIM). Each panel then connects directly to the respective busbar depending upon its voltage requirement.
In general, 5 volts is used for panel backlighting while 12 and 28 volts is used to power the fire suppression panel, EVAC, throttle unit, phone panel and other OEM components
The flat board has a fair amount of real-estate available; as such, expanding the system is not an issue if additional items need to be mounted to the board.
Lights Test busbar. Similar in design to the 5 volt busbar, its use centralizes all wires and reduces the number of connections to a power supply. Despite the pedestal rewire, there is still a lot of loose wire that cannot be 'cleaned up'. The grey coloured object is the flat board
Lighting Panel Knob (backlighting on/off)
All the panels in the center pedestal require 5 volt power to illuminate the backlighting. The general purpose knob located on the pedestal OEM lights panel is used to turn the backlighting on and off.
Instead of connecting each panel’s wire to the on/off lights panel knob – a process that would consume additional wire and look untidy, each wire has been connected to a 10 terminal 5 volt busbar. The busbar in turn is connected to a 12 volt relay which is connected directly with the on/off knob.
When panel lights knob is turned from off to on, the relay closes the circuit and the busbar is energised; any panel connected to the busbar will automatically receive power.
The busbar and relay are mounted to the flat board.
This system has the advantage that it minimizes the number of wires that are connected to the lights panel knob. It also enables one single high capacity wire to connect from the relay to the knob rather than several smaller gauge wires. This minimises the heat produced from using several thinner wires. It is also easier to solder one wire to the rear of the panel knob than it is to solder several wires.
Lights Test and DIM Functionality
The center pedestal also accommodates the necessary components (Lights Test busbar) to be able to engage the Lights Test and DIM functionality. These functions are triggered by the Lights Test Toggle located on the Main Instrument Panel (MIP).
All wires have been corrected colour coded to various outputs and wire ends use ferrules to connect to the card
Interface Cards
In the previous throttle quadrant, a number of interface cards were mounted within the center pedestal.
To ensure conformity, all the interface cards have been removed from the pedestal and are now mounted within one of the interface modules located forward of the simulator.
Furthermore, all the wiring is colour-coded and the wire ends that connect into the I/O cards use ferrules.
The First Officer-side MCS completely rewired. The MCS has quite a bit of wiring, and making the wire neat and tidy, in addition to being relatively accessible, was a challenge
The use of ferrules improves the longevity of the wiring, makes wire removal easier, and looks neater.
Wiring and Lumens
Needless to say, the alterations have necessitated rewiring on a major scale. Approximately 80% of the internal wiring has had to be replaced and/or re-routed to a position that is more conducive to the new design.
The majority of the wiring required by the throttle unit now resides in a lumen which navigates from the various interface modules (located forward of the simulator) to the Throttle Communication Module (TCM).
From the TCM the lumen routes through the throttle firewall, along the Captain-side of the throttle unit before making its way to the flat board in the center pedestal.
The exception to the above is the cabling required for a powered USB hub located within the center pedestal, the wires required for the Lights Test (from the Lights Test Toggle located in the MIP), and the various power wires navigating to the pedestal from the Power Supply Rack. These wires have been bundled into a separate lumen, which resides beneath the floor structure.
Identifying the voltage of wires is an important aspect of any simulation build
Wire Management
Building a simulator using OEM parts, requires an inordinate amount of multi-voltage wiring of various gauges, and it can be challenge to maintain the wire in a neat and tidy manner.
Running the wire through conduits and lumens does help, but in the end, due to the amount of wire, the number of connections, and the very limited space that is available, the wire is going to appear a little messy. Probably more important, is that the wire conforms to an established design standard – meaning it is colour-coded and labelled accordingly.
A dilemma often facing builders is whether to use electrical tape to secure or bind wires. Personally, I have a strong dislike for electrical tape - whilst it does have its short-term usages, it becomes sticky very easily, and becomes difficult to remove if left on wires for a considerable time .
My preferred method is to use simple cable ties, snake skin casing, or to protect the wires near terminals of OEM parts. to use electrical shrink tubing (which can be purchased in different colours for easy identification of wires and terminals).
Final Product
The design and rewiring of many parts in the simulator has been time consuming. But, the result has been:
(i) That all the wires are now colour-coded and labelled for easy identification;
(ii) The wiring follows a defined system in which common-themed items have been centralised.
(iii) Panels that were daisy chained have been rewired with separate D-Sub plugs so they are now stand-alone;
(iv) The frayed wires from the MCS have been replaced with new wires; and,
(v) The wires in general are neater and more manageable (the rat's nest is cleaner...).
This article is one of several concerning the conversion of the OEM Throttle Quadrant.