Altitude and Speed Intervention Explained

Altitude Intervention (ALT INTV) button

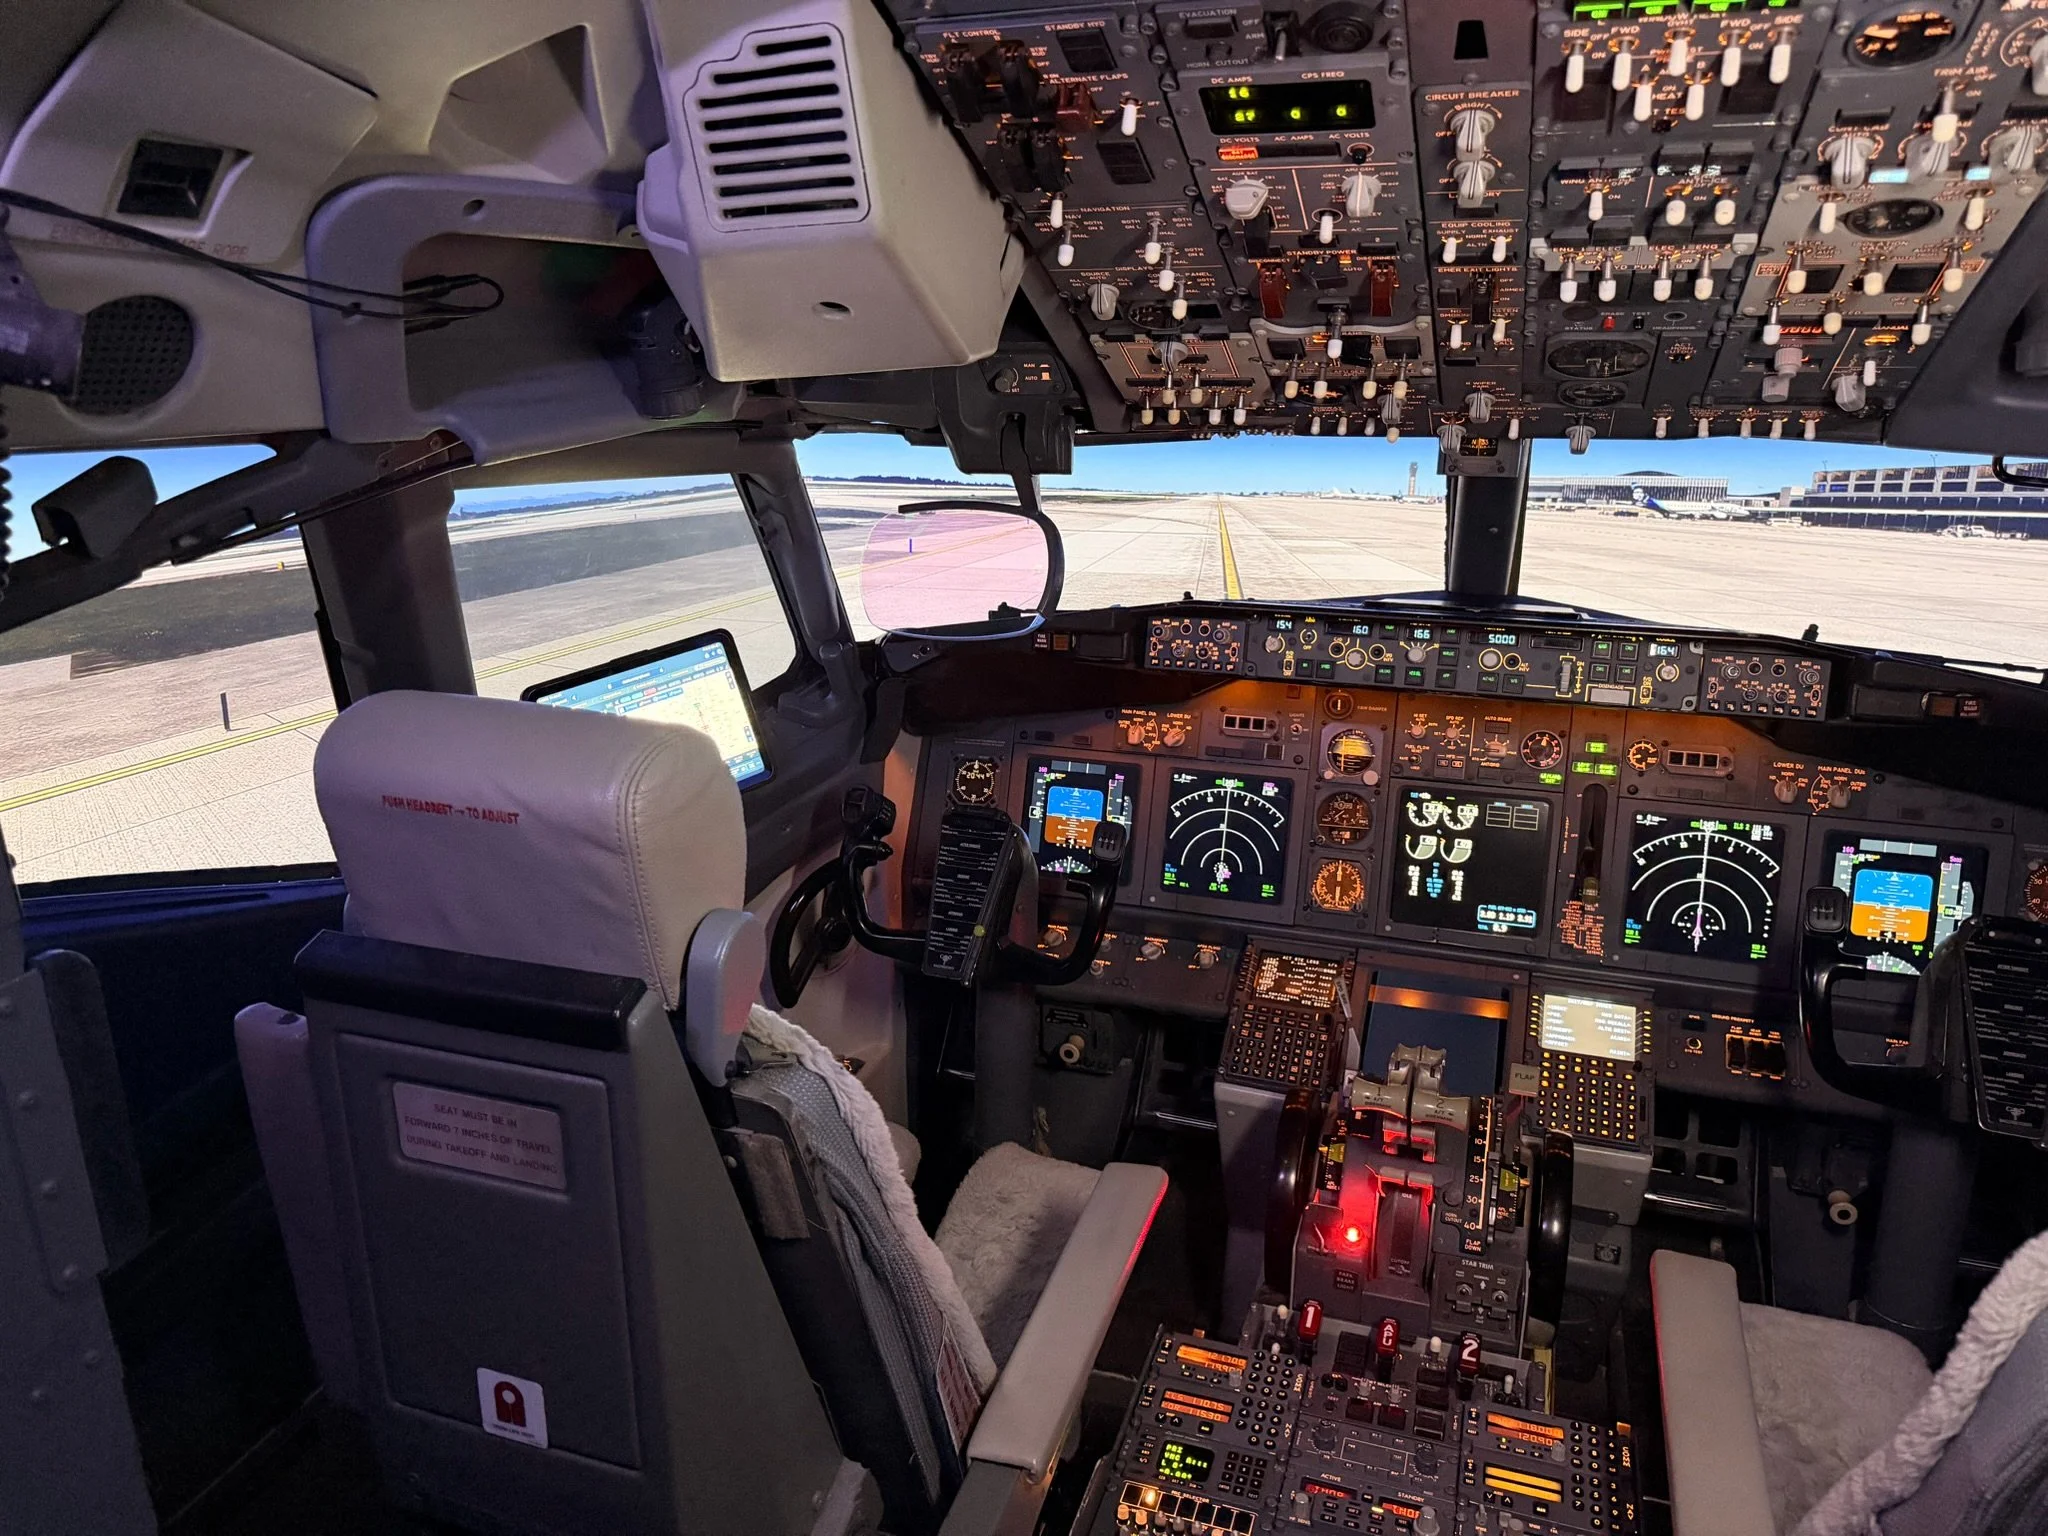
The flight deck can be an extreme work environment, especially during the high-task descent and approach phase of the flight. 

Altitude and Speed Intervention were designed to allow pilots to easily and quickly change either the altitude or speed of their aircraft without re-programming the FMC, disengaging VNAV, or spending excessive time 'heads down'.

The intervention buttons are strategically located on the MCP.  When the buttons are selected, the aircraft's altitude or speed can be altered quickly on ‘the fly’

In this article, I will examine the use of Altitude and Speed Intervention and demonstrate the use of these modes.  In a follow-on article, I will discuss alternate methods that can be used to change altitude whilst maintaining Vertical Navigation.  The reason for separating the two articles, is to avoid confusion that can develop between the different modes.

In this article I use the words Cruise Altitude (CRZ ALT) and Flight Level (FL) interchangeably.  Also to avoid confusion the Control Display Unit (CDU) is the keypad used to interface with the Flight Mode Computer (FMC) that forms part of the Flight Management System (FMS).

I recommend reading the appropriate section in the Flight Crew Operations Manual (FCOM), Flight Crew Training Manual (FCTM) and the Cockpit Companion for a more thorough understanding. 

Furthermore, whether intervention modes function in the simulator will depend upon which avionics suite and FMC software version is used.  This article will deal only with ProSim-AR (ProSim737 avionics suite) which at the time of writing uses U10.8 A. 

Important Points:

  • Altitude and Speed Intervention are company options that may or may not be ordered at the time of airframe purchase.

  • Altitude and Speed Intervention will only operate when a route has been programmed in the CDU, and is active.  VNAV must be selected for either intervention mode to function.

  • Altitude and Speed Intervention is more often used when a temporary change in altitude and/or speed is required with a return to the original altitude/speed imminent.  

MCP, VNAV & FMA Nomenclature and Displays

Prior to examining Altitude and Speed Intervention, it may be fruitful to quickly discuss common words that are used when describing the operation of VNAV and the MCP.

(i)       CONDITION means that a mode will become active only when a condition(s) occurs;

(ii)      ARM means that a mode is armed pending engagement;

(iii)     ACTIVE means the mode is engaged/selected;

(iv)     SELECT means to select or engage the mode (turn on); and,

(v)      DESELECT means to deselect or disengage (turn off) the mode.

Table 1:  FMA displays observed when Altitude and Speed Intervention is engaged

An often misunderstood facet of the MCP is that the annunciators illuminate to indicate a particular mode is active.  This is not entirely correct, as the presence of an illuminated annunciator (light) does not always indicate whether a mode is active or not.

For example, the VNAV annunciator on the MCP will remain illuminated when VNAV is either active or armed.  Furthermore, active modes that are not able to be deselected, do not display an illuminated annunciator.

To determine whether a mode is active or not, the Flight Mode Annunciator (FMA) should be consulted.  The FMA is located above the Primary Flight Display (PFD) and displays various alerts and status messages.  

Refer to Table 1 (download button at bottom of article) for a synopsis regarding the various displays that the FMA will generate when intervention is used.

Important Points:

  • A mode change highlight symbol (green rectangle) is displayed around the command name, in the Flight Mode Annunciator (FMA), whenever a mode has been armed and is about to become active.  The green rectangle will remain displayed for a period of 10 seconds.

  • It’s prudent to cross reference between the FMA, MCP and CDU to determine what mode is armed or active at a given time.

  • Altitude and Speed Intervention, when active, will take precedence over VNAV, although VNAV will remain armed.

Scenario

The aircraft is flying at FL150 (15,000 feet) at 275 kias.  The FMS has an active route (Company Route) that includes altitude and speed constraints (in the LEGS page of the CDU). 

In level flight, with autopilot, LNAV and VNAV selected, the following will be observed:

(i)     LNAV and VNAV will be active;

(ii)    The FMA will display MCP SPD / LNAV / VNAV PTH or VNAV ALT;  

(iii)   The annunciators on the MCP - LNAV, VNAV & CMD A/B will be illuminated;

(iv)   The speed window located on the MCP will be blank (no speed displayed); and,

(v)    LNAV/VNAV will be displayed in white text on the PFD.

LNAV will be controlling the lateral navigation of the aircraft while VNAV will be controlling the speed and vertical altitude of the aircraft.

ATC request a decrease in speed from 275 kias to 240 kias.

Speed Intervention (SPD INTV) button

Speed Intervention (SPD INTV)

Select (press) the SPD INTV button on the MCP.  The MCP speed window becomes active and displays the current speed of 275 kias.  Dial into the speed window on the MCP the new speed requirement of 240 kias. 

Notice the speed indicator display above the speed tape on the PFD has changed from 275 kias to the new speed of 240 kias.  Also note that the VNAV annunciator light on the MCP remains illuminated - in this case VNAV is active.  The speed of the aircraft will be reduced to 240 kias.

If you cross check with the Cruise Altitude in the CDU (CRZ ALT key/TGT SPD), the CDU will still indicate the original cruise speed of 275 kias.  This is because the speed is an intervention speed and, as such, will not have been updated in the FMC.

If you wish to stay at this speed (240 kias), you will need to manually change the cruise speed to 240 kias in the CDU.  However, in this case the reduction in speed is momentary, and ATC advise you to return to your original speed.  

Returning to Original Speed

Press the SPD INTV button (or unselect and reselect VNAV on the MCP).  Doing this, will return the speed to the original speed (275 kias).  It will also change the speed indication on the PFD from 240 kias back to 275 kias.  The MCP speed window will become blank (no speed displayed) to indicate the VNAV is the controlling mode. 

Important Point:

  • When SPD INTV is active, the FMA will display MCP SPD.  When SPD INTV is not active (deselected) the FMA will revert to FMC SPD.

Altitude Intervention (ALT INTV)

Altitude Intervention is slightly more sophisticated in comparison to Speed Intervention.  This is because, amongst other factors, the relationship changes dependent on whether the aircraft is ascending or descending, and whether there are active restrictions (constraints) programmed for waypoints (U10.8.A).

In level flight, with autopilot, LNAV and VNAV engaged, the following will be observed:

(i)     LNAV and VNAV will be active;

(ii)    The FMA will display FMC SPD / LNAV / VNAV PTH;  

(iii)   The annunciators on the MCP - LNAV, VNAV & CMD A/B will be illuminated;

(iv)   The speed window located on the MCP will be blank (no speed displayed); and,

(v)    LNAV/VNAV will be displayed in white text on the PFD.

ATC request a descent from FL150 to FL120.

DESCENT Using ALT INTV (descent from FL150 to FL120)

Dial into the altitude window on the MCP the new altitude (FL120). 

CDU cruise page showing 12000 in scratch pad.  Selecting line select 1 left (LS1L) will update the CDU to the new Flight Level

Notice the altitude display above the altitude tape on the PFD has changed from FL150 to the new altitude of FL120.   Also note that the VNAV annunciator light on the MCP remains illuminated - in this case VNAV is armed.  ALT INTV takes precedence over VNAV.  

Select (press) ALT INTV button on the MCP and the FMA will annunciate FMC SPD / LNAV / VNAV PTH.   The aircraft will descend at 1000 fpm (default descent speed) until FL120 is reached.  

If you cross-check the Cruise Altitude in the CDU (INIT PERF/PERF/CRZ ALT or CRZ key/CRZ ALT), it will display the original Cruise Altitude of FL150.  The FMC has NOT automatically updated the Flight Level to the lower altitude – this is normal and not a fault.  

If you want to remain at FL120, you will need to manually update the Cruise Altitude in the CDU (INIT PERF/PERF/CRZ ALT), or (CRZ key/CRZ ALT) and press the EXEC key.  

Important Points:

  • When the CDU page is open on CRZ (CRZ key), it will display in the scratch pad any change to the altitude in the MCP.  This provides a ‘shortcut’ to insert the new flight level should it be desired to make it permanent.  All that is needed is to press the CRZ/CRZ ALT (in the CRZ page) and the FMC cruise altitude will be updated.  The altitude in the LEGS page will also be updated.

  • By default, Altitude Intervention will always maintain a vertical descent at 1000 fpm.

Returning to Original Flight Level

To return to the original Flight Level (FL150), dial into the MCP the previous Flight Level (FL150) and press ALT INTV.  The aircraft will ascend to FL150.  

Important Points:

  • The FMC will NOT automatically update the Flight Level to the lower altitude.  If desired, this will need to be done manually.

  • When returning to the original Flight Level, VNAV will not engage unless the original Flight Level (FL150) is dialled into the altitude window of the MCP.  For VNAV to be active, the Cruise Altitude in the CDU and the altitude set in the MCP must be identical.

  • ALT INTV takes precedence over VNAV.  The VNAV annunciator on the MCP will remain illuminated and  VNAV will be in armed mode (when ALT INTV is selected).

  • To determine if VNAV is the active mode (or not) the FMA display must be consulted – not the annunciator light on the MCP.

  • U10.8A bring some important changes from earlier U releases.  If there are no altitude restrictions, pressing ALT INTV will automatically update the altitude in the CDU to the lower selected altitude.  However, if an altitude restriction is present the lower altitude will not be updated.

ASCENT Using ALT INTV (ascent from FL120 to FL150)

The ALT INTV button operates a little differently when you ascend.   For a start, it automatically replaces (updates) the Flight Level (CRZ ALT) in the CDU.  It will also update the altitude in the LEGS page in the CDU. 

The FMA will annunciate  N1 / LNAV / VNAV SPD during the climb phase of the flight, changing to FMC SPD / LNAV / VNAV PTH when the new flight level is reached.  When climbing using ALT INTV, the thrust mode uses N1.

Important Points:

  • When a Flight Level of a higher altitude is dialled into the altitude window and ALT INTV selected, the new Flight Level will be updated in the CDU.

  • U10.8A bring some important changes from earlier U releases.  If the selected MCP altitude is BELOW any altitude restriction, then that restriction will be DELETED.  Also, altitude restrictions will be DELETED if they are between the current altitude and the selected MCP altitude (when ALT INTV is pressed).

  • If ascent and descent do not function correctly. In the first instance consult the FMS software for the U version in service.

Considerations When Using ALT INTV

When using ALT INTV, several variables that relate to the altitude constraint (s) will change, depending upon whether you are in VNAV climb, cruise or descent.  Rather than rephrase what already has been written, I have scanned the appropriate page (below) from the Cockpit Companion written by Bill Bulfer.

Using ALT INTV and SPD INTV During a VNAV Approach Phase

ALT INTV is a very handy tool, if during an VNAV approach, the flight crew fail to change the altitude in the MCP to the next lowest altitude constraint.  

To demonstrate, the aircraft is flying a published STAR that will join an VNAV approach.  VNAV and LNAV are active and the flight plan has several altitude and speed constraints.  To meet these constraints, the crew must update the MCP altitude to the next lowest altitude (displayed in the LEGS page of the CDU) prior to the aircraft crossing the constraint.

If the crew fail to update the MCP to the next lowest altitude constraint, then the aircraft will transition from descending flight (VNAV PTH) to level flight (VNAV ALT).   In this situation a crew could engage LVL CHG or V/S,  however, doing so would deselect VNAV.  

A simpler solution is to change the altitude in the MCP window to the next lowest altitude constraint (or MDA) and press ALT INTV.  This will command VNAV to descend the aircraft, at a variable descent rate, to meet the required constraint.   By using ALT INTV, the aircraft will remain in VNAV.

Additionally, SPD INTV is a straightforward way to control the speed of the aircraft during the approach while maintaining VNAV.  Company policy at some airlines insist that Speed Intervention be used approximately 2 nautical miles from of the Final Approach Fix (FAF).

Reliability of ALT INTV in Descent Mode - ProSim-AR

ProSim-AR (Version 1.49) exhibits difficulty in holding a lower altitude level when ALT INTV is used.

The Boeing system is designed that once the V-Path is intercepted, the Flight Director (FD) cross hairs maintain the new altitude by pitch.  In ProSim-AR this pitch is often difficult to hold and a resultant pitching of the aircraft (up and down) occurs as the system attempts to hold the lower altitude.  When using LVL CHG or V/S this does not occur.  Note that this behaviour does not occur when using INTV ALT to ascend.

It is not certain if this behaviour is common only to my system or is more widespread; but a way to solve the issue is to either:

(i)   Use an alternate descent mode; or,

(ii)  Manually change the altitude values in the CDU (INDEX/PERF/CRZ ALT), or (CRZ key/CRZ ALT) and press EXEC.

Procedure (ii) manually changes the Cruise Altitude (CRZ ALT) to the lower altitude in the CDU.  This causes the command logic to switch from the logic that commands Altitude Intervention to the logic that commands altitude in thr FMC.  The aircraft will not pitch and will be stable.

The developers at ProSim-AR are continually tweaking these variables.  In future software releases (post version 221.b12) this issue may well be rectified.

Final Call

There are many of reasons an aircraft will need to alter altitude and/or speed; be it to divert around a localized weather event, or to abide by an Air Traffic Control directive.  Whatever the reason, often the changes are short-lived and a return to the original altitude/speed constraint imminent.

In these situations Altitude and Speed Intervention enable the aircraft to easily and quickly transition between Flight Level changes whilst VNAV is active.   Furthermore, the use if this functionality can minimise the time spent in the ‘heads down’ position during the high-task descent and approach phase of a flight.

In this article, I have explained the Altitude and Speed Intervention functionality of the Boeing 737.  I also have documented "work-arounds" should VNAV not function as anticipated. 

Acronyms and Glossary

  • Annunciator - A push button to engage a particular mode – often has a light that illuminates

  • ALT INTV - Altitude Intervention

  • CDU – Control Display Unit (display screen and keyboard to input data into the FMC)

  • Flight Level – Altitude that the aircraft will fly at (set in FMC)

  • FMA – Flight Mode Annunciator

  • FMC – Flight Management Computer  (part of the Flight Management System)

  • FMS – Flight Management System

  • LNAV – Lateral Navigation

  • MCP – Mode Control Panel

  • PFD – Primary Flight Display

  • SPD INTV - Speed Intervention

  • VNAV – Vertical Navigation

VNAV 'Gotchas' - Avoiding Unwanted Level-Offs

One aspect of using VNAV during published instrument departures, arrivals, and approaches is that it can cause unnecessary level-offs. 

These level-offs can cause engines to spool needlessly, increase fuel cost and stagger a Continuous Descent Final Approach (CDFA) such as when executing  an RNAV approach. 

It is not only domestic airliners that must meet altitude constraints; military aircraft also  must meet the same requirements when landing at a non-military airport (click to enlarge).  Image is copyright xairforces.net.  For those interested in flying the Wedgetail, there is a model available for ProSim-AR users on their forum page.

To avoid this, and ensure that minimum altitude constraints are met, two techniques can be used.

METHOD 1Constraints Are Not Closely Spaced.

This technique is normally used when waypoints with altitude constraints are not closely spaced (in other words, there is a moderate distance between altitude constraints).

During climbs, the maximum or hard altitude constraints should be set in the Mode Control Panel (MCP).

Minimum crossing altitudes need not be set in the MCP as the FMC message function will alert the crew if these constraints cannot be satisfied.

During descent, the MCP altitude is set to the next constraint or clearance altitude, whichever will be reached first.

Immediately prior to reaching the constraint, when compliance with the constraint is assured, and when cleared to the next constraint, the MCP altitude is reset to the next constraint/altitude level.

METHOD 2: Constraints Are Closely Spaced.

Where constraints are closely spaced to the extent that crew workload is adversely affected, and unwanted level-offs maybe a concern, the following is approved:

For departures, set the highest of the closely-spaced constraints.

For arrivals, initially set the lowest of the closely-spaced altitude constraints or the Final Approach Fix (FAF) altitude, whichever is higher.

IMPORTANT: When using either technique, the FMS generated path should be checked against each altitude constraint displayed in the CDU to ensure that the path complies with all constraints.  Furthermore, the selection of a pitch mode other than VNAV PTH or VNAV SPD should be avoided, as this will result in the potential violation of altitude constraints.

To enlarge more on VNAV is beyond the scope of this post.  A future post will address this topic in more detail.

Crew Controls Automation - Not Vice Versa

However, the system is only as good as the knowledge of the person pushing the buttons.  It is very important that a flight crew control the automation rather than the automation control the flight crew. 

If VNAV begins to do something that is unplanned or unexpected, do not spend precious time ‘thinking about the reasons why’ – disconnect VNAV and use a more traditional method or hand floy the aircraft.  Then, determine why VNAV did what it did.  The most common comment heard in today's modern cockpits is ‘What is it doing now…

Final Call

VNAV is an easy concept to understand, but it can be confusing due to innumerable variables associated with vertical navigation.  VNAV is probably one of the more complicated systems that virtual and real pilots alike have to understand.  When using VNAV it is paramount to maintain vigilance on what it is doing at any one time, especially during descent and final approach.     Furthermore, it is good airmanship to always have a redundancy plan in place – a ‘what if’ should VNAV fail to do what was anticipated. 

The below article also discuss VNAV:

An interesting article concerning VNAV:

Acronyms and Glossary

  • CDU - Control Display Unit (aka FMC)

  • FAF – Final Approach Fix

  • FMC - Flight Management Computer

  • FMS - Flight Management System.  Supply of data to the FMC and CDU

  • Gotcha - An annoying or unfavorable feature of a product or item that has not been fully disclosed or is not obvious.

  • LNAV – Lateral Navigation

  • MCP – Mode Control Panel

  • NPA - Non Precision Approach

  • VNAV – Vertical Navigation

  • VNAV PTH – Vertical Navigation Path

  • VNAV SPD – Vertical Navigation Speed

RNAV Approaches

RNAV 07 L - one of several RNAV approach charts for Los Angeles International Airport (LAX).  The most important aspect of an RNAV approach is that it is a Non-Precision Approach (NPA).  Note the word GPS is written in the title of the approach plate

My previous post provided of overview on RNAV and RNP navigation.  This article will explain what a RNAV approach is, provide incite to the operational requirements, and discuss the approach.  I will also briefly discuss Approach Procedures and Vertical Guidance (APV) and RNP/ANP values.

The operational criteria for RNAV approaches is complicated and not easy to explain.  There are a number of RNAV approaches (often different for differing areas of the globe) and each is defined by the accuracy of the equipment used in the execution of the approach.  As such, this article is not all encompassing and I encourage you to read other technical articles available on this website and elsewhere.

RNAV Approaches - Background Information

The Global Positioning System (GPS) is the brand name owned by the US military.  Initially all RNAV approaches were GPS orientated, however, in recent years this has changed to include Global Navigation Satellite System (GNSS) applications.  GNSS applications are not owned (or controlled) by the US military.  As such, an RNAV approach chart uses the words GPS and GNSS interchangeably.

What is an RNAV Approach

The definition for an RNAV approach is 'an instrument approach procedure that relies on the aircraft's area navigation equipment for navigational purposes'.  In other words, a RNAV approach is any non ILS instrument-style approach that does not require the use of terrestrial navigation aids such as VOR, NDB, DME, etc. 

Rather than obtain navigational information directly from  land-based navigational applications, the aids for the approach are obtained from a published route contained within the aircraft's Flight Management System (FMS) and accessible to the crew through the Control Display Unit (CDU).   Broadly speaking, the  approach uses signals, that are beamed from navigational satellites orbiting the Earth, and compares this data with the information from the FMC navigation database.

All Boeing Flight Management Systems (FMS) are RNAV compliant and have the ability to execute an RNAV approach.

Important Point:

  • An RNAV approach is classified as a Non-Precision Approach (NPA).

Non-Precision Approaches (NPA)

Before writing further, a very brief overview of Non-Precision Approaches is warranted.

There are three ways to execute a Non-Precision Approach.

(i)   IAN (integrated Approach Navigation).   IAN is a airline customer option and makes a NPA similar to an ILS approach.  A separate article has been written that addresses IAN.

(ii)   Vertical Speed (V/S).  V/S is not normally used when flying a RNAV approach that uses positional information from the aircraft's database.  However, V/S can be used for other Non-Precision Approaches and to transition to a RNAV approach.

(iii)   VNAV (Vertical Navigation).  VNAV is the preferred method to execute an NPA (provided the approach is part of the FMS database). 

(iv)   LNAV (Lateral Navigation).  LNAV is mandatory for all approaches that are GPS/GNSS/RNP based.

RNAV Approach Types

The following are RNAV approaches:

(i)    RNAV (GPS) approach;

(ii)   RVAV (RNP) approach;

(iii)  RVAV (RNP) AR approach; and,

(iv)  RNAV (GNSS) approach.

The RNAV (GNSS) approach can further be sub-divided into an additional three possible types of approach, each identified by a different minima.  These approaches are:

(i)    RNAV (GNSS) LNAV;

(ii)   APV Baro VNAV approach;

(iii)  APV SBAS approach.

It's easy to become confused by the various types of RNAV approaches, however, the actual flying of a RNAV approach does not differ greatly between each approach type.  The main difference lies in the level of accuracy required for the approach to be flown.

Approach Procedures with Vertical Guidance (APV)

APV refers to any approach which has been designed to provide vertical guidance to a Decision Height (DH).  An APV approach is characterised by a constant descent flight path, a stable airspeed, and a stable rate of descent.  This type of approach rely upon Performance Based Navigation (PBN).

The difference between the two APV approaches (ii and iii mentioned above) is that an APV Baro VNAV approach uses barometric altitude information and data from the FMS database to compute vertical guidance.  in contrast the APV SBAS approach uses satellite based augmentation systems, such as WAAS in the US and Canada and EGNOS in Europe, to determine lateral and vertical guidance. 

I will now discuss the RNAV (GNSS & RNP) approach.

Flying The RNAV (GNSS) Approach

The RNAV (GNSS) approach is designed to be flown with the autopilot engaged.  The recommended roll mode is LNAV or HDG SEL.  The preferred method for pitch is VNAV.  If LNAV and VNAV are engaged, the aircraft will fly the lateral and vertical path as determined by the FMS database; the route is displayed in the LEGS page of the CDU.

The aircraft uses the FMS database to determine its lateral and vertical path.  As such, it is very important that the RAW data published in the navigational database is not altered by the flight crew.  Furthermore, the data presented in the CDU should be cross-checked with the data on the approach chart to ensure it is identical.

As discussed previously, an RNAV (GNSS) approach is classified as a Non-Precision Approach.  Therefore, minima is at the Minimum Descent Altitude (MDA).   It is good airmanship to add +50 feet to the MDA to reduce the chance of descending through the MDA.  If a RNAV (RNP) or APV approach is being flown, the minima changes from a MDA to a Decision Height (DH). Whatever the requirement, the minima will be annotated on the approach chart.

LIDO chart (Lufthansa Systems) depicting the RNAV (RNP) 01 approach into BNE-YBBN (Brisbane Australia).  Note that this chart has a Decision Altitude (DA) rather than a Minimum Descent Altitude (MDA).  Chart courtesy of NaviGraph

RNAV (RNP) Approaches

RNP stands for Required Navigation Performance which means that specific navigational requirements must be met prior to and during the execution of the approach.

There are two types of RNAV (RNP) approaches:

(i)   RNAV (RNP) approach; and,

(ii)  RNAV (RNP) AR approach.

Both approaches are similar to a RNAV (GNSS) approach, however, a RNAV (RNP) approach, through the use of various sensors and equipment, achieves far greater accuracy through the use of Performance Based Navigation (PBN), and can therefore be flown to a DA rather than a MDA.

RNP/ANP - How It Works

An RNAV (RNP) approach compares the position that the aircraft should be in with the actual position of the aircraft.  If this value exceeds the prescribed distance (RNP exceeds ANP), the approach must be aborted.    The use of RNP/ANP enables greater accuracy in determining the position of the aircraft.

RNP/ANP Alerts

If an anomaly occurs between RNP and ANP one of two RNP alerts will be generated:

(i)    VERIFY POSITION - displayed in the scratchpad of the CDU; or,

(ii)   UNABLE REQD NAV PERF-RNP - displayed on the Navigation Display (ND) (if EFIS is set to MAP). 

It should be noted that different versions of CDU software will generate different alerts.  This is because newer software takes into account advances in PBN.  To determine which software version is in use, press IDENT from the CDU main page (LSK1L) and check OP PROGRAM.  ProSim-AR uses U10-8a.

The variables for RNP/ANP can be viewed in the CDU in the POS REF page (page 3), the LEGS page when a route is active, and also on the Navigation Display (ND).

A second type of RNP approach is the RNAV (RNP) AR approach.  This approach enables you to have curved flight paths into airports surrounded by terrain and other obstacles. Hence why special aircraft and aircrew authorization (AR) is required for these approaches.  Other than AR and additional flight crew training, the approach is identical to the RNAV (RNP) approach.

Advantages of RNAV and RNAV (RNP) Approaches

The benefit of using an RNAV approach over a traditional step-down approach is that the aircraft can maintain a constant angle (Continuous Descent Final Approach (CDFA)) until reaching minima.  This has positive benefits to fuel savings, engine life, passenger comfort, situational awareness, and also lowers flight crew stress (no step-downs to be followed).   Additionally, it also minimises Flight Into Terrain (CFIT) events.

A further advantage is that the minimas for an RNAV approach are more flexible than those published for a standard Non-Precision Approach not using RNAV.  RNAV approach charts have differing descent minima depending upon the type of RNAV approach.

For example, if flying a RNAV (RNP) approach the MDA is replaced by a DH.  This enables a lower altitude to be flown prior to a mandatory go-around if the runway threshold is not in sight.  The reason that a RNAV (RNP) approach has a DH rather than a MDA (and its resulting lower altitude constraint) is the far greater accuracy achieved through the use of Performance Based Navigation (PBN).

Approach To Land Using RNAV

The following addresses the basics of what is required to execute an RNAV approach.

Prior to beginning the approach, the crew must brief for the approach and complete ant required preparation. This includes, but is not limited to, the following items:

(i)     Equipment must be operational prior to starting the approach;

(ii)    Selection of the approach procedure, normally without modifications from the aircraft's navigation database (CDU);

(iii)    For airplanes without Navigation Performance Scales (NPS), the map display should be set to the 10 NM or less range.  This is to monitor path tracking during the final approach Segment and provide greater navigational awareness;

(iv)    For airplanes with NPS, the map display range may be set to whatever distance is desired;

(v)     TERR display must be selected on either the Captain or First Officer side of the ND;

(vi)     For airplanes without Navigation Performance Scales (NPS), the RNP progress page on the CDU should be displayed. For airplanes equipped with NPS, selection of the CDU page is at the crew's discretion;

(vii)    The navigation radios must be set according to the type of approach; and,

(viii)   There must be no alerts generated (UNABLE REQD NAV PERF and/or VERIFY POSITION).

In addition to the above, airline Standard Operational Procedures (SOPs) may require additional caveats.  For example, the setting of range rings on the ND to provide enhanced situational awareness at specific points (range rings can be set on the FIX page in the CDU).

Important Points:

  • Select the approach procedure from the arrivals page of the CDU and cross-check this data with that published on the approach chart, especially the altitude constraints and the Glide Path (GP).

  • If the Initial Approach Fix (IAF) in the CDU has an ‘at or above’ altitude restriction, this may be changed to an ‘at’ altitude restriction that uses the same altitude. Speed modifications (using speed intervention) are allowed as long as the maximum published speed is not exceeded. No other lateral or vertical modifications should be made at or after the IAF.

Beginning the Approach

Select LNAV no later than the IAF. If on radar vectors, select LNAV when established on an intercept heading to the final approach course. VNAV PTH must be engaged and annotated in the Flight Mode Annunciator (FMA) for all segments that contain a Glide Path (GP) angle, as shown on the LEGS page, and must be selected no later than the Final Approach Fix (FAF) or published glide path intercept point.

Speed Intervention (INTV), if desired, can be used prior to the GP.  Good airmanship directs that the next lower altitude constraint is dialled into the MCP altitude window as the aircraft passes through the previous constraint.  When 300 feet below the Missed Approach Altitude (MAA) re-set the altitude window in the MCP to the MAA.

Final Approach using RNAV

When initiating descent on the final approach path (the GP), select landing flaps, slow to final approach speed, and do the landing checklist. Speed limits published on the approach chart must be complied with to enable adequate bank angle margins. 

At minima, or as directed by the airline's SOP, the autopilot followed by the autothrottle is disconnected and a visual 'hands on' approach made to the runway threshold.

Once established on final approach, a RNAV approach is flown like any other approach.

Final Call

The Boeing aircraft is capable of several types of Non-Precision Approaches, however, outside the use of ILS and possibly IAN, the RNAV approach enables an accurate glide path to be followed to minima.  While it's true that the differing types of RNAV approaches can be confusing due to their close relationship, the approach is straightforward to fly.

This short article is but a primer to understanding an RNAV approach.  Further information can be found in the FCTM, FCOM and airlines SOP.

In my next article we will look some of the possible 'gotchas' that can occur when using VNAV.

References

Flight Crew Training Manual (FCTM), Flight Crew Operations Manual (FCOM) and airline SOP.

Acronyms and Glossary

  • Annunciator – Often called a korry, it is a light that illuminates when a specific condition is met

  • ANP - Actual Navigation Position

  • APV - Approach Procedure with Vertical Guidance

  • CFIT - Continuous Flight Into Terrain

  • DME – Distance Measuring Equipment

  • FAF - Final Approach Fix

  • FCOM - Flight Crew Operations Manual (Boeing)

  • FCTM - Flight Crew Training Manual (Boeing)

  • FMA - Flight Mode Annunciator

  • FMC – Flight Management Computer

  • FMS – Flight Management System

  • Gotcha- An unfavorable feature of a product or item that has not been fully disclosed or is not obvious.

  • GPS – Global Positioning System

  • GNSS - Global Navigation Satellite System

  • IAF - Initial Approach Fix

  • Korry - See annunciator

  • LNAV – Lateral Navigation

  • LPV - Localizer Performance with Vertical Guidance

  • MAA - Missed Approach Altitude

  • MCP – Mode Control Panel

  • ND – Navigation Display

  • NPA - Non Precision Approach

  • PBN - Performance Based Navigation

  • RNAV – Area Navigation

  • RNP - Required Navigation Performance

  • SOP - Airline Standard Operational Procedure.  A manual that provides additional information to the FCTM and FCOM

  • SBAS - Satellite based augmentation systems.  In the U.S. called WAAS and Europe called EGNOS.

  • VNAV – Vertical Navigation

  • VNAV PTH – Vertical Navigation Path

  • VNAV SPD – Vertical Navigation Speed

  • VOR – VHF Omni Directional Radio Range

  • Updated 11 November 2021

RNAV, RNP, LNAV and VNAV Operations - Overview

Collins Mode Control Panel (MCP) showing lnav and vnav buttons

New flyers to the Boeing 737NG often become confused understanding the various terminology used with modern on-board navigational systems.

Although the concepts are easy to understand, the inter-relationship between systems can become blurred when the various types of approaches and departures are incorporated into the navigational system.

This post will not provide an in-depth review of these systems; such a review would be lengthy, confusing and counterproductive to a new virtual flyer.  Rather, this post will be a ‘grass-roots’ introduction to the concept of RNAV, RNP, LNAV and VNAV.  I will also touch on the concept of Performance Based Navigation (PBN).

In the Beginning there was RNAV

RNAV is is an acronym for Area Navigation (aRea NAVigation). 

Prior to complex computers, pilots were required to use established on-the-ground navigational aids and would fly directly over the navaid.  Such a navaid may be a VOR, NDB or similar device.  Flying over the various navaids was to ensure that the flight was on the correct route.  Often this entailed a zigzag course as navaids could not be perfectly aligned with each other in a straight line - airport to airport. 

When computers entered the aviation world it became possible for the computer to 'create' an imaginary navigation aid based on a direction and distance from a ground-based navaid.  Therefore, a straight line could be virtually drawn from your origin to destination and several waypoints could be generated along this line.   The waypoints were calculated by the computer based on ground VORs and positioned in such a way to ensure more or less straight-line navigation.

In essence, RNAV can be loosely defined as any 'straight line' navigation method similar to GPS that allows the aircraft to fly on any desired path within the coverage of referenced NAVAIDS.

Required Navigation Performance (RNP) and Performance Based Navigation (PBN)

Simply explained, Required Navigation Performance (RNP) is a term that encompasses the practical application of advanced RNAV concepts using Global Navigation Satellite Systems (GNSS).

However, there is a slight difference between RNP and RNAV although the principles of both systems are very similar. 

RNAV airspace generally mandates a certain level of equipment and assumes you have a 95% chance of keeping to a stated level of navigation accuracy.  On the other hand, RNP is performance based and requires a level of on-board performance monitoring and alerting.  This concept is called Performance Based Navigation (PBN).

RNAV and RNP both state a 0.95 probability of staying within 1 nm of course.  But RNP (through PBN) will let you know when the probability of you staying within 2 nm of that position goes below 0.99999.  In essence, RNP and PBN enable an aircraft to fly through airspace with a higher degree of positional accuracy for a consistently greater period of time. 

To achieve this level of accuracy a selection of navigation sensors and equipment is used to meet the performance requirements.  A further enhancement of this concept is the use of RNP/ANP (Required Navigation Performance and Actual Navigation Performance.  Advanced RNAV concepts use this comparative analysis to determine the level or error between the required navigation (the expected path of the aircraft) and the actual navigation (what path the aircraft is flying.)  This information is then displayed to the flight crew.

LNAV and VNAV

LNAV and VNAV are parts of the Flight Guidance System, and are acronyms for Lateral Navigation and Vertical Navigation'.  Both these functions form part of the automation package that the B737NG is fitted with.

LNAV is the route you fly over the ground. The plane may be using VORs, GPS, DME, or any combination of the above. It's all transparent to the pilot, as the route specified in the clearance and flight plan is loaded into the Flight Management System (FMS), of which the Flight Management Computer (FMC) is the interface.

The route shows up as a magenta line on the Navigation Display (ND), and as long as the LNAV mode on the Mode Control Panel (MCP) is engaged and the autopilot activated, the aircraft will follow that line across the ground. LNAV however, does not tell the plane what altitude to fly, VNAV does this.

VNAV is where the specified altitudes at particular waypoints are entered into the FMS, and the computer determines the best way to accomplish what you want.  The inputs from VNAV are followed whenever the autopilot is engaged (assuming VNAV is also engaged).  

The flight crew can, if necessary alter the VNAV constraints by changing the descent speed and the altitude that the aircraft will cross a particular waypoint, and the computer will re-calculate where to bring the throttles to idle thrust and begin the descent, to allow the aircraft to cross the waypoint, usually in the most economical manner.

VNAV will also function in climb and take into account airspeed restrictions at various altitudes and will fly the aircraft at the desired power setting and angle (angle of attack) to achieve the speed (and efficiency) desired.

There is not a fast rule to whether a flight crew will fly with LNAV and VNAV engaged or not; however, with LNAV and VNAV engaged and the autopilot not engaged, LNAV and VNAV will send their signals to the Flight Director (F/D) allowing the crew to follow the F/D cue display and hand fly the aircraft the way the autopilot would if it were engaged.

Reliance on MCP Annunciators

Flight Mode Annunciator (FMA) showing LNAV and VNAV Path Mode engaged.  The Flight Director provides a visual cue to the attitude of the aircraft while the speed is controlled by the the FMC.  CMD indicates that the autopilot is engaged (ProSim737 avionics suite)

LNAV and VNAV have dedicated annunciators located on the Mode Control Panel (MCP).  These annunciators illuminate to indicate whether  a particular mode is engaged. 

However, reliance on the MCP annunciators to inform you of a mode’s status is not recommended.  Rather, the Flight Mode Annunciator (FMA) which forms part of the upper area of the Primary Flight Display (PFD) should be used to determine which modes are engaged.  Using the FMA will eliminate any confusion to whether VNAV (or any other function) is engaged or not.

This post explains the Flight Mode Annunciators (FMA) in more detail.

Final Call

RNAV is a method of area navigation that was derived from the use of VOR, NDBs and other navaids.  RNP through it use of GNSS systems has enabled Area Navigation to evolve to include LNAV and VNAV which are sub-systems of the Flight Guidance System -  LNAV is the course across the ground, and VNAV is the flight path vertically. 

Historically, navigation has been achieved successfully by other methods, however, the computer can almost always do things better, smoother and a little easier – this translates to less workload on a flight crew.  

In my next post, we will discuss RNAV approaches and how they relate to what has been discussed above.

References

The information for this article came from an online reference for real-world pilots.

Acronyms and Glossary

  • Annunciator – Often called a korry, it is a light that illuminates when a specific condition is met

  • DME – Distance Measuring Equipment

  • FMA - Flight Mode Annunciator

  • FMC – Flight Management Computer

  • FMS – Flight Management System

  • GPS – Global Positioning System

  • GNSS - Global Navigation Satellite System

  • LNAV – Lateral Navigation

  • MCP – Mode Control Panel

  • ND – Navigation Display

  • NPA - Non Precision Approach

  • PBN - Performance-based Navigation

  • RNAV – Area Navigation

  • RNP - Required Navigation Performance

  • VNAV – Vertical Navigation

  • VNAV PTH – Vertical Navigation Path

  • VNAV SPD – Vertical Navigation Speed

  • VOR – VHF Omni Directional Radio Range

Control Wheel Steering (CWS) Explained

Collins 737 Mode Control Panel (MCP) showing location of CWS buttons on Collins MCP.  The CMD and CWS buttons are located on the First Officer side of the MCP.  Each of the four press to engage buttons has a green annunciator which illuminates when the mode is engage

CWS is an acronym for Control Wheel Steering.  Broadly speaking, it is a sub-set of the autopilot system which can used on either System A or B.  When engaged, CWS maneuvers the aircraft in response to control pressures applied to the control wheel or column.

The control pressure is similar to that required for manual flight. When control pressure is released, the autopilot holds the existing attitude until CWS is disengaged, or the autopilot is engaged. 

The Flight Crew Training Manual (FCTM) states:

‘Control Wheel Steering (CWS) may be used to reduce pilot workload. Follow the manually flown procedure but instead of disengaging the autopilot, engage CWS.’

CWS is a similar system to the ‘Fly By Wire’ system utilised by Airbus.

Advantages of CWS

The control pressures on the flight controls are in the order of 37 pounds push/pull value +- 3 pounds and continually applying this pressure for a protracted period of time can be tiring.  As such, an obvious advantage of using CWS is that you do not have to continually apply positive pressure to the flight controls to maintain a set pitch or roll attitude. 

CWS enables you to fly the aircraft using the flight controls rather than turning the heading knob on the Mode Control Panel (MCP) or configuring other modes such as Level Change, Vertical Speed, VNAV, etc.  Being able to ‘feel’ the control surfaces through the yoke and column has obvious benefits that flying using the MCP cannot convey.

CWS is also advantageous when flying in turbulent conditions (additional information below) as it results in smoother transitions than when the autopilot is used.  Furthermore, CWS also allows for greater control of the aircraft when performing touch and goes and circuits at lower altitudes.

CWS engaged during climb following flaps retraction.  The FMA displays CWS R & CWS P, the vertical speed is 2650 and pitch mode is V/S after changing from TOGA thrust following climb out

Practical Example

CWS is often used during the climb to altitude with the autopilot being engaged at 10,000 feet.  

In the example (left) the aircraft has CWS engaged during climb following flaps retraction.  The FMA displays CWS R & CWS P, the vertical speed is 2650 and pitch mode is V/S after changing from TOGA thrust following climb out.  Pitch and roll follows the FD bars and speed is 240 KIAS with altitude set to flight level 20900.  If CWS remains engaged, the aircraft will continue at this attitude. 

Airspeed is not protected when using CWS. 

Following rotation, the Flight Director (FD) bars will be followed maintaining V2+15/20 until Acceleration Height (AH) is reached.  At AH, the MCP speed will be increased to climb speed, or to a speed as required by Air Traffic Control.  As airspeed increases the flaps will be retracted.  When the flaps are retracted, the control column will be placed in a position that correlates to the Flight Director bars and CWS A or B will be engaged – the attitude of the aircraft will now be fixed.  

The aircraft, in TOGA thrust, will maintain the established pitch as it ascends to the altitude set on the MCP.  TOGA thrust is speed protected; therefore, as long as the FD bars are followed there will not be a speed incursion.  If a roll mode is selected, the navigational data provided by this mode is also promulgated to the Flight Director.  Once the desired altitude has been reached, LNAV / VNAV can be engaged.

Whether a flight crew used CWS is personal preference.  Some flight crews use it regularly while others have never used it.

Turbulence (autopilot or CWS)

The Flight Crew Training Manual (FCTM) states:

‘That during times of turbulence the A/P system (CMD A/B) should be disengaged.’

When the aircraft is flying through turbulence, the autopilot is attempting to maintain an attitude (pitch) that is based upon a predefined barometric pocket of air that is present at the altitude you are flying at.   In severe turbulence this pocket of air may not be stable and the autopilot will try to change altitude to match the changing barometric pressure.  At its worse, the autopilot may unexpectedly disconnect.

CWS provides a stable buffer in which the aircraft will maintain its position when flying through turbulence.  When CWS is engaged, it will maintain a preset attitude rather than the A/P attempting to match the attitude to changing barometric pressure.

Flight Crew Training Manuals differ in their content; each manual has been written with a particular airline.  Many virtual flyers duplicate the procedures followed by Ryanair.  This is because the documentation for Ryanair is relatively easy to find, and the policy of this airline is reasonably conservative.  As such, I have transcribed from the Ryanair FCTM the segment on the use of CWS during turbulence.

The Ryanair FCTM states:

‘Flight through severe turbulence should be avoided, if possible.  When flying at 30,000 feet or higher, it is not advisable to avoid a turbulent area by climbing over it unless it is obvious that it can be over flown.  For turbulence of the same intensity, greater buffet margins are achieved by flying the recommended speeds at reduced altitudes.  Selection of the autopilot Control Wheel Steering (CWS) is recommended for operation in severe turbulence’.

The recommended Ryanair procedures for flight in severe turbulence is:

  • Do not use Altitude Hold (ALT HLD) mode.

  • Target the airspeed to approximately 280 KIAS or 0.76 MACH, whichever is lower.

  • During severe turbulence there often will be large and often rapid variations in indicated airspeed.  Do not chase the airspeed.

  • Engage the Yaw Damper.

  • If the autopilot is engaged, use CWS position, do not use ALT HLD mode.

  • Disengage the Autothrottle (stops the autothrottle from hunting a desired airspeed)

  • Maintain wings level and the desired pitch attitude. Use the attitude indicator as the primary instrument. In extreme down and updraft conditions extreme attitude changes may occur.  Therefore, do not use sudden and excessive control inputs.  After establishing the trim setting for penetration speed, do not change the stabilizer trim.

Autothrottle Use

When CSW is engaged, the autothrottle should not be engaged.  The reason for this is because the autothrottle is coupled to the automation, and if there is a change in the aircraft's attitude there will be a corresponding change in engine thrust.

This said, I have spoken with several pilots who claim that they leave the autothrottle on when using CWS.  In some respects it depends on the severity of the turbulence encountered. 

Lazy Flying

Although not sanctioned by Boeing, some pilots use CWS as a 'lazy way' of flying, whereby they may establish the aircraft at a specific attitude and vertical speed with the autothrottle engaged.  As CWS is a sub-set of the autopilot system, trim control will still be controlled by the system and the aircraft will maintain the desired attitude until CWS is cancelled.

A Virgin First Officer has stated that, after takeoff and flaps retraction, she will often use engage CWS to climb to a specific altitude, then she will engage LNAV, VNAV and the autopilot. 

It's important to realise there are many ways, (although not sanctioned by Boeing or a specific airline policy) to fly the Boeing 737 aircraft.

Important Point:

  • There is no speed protection when CWS is engaged, except when the aircraft is in TOGA mode.

Technical Data (general)

The Flight Crew Training Manual states:

‘After autopilot engagement, the airplane may be manoeuvred using the control wheel steering (CWS) pitch mode, roll mode, or both using the control wheel and column. Manual inputs by the pilot using CWS are the same as those required for manual flight. Climbs and descents may be made using CWS pitch while the roll mode is in HDG SEL, LNAV or VOR/LOC. Autopilot system feel control is designed to simulate control input resistance similar to manual flight.'

The Mode Control Panel (MCP) has two CWS buttons located on the First Officer side of the MCP beneath the two CMD buttons (CMD A/B).  Like the autopilot, CWS has a redundancy system (system A or system B).  By default the CWS system is off (annunciator is not illuminated). 

The CWS system has been designed so it can be used with or without the autopilot.

To engage the CWS system, either of the two CWS buttons must be pressed.  When engaged, the CWS annunciator will illuminate green and the Flight Mode Annunciator (FMA) on the Primary Flight Display (PFD) will annunciate CWS P and/or CWS R.

CWS cannot be engaged when any of the following conditions are met:

  • Below 400 feet.

  • Below 150 feet RA with the landing gear in the down position.

  • After VOR capture with TAS 250 kt or less.

  • After LOC capture in the APP mode.

Important Points:

  • CWS can only be engaged when there is no pressure on the flight controls. 

  • CWS can be engaged with the autopilot engaged or not engaged.

Operation - What CWS Does

As mentioned, the CWS system can be used with or without the autopilot being engaged. 

CWS can be engaged two ways.  Either by moving the control column when the autopilot is engaged, or by pressing the CWS button on the MCP.

To use CWS in its own right, the autopilot must be disengaged.  This can be done manually by pressing the CMD button or by pressing CWS; the later will disconnect the autopilot (the CMD annunciation will extinguish and the CWS annunciation will illuminate).   To access the CWS system partially, and still use the autopilot, the control column is moved (pitch/roll) while the autopilot is engaged.

Although the CWS concept is easy to understand, documenting exactly what it does is difficult and this can cause confusion.  I wouldn't become too concerned with the 'technical jargon' below, as CWS is easy to master by using the function and remembering what it does:

The following information has been edited from documentation acquired from Smart Cockpit Airline Training.

1:  CWS selected - PITCH and ROLL   (autopilot not engaged)

  • Depressing the CWS button on the MCP engages the autopilot pitch and roll axes in the CWS mode.  It also displays CWS-P and CWS-R on the FMA on both the Captain and First Officer Primary Flight Displays (PFD).  (Note that CMD is not selected and the CMD annunciation is extinguished on the MCP).

  • With CWS engaged, the autopilot maneuvers the aircraft in response to control pressures applied to the control wheel or column.  The control pressure is similar to that required for manual flight.  When control pressure is released, the autopilot holds existing attitude and roll.

•    If the column pressure is released with a bank angle 6 degrees or less, the autopilot rolls the wings level and holds existing heading. This feature is inhibited when any of the following conditions are met:

(i)     Below 150 ft RA with the landing gear down;

(ii)    After F/D VOR capture with TAS 250 kt or less; and,

(iii)   After F/D LOC capture in the APP mode.

2:  Moving control column - PITCH  (autopilot engaged)

  • The FMA will display CWS-P.

The pitch axis engages in CWS while the roll axis is in CMD when:

(i)     The autopilot pitch has been manually overridden with control column force and the  force required for override is greater than normal CWS control column force.  Note that manual pitch override is inhibited in the APP mode with both autopilots are engaged (autoland).

Important Points:

  • When approaching a selected altitude in CWS-P with the A/P in CMD, CWS-P changes to ALT ACQ and, when at the selected altitude, ALT HOLD engages.

  • If pitch is manually overridden while in ALT HOLD at the selected altitude, ALT HOLD changes to CWS-R If control force is released within 250 ft of the selected altitude, CWS-P changes to ALT ACQ and the autopilot returns to the selected altitude and ALT HOLD engages.  If the elevator force is held until more than 250 ft from the selected altitude, pitch remains in CWS PITCH.

3:  Moving control column - ROLL  (autopilot engaged)

•    The FMA will display CWS-R.

The roll axis engages in CWS while the pitch axis is in CMD when:

(i)     The pitch has been manually overridden with control column force and the force required for override is greater than normal CWS control column force.  

Important Point:

  • With CWS-R selected and the autopilot engaged, the aircraft will capture a selected radio course while the VOR/LOC or APP mode is armed. Upon intercepting the radial or localizer, the F/D and autopilot annunciation changes from CWS-R to VOR/LOC engaged and the autopilot tracks the selected course.

Using CWS (with the autopilot engaged) - Simplified

This segment has been added in response to some readers who stated they had difficulty in understanding some of the above content.  I hope it explains, in easier terms, how the CWS system can be used when the autopilot is engaged.

Moving the flight controls (pitch/roll) during automated flight will cause the CWS system to engage.  However, the autopilot (CMD) will remain selected and the CMD annunciator will remain illuminated on the MCP. 

Flying the aircraft in this manner can be useful when hand flying an approach, but wishing to follow the automated inputs from the ILS and/or FMC.

During such a procedure the following will be noted:

Moving flight controls left or right (roll):

(i)      The autopilot annunciation will remain illuminated;

(ii)     The FMA on the PFD will alter from CMD to CWS-R;

(iii)    The AFDS will illuminate A/P P/RST; and,

(iv)    The heading annunciation on the MCP will extinguish, as will the LNAV annunciation if engaged.

The aircraft can now be flown using control wheel steering.  To return to fully automated flight, press the heading button on the MCP.  LNAV, if used, will also need selecting.

Moving flight controls up or down (pitch):

(i)      The autopilot (CMD A/B) annunciation will remain illuminated;

(ii)     The FMA on the PFD will alter from CMD to CWS-P;

(iii)    The AFDS will illuminate A/P P/RST; and,

(iv)    The heading annunciation on the MCP will extinguish, as will LNAV annunciation if engaged.

Important Point:

  • If the pitch is altered to cause the aircraft to ascend, the altitude window in the MCP must be changed to the new altitude prior to moving the flight controls (altitude capture is automatic).  This is not required if the pitch is changed to cause the aircraft to descend.

Final Call

The use of CWS is very much underused and under-appreciated - whether used as a stand-alone system, or in conjunction with the autopilot.

Although surface control loading in a simulator rarely matches that of a real aircraft, the use of CWS in a simulator environment can still have positive benefits equating to better aircraft handling, especially when flying circuits and flying in turbulence.

  • NOTE:   This article has been rewritten to aid in clarity (28 November 2021).

10 Mile ARC to VOR 30 Approach - Hobart, Tasmania Australia (YMHB)

Approach chart depicting VOR 30 Approach to YMHB.  Important points to note are: initial approach courses to intercept the arc (295 & 334), the D10 HB arc, the altitude increments of 4000, 3000 and at 7 miles, 2400, and the Initial Approach Fix (IAF) and speed of 210 kias

Recently, I flew from Brisbane to Hobart and the pilot flying made a different style of approach to what normally is made at this airport.  After landing, I approached the pilots and queried the approach.  The Captain stated that he had decided to fly a semi-automated VOR approach along an arc to land at runway 30. 

The reason being, that Air Traffic Control (ATC) had warned them of turbulent conditions near the airport.  He commented that in such conditions, he felt more confident using the older style arc approach using LNAV/VNAV with Speed Intervention (SPD INTV) engaged, with a transition to Vertical Speed and VOR once on final.

The First Officer stated that this was the first time he had seen an arc being used to set-up for a VOR approach.  He said that usually they use ILS into RWY 12 or RNAV into RWY 30.  He commented that the only time he had made a VOR approach was during simulator training, and then he would probably only use such an approach, if the ILS was inoperative or there was an issue with RNAV.

The use of this approach is a prime example of the variation offered to pilots in relation to how they fly and land the Boeing 737. 

Screen Images

Several screen captures from the Instructor Station, CDU and Navigation Display (ND) which I hope will make it easier to understand this post.  The avionics suite used is ProSim737 distributed by ProSim-AR.  Note that some of the mages are not sequential as I captured the images over two simulator sessions.

How To Set-Up An Arc

To set-up an approach using an arc is very easy.  

The following example is for Hobart, Tasmania Australia (YMHB).  The instructions assume that you are conversant with operating the CDU and have a basic understanding of its use.  

Essentially, an arc is using a Place/Bearing/Waypoint to define an arc around a point at a set distance.  The distance between each of the generated waypoints along the arc, is at the discretion of the flight crew.

Approach Charts

To determine the correct distance to create the arc, the approach chart for the airport should be consulted.  The chart, in addition to providing this information, will also aid you in decided where to place the final waypoint (if wanted) along the approach course.

In this example, the YMHB VOR 30 approach states that the aircraft must fly an arc 10 miles from the airport between an altitude of 4000 and 3000 feet before descending to be at 2400 feet 7 miles from the runway  threshold.

The approach chart depicted is provided by Lufthansa Systems (LIDO/FMS) distributed by Navigraph

CDU Instructions

(i)    Open the FIX page and type in the scratchpad the airport code (YMHB).  After uploading, type the distance (/10 miles).  This will create a green-dotted citcle around YMHB with a radius of 10 miles.

(ii)    Open the LEGS page and type into the scratchpad the airport code (YMHB).  Immediately following YMHB, type the required radial1 (in degrees) from the airport that you wish the initial waypoint to be generated.  Follow this with a slash and type in the distance from the airport (YMHB340/10).  

This will generate a waypoint 10 miles from YMHB on the 340 radial.  This is the waypoint from which you will begin to build your arc.  

Obviously, the radial you use to define the location of your first waypoint will depend upon the bearing that you are flying toward the airport.

(iii)    To Generate the ARC you must repeat the above process (ii) changing the radial by 10 degrees (or whatever you believe is needed) to generate the required waypoints around the arc at 10 miles from the airport.  As an example: YMHB320/10, YMHB340/10, YMHB000/10 and so forth until the arc is built.

As you upload each of the radials you will note that the name for the waypoint is changed to a sequential number specific to each waypoint.  As an example; the above waypoints will each be named YMH01, YMH02 and YMH03.

If you make a mistake, you can delete a waypoint and start again; however, realize that the sequential numbers will not be in order.  This is not an issue (it is only a number) but it is something be aware of.

In our example, the VOR approach is for runway 30.  Therefore; your final waypoint on the arc will be YMHB121/10.  Prior to reaching this waypoint, if flying manually, begin the right hand turn to intercept the approach on the 121 radial (bearing 300 degrees).

A Note About /-+

The more observant will note that the distances in the example above do not utilise the /+ key before the distance (YMHB340/+10).  When entering the distance it can be with or without the + key.  

Variation

Before going further, there are many ways to fly the B737.  The method selected is at the discretion of the pilot in command and is dependent upon airline preferences, environmental conditions, and pilot experience.  This statement was stressed to me when I spoke with the Captain of the aircraft.

Often an approach will incorporate a number of automated systems including VNAV, LNAV, Vertical Speed, Level Change, VOR Localizer and old fashioned manual VFR flying.  In most cases the particular approach will be programmed into the CDU, at the very least for situational awareness.  However, the CDU does not have to be used and often a step down approach is a good way to maintain flying skills and airmanship.

Handy Hints

The following hints will assist with situational awareness and in allowing the aircraft to be guided by the autopilot to a point to which manual flight can commence.

If you carefully study the approach chart for YMHB VOR 30, you will note that the altitude the aircraft should be at when at 7 miles from the threshold should be 2000 feet.  The chart also depicts the letter D at this point meaning that a continuous descent can be made this point.

Hint One - visual descent point (VDP)

To make the transition from the arc to the approach easier, create a waypoint at the 7 mile point from the airport along the radial used for the approach (YMHB121/7).  Using a waypoint allows the aircraft’s Lateral Navigation (LNAV) to be used.  This type of waypoint is usually referred to as a Visual Descent Point (VDP).

When the waypoint at 7 miles from the threshold is reached, a transition to manual flying can commence, or Vertical Speed can be used to maintain a 3 degree glidepath (GP) while following the VOR.  Remember to change the EFIS from MAP to VOR so you can use the VOR indicator during the approach.

Hint Two - extend runway line

Assuming you have not inserted an approach into the CDU, an aid to increase situational awareness is to select the correct runway from the CDU and enter a distance that the runway line is to be extended from the threshold.

To do this, select runway 30 from the ARRIVALS (ARR) page in the CDU (RWY30) and type the numeral 7 (or whatever distance you require) into the scratchpad and upload.  This will extend the green line from the runway threshold to the previously generated waypoint at 7 miles.  Ensure you clean up any discontinuity (if observed) in the LEGS page.

This enables three things:

  1. The generation of a 3 degree glidepath (GP) from the distance entered (example is 7 miles) to the runway threshold.

  2. It enables LNAV (even if the autopilot is not engaged) to continue to provide the Flight Director (FD) with heading information during the approach, and 

  3. It enables the Navigation Performance Scales (NPL) on the Pilots Flight Display (PFD) to provide glidepath (GP) guidance (assuming that the correct runway or approach is selected in the CDU and NPL is enabled within the ProSim737 avionics suite).

UPPER LEFT: Screen capture from the instructor station PFD and ND for the approach into YMHB.  The aircraft, after turning right from the 10 mile arc, is aligned with the 121 radial approaching the waypoint YMH07 (the WP entered at the 7 mile point).  LNAV is engaged and the aircraft is being controlled by the autopilot.  As RWY 30 was inserted into the route, the Navigation Performance Scales (NPS) show Glidepath (GP) data in the Primary Flight Display (PFD).  Note that the EFIS is still on MAP and is yet to be turned to VOR.  In real life, VOR would have been selected earlier (click to enlarge).

LOWER LEFT:  The transition from LNAV to VOR has occurred and the autopilot and autothrottle are not controlling the aircraft. The aircraft is on short final with gear down, flaps 30 and the airspeed is slowly decaying to VREF+5. 

The EFIS has been changed from MAP to VOR to allow manual tracking using the VOR needle. The NPS show good vertical alignment with a lateral left offset; the VOR indicator confirms this.  The Flight Mode Annunciator (FMA) displays LNAV (although the autopilot is disengaged) and the Flight Director (FD) and NPS show glidepath (GP) data.  The Flight Path Vector (FPV) symbol shows a continuous descent at roughly 3 degrees.  The altitude window and heading on the MCP has been set to the appropriate missed approach (4200/300).  Click image to enlarge.

Do Not Alter Constraints

As alluded earlier, there are many ways to accomplish the same task.  However, DO NOT alter any constraints indicated in the CDU if an approach is selected and executed.  CDU generated approaches have been standardised for a reason.

Finding the Correct Radial/Bearing to Build Your Arc

Finding the correct bearing to use on the arc can be challenging for those less mathematically inclined.  An easy method is to use one of the two MCP course selector knobs.  

Rotate the knob until the green dotted line on he Navigation Display (ND) lies over the area of the arc that you wish the waypoint to be created.  Consult the MCP course selector window - this is the figure you place in the CDU.  Next, rotate the knob a set number of degrees and repeat the process.  You can also consult the data displayed along the course indicator line on the Navigation Display (ND). 

When you build the arc, ensure you have set the EFIS to PLN (plan).  PLN provides more real estate to visualize the approach on the Navigation Display (ND).  You can use STEP in the LEGS page to cycle through the waypoints to ensure you have an appropriate view of the surrounding area.

Important Points

  • Always double check the Place/Bearing/Waypoint entries in the CDU and in the ND (PLN) before executing.  It is amazing how easy discrepancies can occur.

  • Always check the approach plate for the approach type you are intending to make.  Once again, mistakes are easy to make.

  • If using VNAV, double check all speed and altitude constraints to ensure compliance with the approach chart and situation (some airlines promote the use of the speed intervention button (SPD INTV) to ensure that appropriate speeds are maintained).

  • If need be, select the approach (ARR) in the CDU to provide added situational awareness.

Images

The following are screen captures from the instructor station CDU and Navigation Display (ND).  Ignore altitude and speed constraints as these were not set-up for the example. Click each images to enlarge.

LEFT: Circular FIX ring has been generated around YMHB at 10 mile point.  The arc waypoints will be constructed along this line.

LEFT:  Various waypoints have been generated along the 10 mile fix line creating an arc.  The arc ends at the intersection with the 212 radial for the VOR 30 approach into YMHB.  The route is in plan (PLN) view and is yet to be executed.

LEFT:  The constructed arc as seen in MAP view.  From this view it is easy to establish that the aircraft is approaching TTR and once reaching the 10 mile limit  defined by the 10 mile FIX (green-coloured dotted circle), the aircraft will turn to the left to follow the arc waypoints until it intersects with the 121 radial.

LEFT:  This image depicts the waypoint generated at 7 mile from the threshold (YMHB121/7).  This waypoint marks the point at which the aircraft should be on the 121 radial to VOR 30 and at 2400 feet altitude (according to the VOR 30 approach plate.

LEFT:  RWY 30 has been selected from the arrivals (ARR) page.  This displays the guidepath (GP) assistance. it also generates a runway line extending from the threshold to 7 miles out; the same distance out from the threshold that the final waypoint was generated.

The course line is coloured pink indicating that LNAV is enabled and the aircraft is following the programmed route. 

At the final waypoint (YM10) the autopilot (if used) will be disengaged and the aircraft will be flown manually to the runways using the VOR approach instrumentation and visual flight rules (VFR).  The EFIS will be changed from MAP to VOR.  LNAV will remain engaged on the MCP to ensure that the NPL indications are shown on the PFD.  The NDL indicators provide glidepath (GP) guidance that is otherwise lacking on a VOR approach.

Final Call

I rarely use automated systems during landing, unless environmental conditions otherwise dictate.  I prefer to hand fly the aircraft where possible during the approach phase, and often disengage the autopilot at 5000 feet.  If flying a STAR and when VNAV/LNAV is used, I always disengage the autopilot no later than 1500 feet.  This enables a safe envelope in which to transition from automated flight to manual flight.

Using an arc to fly a VOR approach is enjoyable, with the added advantage that it provides a good refresher for using the Place/Bearing/Waypoint functionality of the CDU.

Additional articles that address similar subjects are:

Glossary

  • CDU – Control Display Unit (aka Flight Management Computer (FMC).

  • EFIS – Electronic Flight Instrument System.

  • LNAV – Lateral navigation.

  • RADIAL/BEARING – A radial radiates FROM a point such as a VOR, whilst a bearing is the bearing in degrees TO a point.  The bearing is the direction that the nose of the aircraft is pointing.

  • VNAV – Vertical Navigation.

Autobrake System - Review and Procedures

air berlin 737-700 -  autobrake set, flaps 30, spoilers deployed, reverse thrust engaged (Marcela, GFDL 1.2 www.gnu.org/licenses/old-licenses/fdl-1.2.html, via Wikimedia Commons)

The autobrake, the components which are located on center panel of the Main Instrument Panel (MIP), is designed as a deceleration aid to slow an aircraft on landing.  The system uses pressure, generated from the hydraulic system B, to provide deceleration for pre-selected deceleration rates and for rejected takeoff (RTO). An earlier post discussed Rejected Takeoff procedures.  This article will discuss the autobrake system.

General

The autobrake selector knob (rotary switch) has four settings: RTO (rejected takeoff), 1, 2, 3 and MAX (maximum).  Settings 1, 2 and 3 and RTO can be armed by turning the selector; but, MAX can only be set by simultaneously pulling the selector knob outwards and turning to the right; this is a safety feature to eliminate the chance that the selector is set to MAX accidentally.  

When the selector knob is turned, the system will do an automatic self-test.  If the test is not successful and a problem is encountered, the auto brake disarm light will illuminate amber.

The autobrake can be disengaged by turning it to OFF, by activating the toe brakes, or by advancing the throttles; which deactivation method used depends upon the circumstances and pilot discretion.  Furthermore, the deceleration level can be changed prior to, or after touchdown by moving the autobrake selector knob to any setting other than OFF.  During the landing, the pressure applied to the brakes will alter depending upon other controls employed to assist in deceleration, such as thrust reversers and spoilers.

The numerals 1, 2, 3 and MAX provide an indication to the severity of braking that will be applied when the aircraft lands (assuming the autobrake is set).

In general, setting 1 and 2 are the norm with 3 being used for wet runways or very short runways.  MAX is very rarely used and when activated the braking potential is similar to that of a rejected take off; passenger comfort is jeopardized and it is common for passenger items sitting on the cabin floor to move forward during a MAX braking operation.  If a runway is very long and environmental conditions good, then a pilot may decide to not use autobrakes favouring manual braking.

Often, but not always, the airline will have a policy to what level of braking can or cannot be used; this is to either minimize aircraft wear and tear and/or to facilitate passenger comfort. 

The pressure in PSI applied to the autobrake and the applicable deceleration is as follows:

  • Autobrake setting 1 - 1250 PSI equates to 4 ft per second squared.

  • Autobrake setting 2 - 1500 PSI equates to 5 ft per second squared.

  • Autobrake setting 3 - 2000 PSI equates to 7.2 ft per second squared.

  • Autobrake setting MAX and RTO - 3000 PSI equates to 14 ft per second (above 80 knots) and 12 ft per second squared (below 80 knots).

Conditions

To autobrake will engage upon landing, when the following conditions are met:

  • The appropriate setting on the auto brake selector knob (1, 2, 3 or MAX) is set;

  • The throttle thrust levers are in the idle position immediately prior to touchdown; and,  

  • The main wheels spin-up.

If the autobrake has not been selected before landing, it can still be engaged after touchdown, providing the aircraft has not decelerated below 60 knots. Setting the autobrake usually forms part of the approach cehcklist.

To disengage the autobrake system, any one of the following conditions must be met:

  1. The autobrake selector knob is turned to OFF (autobrake disarm annunciator will not illuminate);

  2. The speed brake lever is moved to the down detent position;

  3. The thrust levers are advanced from idle to forward thrust (except during the first 3 seconds of landing); or,

  4. Either pilot applies manual braking.

The last three points (2, 3 and 4) will cause the autobrake disarm annunciator to illuminate for 2 seconds before extinguishing.

Important Facet

It is important to grasp that the 737 NG does not use the maximum braking power for a particular setting (maximum pressure), but rather the maximum programmed deceleration rate (predetermined deceleration rate).  Maximum pressure can only be achieved by fully depressing the brake pedals or during an RTO operation.  Therefore, each setting (other than full manual braking and RTO) will produce a predetermined deceleration rate, independent of aircraft weight, runway length, type, slope and environmental conditions.

Autobrake Disarm Annunciator

The autobrake disarm annunciator is coloured amber and illuminates momentarily when the following conditions are met:

  • Self-test when RTO is selected on the ground;

  • A malfunction of the system (annunciator remains illuminated - takeoff prohibited);

  • Disarming the system by manual braking;

  • Disarming the system by moving the speed brake lever from the UP position to the DOWN detente position; and,

  • If a landing is made with the selector knob set to RTO (not cycled through off after takeoff).  (If this occurs, the autobrakes are not armed and will not engage.  The autobrake annunciator remains illuminated amber).

The annunciator will extinguish in the following conditions:

  • Autobrake logic is satisfied and autobrakes are in armed mode; and,

  • Thrust levers are advanced after the aircraft has landed, or during an RTO operation.  (There is a 3 second delay before the annunciator extinguishes after the aircraft has landed).

Preferences for Use of Autobrakes and Anti-skid

When conditions are less than ideal (shorter and wet runways, crosswinds), many flight crews prefer to use the autobrake rather than use manual braking, and devote their attention to the use of rudder for directional control.   As one B737 pilot stated - ‘The machine does the braking and I maintain directional control’.

Anti-skid automatically activates during all autobraking operations and is designed to give maximum efficiency to the brakes, preventing brakes from stopping the rotation of the wheel, thereby ensuring maximum braking efficiency.  Anti-skid operates in a similar fashion to the braking on a modern automobile.

Anti-skid is not simulated in FSX/FS10 or in ProSim737 (at the time of writing).

To read about converting an OEM Autobrake.

Rejected Takeoff (RTO) - Review and Procedures

The Rejected Takeoff is part of the Auto Brake Selector Panel located on the Main Instrument Panel (MIP).  RTO can be selected by turning the selector knob to the left from OFF by one click. The knob is from a classic 737-500 knob

A takeoff may be rejected for a variety of reasons, including engine failure, activation of the takeoff warning horn, ATC direction, blown tyres, or system warnings.  For whatever reason, Boeing estimates that 1 takeoff in every 2000 will be rejected (Boeing Corporation).

This is an OEM (Original Equipment Manufacture) autobrake assembly that has been converted for use in the simulator.  Note that the selector knob is not NG compliant but is from a 500 series airframe.  In time this knob will be replaced.  (click image to enlarge)

Performed incorrectly, an RTO can be a dangerous procedure; therefore, protocols have been are established that need to be followed.  

This is the first of two consecutive posts that will discuss components of the autobrake system.  In this post RTO procedures will be explained.  In the second post the auto brake will be examined.

Rejected Takeoff (RTO)

The Auto Brake and Rejected Takeoff (RTO) are part of Auto Brake System, the components which are located on center panel of the Main Instrument Panel (MIP).  An RTO is when the pilot in command makes the decision to reject the takeoff of the aircraft.  

The Boeing Flight Crew Training Manual (FCTM) states:

  • A flight crew should be able to accelerate the aircraft, have an engine failure, abort the takeoff, and stop the aircraft on the remaining runway'; or,

  • 'accelerate the aircraft, have an engine failure, and be able to continue the takeoff utilizing one engine’.  

Two important variables of pre-flight planning need to be established for an RTO to be executed safely - V speeds and runway length.

V Speeds and Runway Length

There are three V speeds that are critical to a safe takeoff and climb out: V1, Vr and V2.  

V1 is the speed used to make the decision to ‘abort or fly’.  Vr is the rotation speed, or the speed used to begin the rotation of the aircraft by smoothly pitching the aircraft to takeoff attitude.  V2 is the speed used for the initial climb-out, and is commonly called the takeoff safety speed.  The takeoff safety speed ensures a safe envelope for single engine operations.

It stands to reason, that the runway must be long enough to cater towards the V speeds calculated from the weight of the aircraft and outside temperature.

Rejected Takeoff - Conditions and Procedure

In general, the protocol used to execute an RTO, is to:

  • Abort the takeoff for ‘cautions’ below 80 knots; and,

  • Between 80 knots and V1 speed, abort only for ‘bells’ (fire warning) and flight control problems.

If a problem occurs below V1 speed, the aircraft should be able to be stopped before reaching the end of the runway.  After exceeding V1 speed, the aircraft cannot be safely stopped and the only option is to takeoff, and after reaching a safe minimum altitude and speed, troubleshoot the problem.

Before takeoff, a flight crew will position the auto brake selector knob to RTO.  This action will trigger the illumination of the auto brake disarm annunciator, which will illuminate amber for 2 seconds; this is a self-test to indicate that the system is working.  After 2 seconds the annunciator will extinguish.

To arm the RTO prior to takeoff, the following conditions must be met:

  • The auto brake and anti-skid systems must be operational;

  • The aircraft must be on the ground;

  • The auto brake selector must be set to RTO;

  • The forward thrust levers must be in the idle position; and

  • The wheel speed must be less than 60 knots.

Once armed, the RTO system only becomes operative after the aircraft reaches 80 knots ground speed (some manuals state 90 knots).  If an ‘abort’ is indicated below 80 knots, the aircraft will need to be stopped using manual braking power.  

The auto brake will remain in the armed mode if the RTO abort was executed prior to 80 knots (the auto brake disarm annunciator does not illuminate).

To engage the RTO the following conditions must be met:

  • The auto brake must be set to RTO;

  • The thrust levers must be retarded to idle position;

  • The aircraft must have reached 80 knots; and,

  • The autothrottle must be disconnected.

When an RTO is executed and the auto brake system engages, the system will apply 3000 PSI to the brakes to enable the aircraft to stop.  Additionally, if the aircraft has reached a wheel speed in excess of 60 knots, and one or two of the reverse thrust levers are engaged, the spoiler panels will extend automatically to the UP position (deploy), and the speed brake lever on the throttle quadrant will move to the UP position.

The auto brake will disengage, if during the RTO either pilot:

  • Activates the toe brakes;

  • Turns the selector knob of the auto brake from RTO to off.   

If the reversers have been engaged and the speed brake lever is in the UP position, then the lever will abruptly move to the DOWN detente position.  When this occurs, the speed brake annunciator will illuminate amber for 2 seconds before extinguishing.  Braking will then need to be accomplished manually.

RTO Procedure

  1. Pilot flying calls ‘STOP’, ‘ABANDON’ or ‘ABORT’

  2. Pilot flying closes thrust levers and disengages autothrottle.

  3. Pilot flying verifies automatic RTO braking is occurring, or initiates manual braking if deceleration is not great enough, or autobrake disarm light is illuminated.

  4. Pilot flying raises speedbrake lever.

  5. Pilot flying applies maximum reverse thrust or thrust consistent with runway and environmental conditions.

  6. Once stopped, pilot flying engages parking brake and completes RTO checklist.

Important Point:

  • Point 4 is important as although the spoilers deploy automatically when the reverse thrust is engaged, the speedbrake lever must be extended manually by the pilot flying (prior to application of reverse thrust).  This is to minimise any delay in spoiler extension, as extension is necessary for efficient wheel braking.

What Circumstances Trigger An RTO

Prior to 80 knots, the takeoff should be rejected for any of the following:

  • Activation of the master caution system;

  • Unusual noise and vibration;

  • Slow acceleration;

  • Takeoff configuration warning;

  • Tyre failure;

  • Fire warning;

  • Engine failure;

  • Bird strikes;

  • Windshear warning;

  • Window failure; and/or,

  • If the aircraft is unsafe or unable to fly.

After 80 knots and prior to V1, the takeoff should be rejected for any of the following:

  • Fire warning;

  • Engine failure;

  • Windshear warning; and/or,

  • If the aircraft is unsafe or unable to fly.

After V1 has been reached, takeoff is mandatory.

Important Points:

Important points to remember when performing a Rejected Takeoff are:

  1. Engage the RTO selector knob before takeoff;

  2. Retard throttles to idle;

  3. Disengage the autothrottle (A/T);

  4. Engage one or both reverse thrust levers;

  5. Monitor RTO system performance, being prepared to apply manual braking if the auto brake disarm light annunciates;

  6. Manually raise speed brake lever if not already in the UP position BEFORE engaging reverse thrust; and,

  7. Remember that RTO functionality engages only after the aircraft has reached 80 knots ground speed, and remains armed if the RTO has been executed below 80 knots.

Procedural Variations

A successful RTO is dependent upon the pilot flying making timely decisions and using proper procedures.  Whether an RTO is executed fully or partly is at the discretion of the pilot flying (reverse thrust engaged to deploy spoilers).

It should be noted that If the takeoff is rejected before the THR HLD annunciation, the autothrottles should be disengaged as the thrust levers are moved to idle. If the autothrottle is not disengaged, the thrust levers will advance to the selected takeoff thrust position when released. After THR HLD is annunciated, the thrust levers, when retarded, remain in idle.

For procedural consistency, disengage the autothrottles for all rejected takeoffs.

Figure 1 provides a visual reference indicating the distance taken for an aircraft to stop after various variations of the Rejected Takeoff are executed (copyright, Boeing Flight Crew Training Manual FCTM).

figure 1: distance taken for an aircraft to stop after various variations of the Rejected Takeoff are executed (copyright, Boeing Flight Crew Training Manual FCTM)

This post has explained the basics of a Rejected Takeoff.  Further information can be found in the Flight Crew Training Manual (FCTM) or Quick Reference Handbook (QRH).

In the next post the autobrake system will be discussed.

Direct-To-Routing, ABEAM PTS and INTC CRS - Review and Procedures

In an earlier post, a number of methods were discussed in which to create waypoints ‘on the fly’ using the Control Display Unit (CDU).  Following on a similar theme, this post will demonstrate use of the Direct-To Routing, ABEAM PTS and Course Intercept (INTC CRS) functionality.

CDU use an appear very convoluted to new users, and by far the easiest way to understand the various functionalities is by ‘trial and error and experimentation’. 

The software (Sim Avionics and ProSim737) that generates the math and formulas behind the CDU is very robust and entering incorrect data will not damage the CDU hardware or corrupt the software.  The worst that can happen is having to restart the CDU software. 

Line Style and Colour

The style and colour of the line displayed on the Navigation Display (ND) is important as it provides a visual reference to the status of a route or alteration of a route.

Dashed white-coloured lines are projected courses whilst solid magenta-coloured lines are saved and executed routes.  Similar colour schemes apply to the waypoints in the LEGS page.  A magenta-coloured identifier indicates that this is the next waypoint that the aircraft will be flying to (it is the active waypoint).

Direct-To Routing

A Direct-To Routing is easily accomplished, by selection of a waypoint from the route in the LEGS page, or by typing into the scratchpad (SP) a NAVAID identifier and up-selecting this to LSK 1L.  Once up-selected, the Direct-To route will be represented on the Navigation Display (ND) by a dashed white-coloured line.  Pressing the EXEC button on the CDU will accept the route modification and precipitate several changes:

  • The route line displayed on the ND, previously a white-coloured dashed line will become solid magenta in colour;

  • The previous displayed route will disappear from the ND;

  • All waypoints on the LEGS page between the aircraft's current position and the Direct-To waypoint in LSK 1L will be deleted; and,

  • The Direct-To waypoint in LSK 1L will alter from white to magenta.

Once executed the FMS will direct the aircraft to fly directly towards the Direct-To waypoint.

ABEAM PTS

Following on from the Direct-To function is the ABEAM PTS function located at LSK 5R. 

ABEAM points (ABEAM PTS) are one or more fixes that are generated between two waypoints from within a programmed route.  The ABEAM PTS functionality is found in the LEGS page of the CDU at LSL 5R and is only visible when a Direct-To Routing is being modified, within a programmed route (the LEGS page defaults to MOD RTE LEGS).  Furthermore, the ABEAM PTS dialogue will only be displayed if the the up-selected fix/waypoint is forward of the aircraft's position; it will not be displayed if the points are located behind the the aircraft.

If the ABEAM PTS key is depressed, a number of additional in-between fixes will be automatically generated by the Flight Management System (FMS), and strategically positioned between the aircraft’s current position and the waypoint up-selected to LSK 1L.  The generated fixes and a white-coloured dashed line showing the modified course will be displayed on the Navigation Display (ND).  

To execute the route modification, the illuminated EXEC button is pressed.  Following execution, the white-coloured line on the ND will change to a solid magenta-coloured line, and the original displayed route will be deleted.  Furthermore, the LEGS page will be updated to reflect the new route.

Nomenclature of Generated Fixes

The naming sequence for the generated fixes is the first three letters of the original waypoint name followed by two numbers (for example, TTR will become TTR 01 and CLARK will become CLA01).  If the fixes are regenerated, for instance if a mistake was made, the sequence number will change indicating the next number (for example, TTR01, TTR02, etc).  

Technique

  1. Up-select a waypoint from the route in the LEGS page to LSK 1L, or type into the scratchpad a NAVAID identifier.  This is a Direct-To Routing; when executed the waypoints between the up-selected waypoint and LSL 1L are deleted.

  2. Press ABEAM PTS in LSK 5R to generate a series of fixes along a defined course from the aircraft’s current location to the up-selected waypoint.  The fixes can be seen on the ND.

  3. Pressing the EXEC button will accept and execute the ABEAM PTS route.

Example and Figures

The below figures are screen captures using ProSim737 avionics suite.  The programming of the CDU has been done with the aircraft on the ground.  Click any image to enlarge.

FIGURE 1:  The LEGS page shows a route HB-TTR-CLARK-BABEL-DPO-WON.  The route is defined by a solid magenta-coloured line

FIGURE 2:  The Route is altered to fly from HB to BABEL.  Note that in the LEGS page, the title has changed from ACT to MOD RTE 1 LEGS.  The ND displays the generated ABEAM PTS and projected course (white-coloured dashed line), beginning from the aircraft’s current position and traveling through HB01, TTR01, CLA01 to BABEL.   The EXEC light is also illuminated

FIGURE 3:  When the EXEC light is pressed, the ABEAM PTS and altered route (Figure 2) will be accepted.  The former route will be deleted and the white-coloured dashed line will be replaced by a solid magenta-coloured line.  The magenta colour indicates that the route has been executed.  The LEGS page will also be updated and display the new route, with the waypoint HB01 highlighted in magenta

The Intercept Course (INTC CRS)

To understand the INTC CRS, it is important to have a grasp to what a radial and bearing is and how they differ from each other.  For all practical purposes, all you need to know is that a bearing is TO and a radial is FROM.  For example, if the bearing TO the beacon is 090, you are on the 270 radial FROM it. 

The Intercept Course (INTC CRS) function is located beneath the ABEAM PTS option in the LEGS page of the CDU at LSK 6R.  Like the ABEAM PTS function, the INTC CRS function is only visible when a when a Direct-To Routing, is being modified within a programmed route (the LEGS page defaults to MOD RTE LEGS).

The function is used when there is a requirement to fly a specific course (radial) to the fix/waypoint.  By default, the INTC CRC displays the current course to the fix/waypoint.  Altering this figure, will instruct the FMS to calculate a new course, to intercept the desired radial towards the fix/waypoint (1)  The radial will be displayed on the ND as a white-coloured dashed line, while the course to intercept the radial (from the aircraft’s current position) will be displayed as a magenta-coloured dashed line.

Visual Cues

An important point to note is that,  if the course (CRS) is altered, is that the displayed (ND) white-coloured line will pass directly through the fix/waypoint, but the line-style will be displayed differently dependent upon what side of the fix/waypoint the radial is, in relation to the position of the aircraft.  The line depicted by sequential long and short dashes (dash-dot-dash) shows the radial TOWARDS the fix/waypoint while the line showing dots, displays the radial AWAY from the fix/waypoint. 

It is important to understand, that for the purposes of the FMS, it will always intercept a course TO a fix/waypoint; therefore, the disparity in how the line-style is represented provides a visual cue to ensure a flight crew does not enter an incorrect CRS direction.

Intercept Heading

However, the flight crew may wish not fly directly to the fix/waypoint, but fly a heading to intercept the radial.  In this case, the flight crew should select the particular heading they wish to fly in the MCP heading selector window, and providing LNAV is armed, the aircraft will fly this heading until reaching the intercept course (radial), at which time the LNAV will engage and the FMS will direct the aircraft to track the inbound intercept course (radial) to the desired fix/waypoint.

Technique

  1. Up-select a waypoint from the route in the LEGS page to LSK 1L, or type into the scratchpad a NAVAID identifier and up-select.  This is a Direct-To Routing and will delete all waypoints that the aircraft would have flown to prior to the up-selected identifier.

  2. Type the course required into INTC CRS at LSK 6R.

  3. This will display on the ND a white-coloured long dashed line (course/radial).  Check the line-style and ensure that the course is TOWARDS the waypoint.  The line, closest to the aircraft should display sequential long and short dashes.

  4. Prior to pressing the EXEC button to confirm the route change, check that the intended course line crosses the current course line of the active route (solid magenta-coloured line).

  5. If wishing to fly a heading to intercept the radial, use the MCP heading window.  If LNAV is armed the FMS will direct the aircraft onto the radial.

Example and Figures

The below figures are screen captures using ProSim737 avionics suite.  The programming of the CDU has been done with the aircraft on the ground.  Click any image to enlarge.

FIGURE 1:  The LEGS page shows a route HB-TTR-CLARK-BABEL-DPO-WYY-WON.  The route is defined by a solid magenta-coloured line.   ATC request ‘QANTAS 29 fly 300 degrees until intercepting the 345 degree radial of BABEL; fly that radial to BABEL then remainder of route as filed

FIGURE 2:  From the LEGS page, locate in the route the waypoint BABEL (LSK 4L).  Recall that the INTC CRS will only function in Direct-To Routing mode. Up-select BABEL to LSK 1L.  Note that a dashed white-coloured line is displayed on the ND showing the new course from HB to BABEL.  The original course is still coloured magenta and the EXEC light is illuminated

FIGURE 3:  Type the radial required (345) into INTC CRS at LSK 6R.  This action will generate (fire across the page) a white-coloured dashed line displaying the 345 course to BABEL (the 165 radial).  Check the line-style and ensure the radial crosses the aircraft’ current course which is 300.  Recall that this line style indicates that the radial to TO BABEL

FIGURE 4:   Press EXEC to save and execute the new route.  The dashed line alters to a solid magenta-coloured line and joins with the remainder of the route at BABEL.  The magenta colour indicates this is now the assigned route.  Note that the magenta line continues across the ND away from the aircraft and BABEL.  This is another visual cue that the radial is traveling TO BABEL

If the aircraft continues to fly on a course of 300 Degrees, and LNAV is armed, the FMS will alter course at the intersection and track the 345 course to BABEL (165 radial).  The LEGS page is also updated to reflect that BABEL is the next waypoint to be flown to (BABEL is coloured magenta

Final Call

Direct-To Routings and ABEAM Points are usually used when a flight crew is required to deviate, modify or shorten a route.  Although the use of ABEAM PTS can be debated for short distances, the technology shines when longer routes are selected and several fixes are generated. The Intercept Course function, on the other hand, is used whenever published route procedures (STAR and SID transitions), or ATC require a specific course (radial) or heading to be followed to or from a navigation fix.

Caveat

The content of this post has been checked to ensure accuracy; however, as with anything that is convoluted minor mistakes can creep in (Murphy, aka Murphy's Law, reads this website).  If you note a mistake, please contact me so it can be rectified.

Acronyms and Glossary

  • ATC – Air Traffic Control

  • CDU – Control Display Unit

  • Direct-To Routing – Flying directly to a fix/waypoint that is up-selected to LSK 1L in the CDU.  All waypoints prior to the u-selected waypoint will be deleted

  • DISCO – refers to a discontinuity between two waypoints loaded in a route within the LEGS page of the CDU.  The DISCO needs to be closed before the route can be executed

  • DOWN-SELECT - Means to download from the CDU LEGS page to the scratchpad of the CDU)

  • FIX – A geographical position determined by visual reference to the surface, by reference to one or more NAVAIDs

  • FMC – Flight Management Computer

  • FMS – Flight Management System

  • Identifiers – Identifiers are in the navigation database and are VORs, NDB,s and published waypoints and fixes

  • LSK 5L – Line Select: LSK refers to line select.  The number 5 refers to the sequence number between 1 and 6.  L is left and R is right (as you look down on the CDU in plan view)

  • MCP – Mode Control Panel

  • NAVAIDS – Any marker that aids in navigation (VOR, NDB, Waypoint, Fix, etc.).  A NAVAID database consists of identifiers which refer to points published on routes, etc

  • ND – Navigation Display

  • RADIALS – A line that transects through a NAVAID representing the points of a compass.  For example, the 045 radial is always to the right of your location in a north easterly direction (Bearings and Radials Paper)

  • ROUTE – A route comprising a number of navigation identifiers (fixes/waypoints) that has been entered into the CDU and can be viewed in the LEGS page

  • SP - Scratchpad

  • UP-SELECT – Means to upload from the scratchpad of the CDU to the appropriate Line Select (LSK)

  • WAYPOINT – A predetermined geographical position used for route/instrument approach definition, progress reports, published routes, etc.  The position is defined relative to a station or in terms of latitude and longitude coordinates.

1:  The FMS will calculate the new course based on great circle course between the aircraft’s current location and the closest point of intercept to the desired course.  This course is displayed on the ND as a white dashed line.

Integrated Approach Navigation (IAN) - Review and Procedures

Japanese airlines nearly always gravitate to new technology.  ANA landing RJAA (Narita, Japan). Maarten Visser from Capelle aan den IJssel, Nederland, JA02AN B737 ANA gold cs landing (7211516992), CC BY-SA 2.0

Increased navigational accuracy obtained from software and hardware improvements have led to several enhanced approach types being developed for the Boeing 737.  These augmented approach types provide a constant rate of descent, follow an approximate 3 degree glide path, and eliminate the traditional step-down style of approach.   

This improves landing capability in adverse weather conditions, in areas of difficult terrain, and on existing difficult to fly approach paths.  Not to mention, the benefits that a stabilized and safer approach bring: greater passenger comfort, less engine wear and tear, and lower fuel usage while bringing less workload for the flight crew. 

In this article, I will discuss the concept of Integrated Approach Navigation (IAN) and explain the procedures recommended by Boeing to successfully implement IAN. 

The Boeing Flight Crew Training Manual (FCTM) has an excellent section addressing IAN, and I recommend you read it to gain a greater understanding of how the IAN system functions.

The Navigation Performance Scales (NPS), which augment IAN, will not be discussed.  NPS will form part of a future article.  Information in this article relates to FMC software U10.8A.

Overview

Integrated Approach Navigation (IAN) derives information from an approach type selected from the Flight Management Computer (FMC) database to generate a 3 degree glide path from the Final Approach Fix to the threshold of the runway.  In so doing, it displays visual cues similar to the Instrument Landing System (ILS).  Flight path guidance is derived from the FMC, navigational radios, or combination of both. 

To use IAN, an approach with a glide path must be selected from the FMC database.  The approach must include a series of waypoints that depict a vertical profile that includes a glide path.  

An IAN approach may be flown with a single autopilot, raw data, or by following the visual cues displayed on the Flight Director (FD).

IAN is an airline option, and although not every airline carrier will have IAN as part of their avionics suite, the technology is becoming more popular as the safety and economic benefits of IAN are understood by airline carriers.

Geometric Path (Glide Path)

An IAN Approach approximates a 3 degree glide path (descent profile) from the Final Approach Fix (FAF) to approximately 50 feet above the runway threshold.  Although, the glide path may not comply with altitude constraints in the FMC prior to the FAF, the generated glide path will always be at or above the altitude constraints between the FAF and the Missed Approach Point (MAP) displayed in the FMC.

Critically, an IAN approach is a Category I Non Precision Approach (NPA) and is not to be confused with an ILS Precision Approach.  Therefore, NPA procedures must be adhered to when initiating an approach using IAN.  

Although the automation provided by IAN will guide an aircraft (in most cases) to the threshold of the runway, IAN has not been designed to do this.  Rather, IAN has been designed to guide the aircraft to the MAP published on the approach chart.  The flight crew will then disengage IAN by disengaging the autopilot and autothrottle and fly the remainder of the approach manually as per NPA protocols.

In some instances, the final approach course (FAC) is offset from the runway center line and manoeuvring the aircraft for direct alignment will be necessary, whilst following the glide path angle.

Although the final approach is very similar to an ILS approach, IAN does not support autoland; if the aircraft is not in a stable configuration and you are not visual with the runway at or beyond the MDA, a missed approach procedure (Go-Around) should be executed.

Consistency in Procedures (eighteen approach types to one)

The introduction of IAN has condensed the number of approach types (and differing procedures) to one consistent procedure; minimising the amount of time an airline needs to train pilots in numerous approach types.  Time is money and utilising advanced technology such as IAN can increase airline productivity and safety.

Approach Types

IAN can be used for the following approach types:

  • RNAV

  • RNAV (RNP) – (provided there are no radius to fix legs)

  • NDB and VOR

  • GPS & GNSS

  • LOC, LOC-BC, TACAN, LDA SDF (or similar style approaches)

Note that if using IAN to execute a Back Course Localiser approach (B/C LOC), the inbound front course must be set in the MCP course window.

During the approach you must monitor raw data and cross check against other navigational cues.  Furthermore, although the use of IAN is recommended only for straight-in approaches, line use suggests that flight crews routinely engage IAN up to, but not exceeding 45 degrees from the runway approach course.

IAN is compatible with several approach types, however, being compatible does not necessarily mean that every approach type in the FMC is suitable. 

Since IAN was introduced, additional approaches have been developed and added to the RNAV family; in particular, RNAV (RNP) approaches, that use ‘radius to fix’ (RF) to generate a curved path that terminates at a location where an approach procedure begins.   These approaches have been designed to optimise airspace and usually have tight separation requirements; to fly these approaches an aircraft is required to have additional on-board navigation performance monitoring and alerting equipment. 

These approach charts are identified by the title RNAV (RNP) RWY XX and the letters AR (Authorisation Required) in the description of the chart. 

These approaches and are not suitable to use with IAN; they should be flown with LNAV/VNAV.

Recommended Approach Types

The best approach to use with IAN are straight-in or near straight-in approaches.  VOR, LOC, NDB, RNAV and RNAV (GNSS) approaches work especially well as these approaches usually provide relatively long straight-in legs. 

IAN can be used on an RNP (AR) approaches as long as there are no RF turns involved (straight-in approach only).  If flying such an approach you should be aware that the legs can be quite short and IAN may arm and engage quite late in the approach profile.

Important Point:

  •    The use of IAN is not authorised for a RNAV (RNP-AR) approach.

Using IAN – General

IAN does not need to be specifically ‘turned on’ for it to function; the functionality, if installed in the aircraft, is always operational.  When the aircraft is within range of the designated approach, the runway data and/or Deviation Pointers will annunciate and be displayed on the PFD.  At any time after this point has been reached, IAN can be armed and or engaged by pressing the APP button on the MCP.

Navigation Radios and Radio Frequencies

For an IAN approach to function, an approach procedure with a glide path must be selected from the FMC database.  Although selection of navigation radios is not mandatory, selection is recommended, as correct tuning of the radios can provide increased visual awareness and redundancy, should a CDU failure occur, or there be a corruption of the data in the FMC. 

Boeing strongly advise to tune the radios to the correct localiser frequency for the approach.  This eliminates the possibility of the radio picking-up another approach from a nearby airport (and providing erroneous data to the crew).  The ILS frequency must never be used with an IAN approach (unless the glideslope is inoperative).  In the case of an inoperative glideslope, the G/S prompt in the CDU must be selected to OFF to ensure that the FMC generated glide path is flown. 

Minimum Descent Altitude (MDA)

As mentioned, an IAN approach is a NPA, and when authorised by the Regulatory Authority non-ILS approaches can be flown to a published VNAV Decision Altitude/Height (DA/H) or to a published MDA (the MDA is used as a decision altitude).  If not authorised to use the MDA as a decision altitude, crews must use the MDA specified for the approach flown.

To comply with the MDA protocols during a constant angle approach where a level off is not planned at the MDA, it is necessary to add +50 feet to the published MDA.  This enables an adequate buffer to prevent incursion below the MDA and adhere to the NPA protocols.

Important Points:

  • IAN uses the FMC database to generate a 3 degree glide path from the FAF to the runway threshold.  IAN does not require the navigation radios to be tuned.  However, it is recommended to tune the radios.

  • Some approaches in the FMC database have a number of glide paths displayed with differing altitudes.  When presented with this scenario, always select the first glide path and altitude.

IAN approach to RJAA ILS X or LOC X Rwy 16L.  The localiser has been captured and the FMA displays FAC in green, while G/P is armed (FMA G/P white).  The vertical Deviation Pointer is displayed as an outlined magenta-coloured diamond (anticipation pointer) while the localiser is displayed as solid magenta (because FAC has been captured).  The source of the runway data is from the FMC (ProSim737 avionics suite)

Using IAN - IAN Annunciations and Displays

IAN can display several visual cues to alert you to the status of the IAN system.  The cues are triggered at various flight phases and are displayed on the attitude display of the Primary Flight Display (PFD) and on the Flight Mode Annunciator (FMA).

Runway Data:   Runway data (runway identifier, approach front course, approach type and distance to threshold) is displayed in the top left area on the PFD when either the localiser or the selected FMC approach is in range of the runway. 

IAN approach to RJAA ILS X or LOC X Rwy 16L.  The localiser and glide path have been captured.  The FMA displays FAC and G/P in green and SINGLE CH is displayed.  The Deviation Pointers, previously in outline (Figure above), are now solid filled.  The aircraft will descent on the glide path to the threshold of the runway (ProSim737 avionics suite)

If the source of the runway data is the navigation radio, then this information will be displayed when the radio is in range of the localiser.  However, if the primary data source is from the FMC (radio not tuned) the runway data will be displayed only after IAN has engaged.   When IAN engages, the runway data will be sourced from the FMC.  This will be evident as the  approach type will be displayed on the PFD.

The approach type (LNAV, FMC, LOC, ILS etc) displayed will depend on what type of approach has been selected from the FMC database. 

Approach Guidance:  Approach guidance (Deviation Pointers) are displayed on the PFD whenever IAN is in range of the runway.  When the Deviation Pointers are displayed, IAN can be used.

Final Approach Course (FAC):  The letters FAC are displayed on the center FMA when IAN is armed.

It stands to reason, that FAC (lateral guidance) usually annunciates prior to G/P (vertical guidance), but depending on the position of the aircraft when APP in pressed, both annunciations may be displayed at the same time.

Glide Path (G/P):  The letters G/P are displayed on the right FMA when IAN is armed.

FMA FAC and G/P Colours:  Two FMA colours are used.  White indicates that the FAC or G/P is armed.  The colour of the FMA display will change from white to green when the aircraft captures either the localiser or glide path. 

Mode Control Panel (MCP):  Arming IAN (pressing the APP button on the MCP) will cause the letters APP on the MCP to be illuminated in green.  The APP light will extinguish when IAN captures the glide path.  

Lateral and Vertical Guidance Deviation Pointers:  Deviation Pointers display the lateral and vertical position of the aircraft relative to the final approach course of the selected runway.  The lateral pointer represents the localiser while the vertical pointer represents the glide path.  The pointers are displayed whenever IAN is in range of the runway. 

The pointers will initially be displayed as either magenta or white-coloured outlined diamonds.  When the aircraft captures either the localiser or glide path, (2 1/2 dots from center) the pointer (s) will change from an outline, to a solid-filed magenta-coloured diamond.

Whether the initial colour of the diamonds is magenta or white depends on which pitch/roll mode has been selected when the aircraft comes into range.

Although the correct name for the pointers is Deviation Pointers, they are often called anticipation pointers, anticipation cues or ghost pointers (ghost pointers being an 'Americanism').

During an IAN approach:

  1. The deviation alerting system will self-test when passing through 1500 feet radio altitude.  The self-test will generate a two-second FAC deviation alerting display on each PFD (the pointers will flash in amber); and,

  2. If the autopilot is engaged, and at low radio altitudes, the scale and Deviation Pointers will turn amber and begin to flash if the deviation from either the localiser or glide path is excessive.

SINGLE CH:  SINGLE CH will be displayed in green, when the aircraft captures the glide path (both the localiser and glide path). At this time, the Deviation Pointers will change from white-coloured outlines to solid magenta-coloured diamonds.  FAC and G/P on the FMA will also be in green.  Additionally, the illuminated APP button on the MCP will extinguish.  At this point, the aircraft will be guided automatically along the glide path.

Flight Mode Annunciations (FMA):  The FMA display will vary depending on the source of the navigation guidance used for the approach.

For localiser-based approaches (LOC, LDS, SDF and ILS (glideslope OUT), the FMA will display VOR/LOC and G/P.  For B/C LOC approaches, the FMA will display B/CRS and G/P.

If lateral course guidance is derived from the FMC (RNAV, GPS, VOR, NDB and TACAN approaches), the FMA will display FAC and G/P.

Ground Proximity Warning System (GWPS) Aural Warnings and Displays:  GWPS warnings will annunciate if at any time the aircraft deviates below the glide path, and failure to disengage IAN at the appropriate altitude will trigger a GPWS aural warning alert ‘autopilot autopilot’ at 100 feet radio altitude.  This is in addition, to the words ‘autopilot’ being displayed on the PFD.

Using IAN – At What Distance Does IAN Work

IAN is not designed to navigate to the airport and its functionality will only be available when the  aircraft is in range of the airport runway; for a straight-in approach, this is at approximately 20 nautical miles.  However, this distance can be considerably less if the aircraft is not on a straight-in course to the runway. 

Important Point:

  • To give you the longest time from which to transition to an IAN approach, try to choose a suitable approach type (from the FMC) that exhibits a ‘more or less’ straight-in approach.

Using IAN – When to Arm and Engage IAN

  1. IAN can be armed at anytime after the Deviation Pointers are displayed on the PFD.  

  2. To arm/select IAN, the flight crew press the APP button on the Mode Control Panel (MCP) similar to performing an ILS approach.

  3. IAN is armed only after clearance for final approach has been received from Air Traffic Control (ATC).  By this time, the aircraft is probably on a straight-in approach.

  4. IAN cannot be used for STARS and is not designed to be engaged when the aircraft is ‘miles’ from the designated runway.  Transition to an IAN approach can be from any of several pitch/roll modes.

  5. IAN (if armed) engages automatically when the either the localiser or glide path is captured.

IAN should only be armed or engaged when:

  1. The guidance to be used for the final approach is tuned and identified on the navigation radio;

  2. An approach has been selected from the FMC database that has a 3 degree glide path;

  3. The appropriate runway heading is set in the course window in the MCP;

  4. The aircraft is on an inbound intercept heading;

  5. ATC clearance for the approach has been received; and,

  6. The approach guidance information is displayed on the PFD along with the lateral and vertical Deviation Pointers.

Disengaging IAN

IAN is either armed, engaged or not engaged. 

If you want to disarm IAN from the arm mode, it is a matter of pressing the APP button on the MCP; the light on the APP button will extinguish and the Deviation Pointers on the PFD will not be visible.

If you want to disengage IAN after it has captured either the localiser or glide path (or both), pressing the APP button on the MCP will do nothing.  In this scenario, to disengage IAN you will need to conduct a Go-Around by selecting TOGA, or change the pitch/roll mode (i.e. Level Change).

Disconnecting the autopilot and flying manually will also disengage IAN; the upside being that the Deviation Pointers will remain displayed on the PFD, until a different pitch/roll mode is selected.

Important Points:

  • If the navigation radio is not tuned to the localiser, the runway data will not be displayed until IAN is engaged, however, the Deviation Pointers will be displayed.

  • IAN can be armed whenever the aircraft is in range of the runway - in other words whenever the Deviation Pointers are displayed on the PFD.

  • When IAN is armed, the FAC and G/P display on the FMA is coloured white.

  • When IAN is engaged (localiser or glide path) the FAC and G/P on the FMA is coloured green.

  • IAN will only engage after capture of either the lateral (FAC) or vertical glide path (G/P).

  • When IAN has captured the glide path, SINGLE CH will be displayed in green in the PFD.

Using IAN - Set-Up and Procedure

The following procedures used for an IAN approach are derived from ILS procedures and are consistent for all approach types. 

  • Select the appropriate approach to use from the FMC database.  Ensure that the selected approach has a glide path.  Do not alter any of the approach constraints. 

  • Set the altitude of the glide path (from the FMC) in the MCP altitude window.

  • Fly the aircraft in whatever pitch/roll mode to the Initial Approach Fix (IAF).  Remember straight-in approaches are best, although offsets between 25 and 45 degrees may be used but not recommended. 

  • Configure the navigation radios to the correct frequency based on the approach type you have selected from the FMC database.  Do not use an ILS frequency.

  • Set the barometric minimums to the altitude published on the approach chart.  Add 50 feet to avoid breaking NPA protocols.

  • Set the correct runway approach course in the MCP course window.

  • Do not select IAN (press the APP button) until the aircraft is in the correct position relative to the approach course. 

  • When approximately 2 miles from the FAF - GEAR DOWN, FLAPS 15, SPEED CHECK.

  • At glide path capture (FAF) – FLAPS 25/30 (landing flaps), SPEED CHECK.

  • At 300 Feet below glide path capture, reset the MCP altitude window to the missed approach altitude.  Failure to wait until the aircraft descends 300 feet will cause the ALT HOLD annunciation to display and the aircraft levelling off.

  • At minima – Disengage autopilot and autothrottle, manually align aircraft to the runway, and follow the Deviation Pointers and Flight Director (FD) cues to the runway threshold.   Maintain the glide path to the flare and do not descend below the displayed glide path. 

Although glide path guidance can be used as a reference once the aircraft descends below the MDA, the primary means of approach guidance is visual.  If not visual at the MDA, execute a Go-Around.  Remember, using IAN is a NPA.

Important Points:

  • When using IAN the aircraft should be configured approximately 2 nautical miles from the FAF (this is one of the fundamental differences between an IAN approach and an ILS approach).

  • Often, the runway may not be aligned with the FMC generated course.  The FCTM states; ‘If the final approach course is offset from the runway centreline, manoeuvring to align with the runway centreline is required.  When suitable visual reference is established, continue following the glide path angle while manoeuvring to align with the runway.

  • Flying an IAN approach is an NPA; it is important to fly visually after passing the MDA.

  • The approach mode (APP on center CTR knob) on the EFIS can be selected when using IAN.  This will display the IAN approach on the Navigation Display as if it is an ILS approach.

Transitioning to an IAN Approach

A flight crew will usually transition to an IAN approach 2 nautical miles prior to the Initial Approach Fix (IAF).  

At this distance from the runway there is not a lot of time to configure the aircraft for landing, and if IAN engages when the aircraft is either above or below the glide path, there is a possibility that the aircraft will abruptly and unexpectedly ascend or descend as the automation attempts to capture the glide path.   Therefore, you must be in diligent that the aircraft’s altitude roughly matches the position of the Deviation Pointers when close to the FAF.

Techniques to Transition Smoothly to an IAN Approach

There are several techniques that can be used to ensure a smooth transition to an IAN approach.

By far the easiest technique to ensure a seamless transition without any abrupt lateral or vertical deviation, is to position the aircraft ‘more or less’ within one dot deviation of the localiser or glide path (Deviation Pointers) prior to selecting IAN. 

In this way you can follow (‘fly’) the Deviation Pointers and engage IAN when the aircraft is more or less aligned with the position of the pointers (similar to how an ILS approach is carried out).

Another technique, is to fly the aircraft until ALT HOLD is displayed in the FMA (assuming that the altitude set in the altitude window in the MCP is approximately 2 nautical miles from the FAF).  Then select IAN.  This should enable the aircraft to smoothly capture the glide path when reaching the FAF.

Importantly, if transitioning to IAN from VNAV, it is prudent to engage SPD INTV to manually control MCP speed.


FIGURE 1:  Visual representation of an IAN approach and transition from roll mode. (Copyright Boeing FCTM).


Increased Spatial Awareness

Any approach can be busy and it is easy to forget something.  Therefore, it is wize to create a circle at 2 miles from the FAF that can be displayed on the Navigation Display (NP).

One way to accomplish this is by using the FIX page in the CDU. 

In the LEGS page copy to the scratchpad the FAF (click the line on which the FAF is located).   Open the FIX page and upload the FAF (from the scratchpad) to the FIX entry.  To create a dashed circle at 2 nautical miles from the FAF, enter /2 to Line Select Left 1.

Important Points:

  • Maintaining the correct approach speed and altitude is paramount to a successful IAN approach.  If the aircraft is travelling too fast, slowing down after IAN has engaged can be difficult.  Likewise, if the aircraft is too high and IAN engages, the vertical descent can be steep as the aircraft attempts to follow the FMC generated glide path.

  • You must be vigilant and anticipate actions and events before they occur.

Using IAN - Situations To Be Attentive Of

Automation can have its pitfalls and IAN is no different.  However, once potential shortcomings are known, it is straightforward to bypass them.  The most common mistake, especially with virtual pilots, is not following the correct procedure.

Possible 'surprises' associated with an IAN approach are:

1.   Failing to configure the aircraft prior to IAN engaging in FAC and G/P mode.

Unlike an ILS approach, where configuration for landing is initiated when the aircraft captures the glideslope (usually some distance from the runway) during an IAN approach configuration for landing is initiated approximately 2 nautical miles from the FAF.  

If you have not configured the aircraft for landing prior to the capture of the glide path, there may be insufficient time for you to complete recommended actions and checklists.   

If you believe this will occur, there is no reason why configuration cannot occur at an earlier stage.

2.   Forgetting to set the Missed Approach Altitude (MAA) in the MCP.

Failing to wait until the aircraft has descended 300 feet below the glide path capture altitude to reset the MCP altitude to the MAA.  Failure will cause the ALT HOLD annunciation to display and the aircraft leveling off.

3.   Approaching the runway while not on the correct intercept course.

IAN operates flawlessly with straight-in approaches and to a certain extent with approaches up to 45 degrees from the main approach course, however, IAN will not engage if you approach the assigned runway at 90 degrees.  Nor will IAN engage if you are attempting to fly a STAR.

4.   Forgetting to set the initial glide path altitude in the MCP (from the FMC).

A common mistake is not setting the glide path altitude (from the FMC) in the MCP window when configuring the aircraft for an IAN approach.

ProSim737 and IAN

Installing IAN to ProSim-AR Avionics Suite

IAN forms part of the avionics suite, however, for IAN to function it needs to be selected (turned on) in the ProSim-AR IOS (Instructor Operator Station).  The same is for the Navigation Scales (if required).

To turn on IAN, open IOS: Settings/Cockpit Setup Options/Options and place a tick in the appropriate box beside IAN.  A restart of the ProSim-AR main module may be required for the change to take effect.

IAN was introduced to the ProSim737 avionics suite in December 2014.   For the most part, the functionality is reliable and operates as it should (see note 1).

As at writing, known issues are as follows (this may change with Version 3 software updates):

  • ProSim737 does not display the IAN runway data immediately following the engagement of TO/GA during the take-off roll. 

This is incorrect.  In the real aircraft, this information is displayed immediately following the engagement of TO/GA during the take-off roll while.  (further research required)

  • The colour of the approach guidance display (LNAV/VNAV) after TO/GA is engaged is currently white.  This is incorrect.  The colour should be green.

  • At 100 feet AGL, if IAN is engaged and the autopilot remains selected, a flashing AUTOPILOT warning in amber colour will be displayed on the PFD.   This is correct.  However, an audible ‘autopilot’ callout should also be heard.  This is not simulated.

Important Point:

  • ProSim737 users should also note, that for IAN to function within the avionics suite, it must be selected in the cockpit set-up page of the Instructor Station (IOS).

Note 1:   IAN works flawlessly for straight-in approaches (or approaches that are slightly offset).  However, the ProSim software when using some RNAV (RNP) approaches has trouble maintaining the correct vertical profile.

When a RNAV (RNP) approach (not AR) is selected, IAN arms and engages very late in the approach profile (after the FAF).  The altitude that IAN engages is well below the profile used in VNAV; this results in the aircraft diving to capture the IAN glide path.  Once the aircraft is established on the glide path IAN works as it is supposed to. 

The above scenario does not occur with every VNAV (RNP) approach; only those that exhibit a curved radius to fix (RF) profile or short leg profile to the runway threshold.

In the real aircraft (depending on operator and country of operation) IAN can handle all RNAV (RNP) approaches with the exception of RNAV (RNP-AR)  approaches.

In comparison, Precision Manuals Development Team (PMDG) NGX and NGXu can fly the above approaches in IAN.  This has been achieved by artificially replicating the approach using various hidden ‘waypoints’ that their software can read.  In effect, what you are seeing is the aircraft flying over the waypoints that have been overlaid onto the curves in the approach. 

I do not believe ProSim has replicated PMDG’s methodology in their software.

Therefore, if flying an RNAV (RNP) approach using IAN, select only those approaches that are ‘more or less’ straight-in without RF curves or turns; otherwise, use LNAV/VNAV.

BELOW:   Montage of four screen captures of the PFD showing some of the displays generated during an IAN approach (images upper left to right then bottom left to right).  Images 1-3 are sequential. Image 4 is standalone.

Image 1:  Aircraft is LNAV/VNAV approaching the IAF.  The aircraft is too far from the runway for IAN to be in range to operate (RJAA VOR Rwy 16R).

Image 2:  Aircraft is in range of RJAA localiser (tuned in the navigation radio).  Runway data is displayed from localiser and Deviation Pointers are displayed in outlined white-coloured diamonds (anticipation pointers).  The Deviation Pointers will change from white (outline) to magenta (either outline or solid) when either the localiser or glide path is captured.  FAC and G/P are displayed on the FMA in white indicating that IAN has been armed.  Note that if IAN was not armed, only the runway data and Deviation Pointers would be displayed (RJAA VOR Rwy 16R).

Image 3:  IAN has captured the localiser and the lateral Deviation Pointer is displayed as a solid magenta-coloured diamond.  FAC (in green) is displayed on the FMA.  The vertical Deviation Pointer is still in outline and in white (anticipation pointer), as is the G/P on the FMA.   IAN is tracking the localiser (RJAA VOR Rwy 16R).

Image 4:  IAN has engaged.  The runway data is now sourced from the FMC and not the localiser (as in the above examples).  The FMA displays FAC and G/P in green colour, SINGLE CH is displayed, and both Deviation Pointers are solid magenta-coloured diamonds.  IAN has captured the Glide Path (RJAA ILS X or LOC X Rwy 16L).

Montage of four screen captures of the PFD showing some of the displays generated during an IAN approach (images upper left to right then bottom left to right).  Images 1-3 are sequential. image 4 is standalone

Image 1: Aircraft is LNAV/VNAV approaching the IAF.  The aircraft is too far from the runway for IAN to be in range to operate (RJAA VOR Rwy 16R).

Image 2: Aircraft is in range of RJAA localiser (tuned in the navigation radio).  Runway data is displayed from localiser and Deviation Pointers are displayed in outlined white-coloured diamonds (anticipation pointers).  The Deviation Pointers will change from white (outline) to magenta (either outline or solid) when either the localiser or glide path is captured.  FAC and G/P are displayed on the FMA in white indicating that IAN has been armed.  Note that if IAN was not armed, only the runway data and Deviation Pointers would be displayed (RJAA VOR Rwy 16R).

Image 3: IAN has captured the localiser and the lateral Deviation Pointer is displayed as a solid magenta-coloured diamond.  FAC (in green) is displayed on the FMA.  The vertical Deviation Pointer is still in outline and in white (anticipation pointer), as is the G/P on the FMA.   IAN is tracking the localiser (RJAA VOR Rwy 16R).

Image 4: IAN has engaged.  The runway data is now sourced from the FMC and not the localiser (as in the above examples).  The FMA displays FAC and G/P in green colour, SINGLE CH is displayed, and both Deviation Pointers are solid magenta-coloured diamonds.  IAN has captured the Glide Path (RJAA ILS X or LOC X Rwy 16L)

Videos of IAN Approach


IAN APPROACH IN SIMULATOR


IAN APPROACH IN REAL 737-800 AIRCRAFT


Final Call

The use of Global Positioning Systems has enabled stabilised approaches at many airports, and the IAN system can take advantage of this technology to provide intuitive displays that support stabilised approaches on a consistent basis. 

Aircraft fitted with IAN are capable of using the APP button located on the MCP to execute an instrument ILS-style approach based on flight path guidance from the FMC.  This makes Non Precision Approaches easier to execute with increased safety.  It also enables a constant descent angle, less engine spooling, wear and tear, and improved passenger comfort.  Furthermore, IAN uses a standardised and consistent procedure, that in addition to improved displays and alerts,  can be used in place of LNAV/VNAV.

Nevertheless, a flight crew must be vigilant when using any automation, especially during the critical approach phase where there is little margin for error.  First and foremost is the innate ability to fly the airliner manually, and although automation such as IAN can enhance safety, it does so at the detriment of manual flying skills.

References

Several sources were used to obtain the information documented in this post, including: personal communication with a B737-800 pilot, the Boeing Flight Crew Training Manual and the Boeing 737 Technical Guide by Chris Brady.

If any discrepancies are noted in this article, please contact me so they can be rectified.

Acronyms and Glossary

  • AGL – Above Ground Level

  • APP – Approach button located on MCP

  • CDU – Control display Unit (glorified keyboard)

  • EFIS – Electronic Flight Instrument Display

  • FAC – Final Approach Course

  • FAF – Final Approach Fix

  • FMA – Flight Mode Annunciator

  • FMC – Flight Mode Computer

  • FMS – Flight Management System

  • G/P – Glide Path (Non Precision Approach / NPA)

  • G/S – Glideslope (Precision Approach / PA)

  • IAF – Initial Approach Fix

  • IAN – Integrated Approach Navigation

  • ILS – Instrument Landing System

  • IMC – Instrument Meteorological Conditions

  • MAP – Missed Approach Point

  • MCP – Mode Control Panel

  • MDA - Minimum Descent Altitude

  • ND – Navigation Display

  • PFD – Primary Flight Display

  • RA – Radio Altitude

  • RF – Radius to fix

  • RNAV (RNP-AR) Approach - RNP-AR is a subset of an RNAV approach that requites authorization (RA) to fly

  • Select – To select , arm or engage something

  • STAR  -  Standard Terminal Arrival Route

Review and Updates

  • 25 August 2017 - Review and content updated.

  • 03 December 2019 - Review and content updated.

  • 29 October 2019 - Review and content updated.

  • 28 April 2021 - Review and content updated.  Release of .pdf.

  • 21 December 2022 - Updated to latest procedure changes.

Cost Index (CI) Explained

Screengrab from CDU screen showing the Cost Index page in PERF INIT

The Cost Index (CI) function of the Flight Management Computer (FMC) is an important and often misunderstood feature of a modern airliner.  Apart from real-world cost savings in fuel, differing CI values alter airspeeds used during the climb, cruise and descent phase of a flight.  Certainly, the CI value is not a pressing issue for a virtual pilot flying a simulator, but to an operating airline in a fuel-expensive environment, differing CI values can equate to thousands of dollars saved.

CDU showing Cost Index.  A CI of 11 will generate significant savings as opposed to a value of 300.  FMC is produced by Flight Deck Solutions (FDS)

Simply explained, the CI alters the airspeed used for economy (ECON) climb, cruise and descent; it is the ratio of the time-related operating costs of the aircraft verses the cost of fuel.  If the CI is 0 the FMC calculates the airspeed for the maximum range and minimum trip fuel (lower airspeed).  Conversely, if the CI is set to the highest number, the FMC will calculate higher airspeeds (Vmo/Mmo) and disregard any cost savings.

In practice, neither of the extreme CI values is used; instead, many operators use values based on their specific cost structure, modified if necessary to the requirements of individual flight routes.  Therefore, the CI values will typically vary between airline operators, airframes, and individual routes.

Access to the CI is on page 1 of 2 in the ‘ACT PERF INIT’ page of the Control Display Unit (CDU) of the Flight Management Computer (FMC).  It is on the left hand side lower screen and displayed ‘COST INDEX’.  The range of the CI is 0-200 units in the Boeing 737 Classics and 0-500 units in the Next Generation airframes.

Fuel Verses Time and Money

There is a definite benefit to an airline’s fuel cost when the CI is used correctly.  Bill Roberson in his excellent article ‘Fuel Conservation Strategies: Cost Index Explained’ states the difference between a CI value of 45 verses a CI value of 12 for a B737-700 can be in the order of $1790 - $1971 USD depending upon the price of fuel; the time gained by selecting the higher CI value (CI-12) is in the area of +3 minutes.  Although these time savings appear minimal, bear in mind that airlines are charged by the minute that they remain at the gate.

Granted fuel savings are important, but so is an airline’s ability to consistently deliver on time, its passengers and cargo. It is a fine line between cost savings and time management, and often the CI will be changed before a flight to cater towards unscheduled delays, a change in routing, short or long haul flights, cost of fuel, aircraft weight, or favourable in-flight weather conditions (i.e. tailwind).

A higher CI value may be used by airlines that are more interested in expediency than fuel cost savings; the extra revenue and savings generated by an airline that consistently meets its schedule with less time spent at the gate may be equal to, or greater than any potential fuel savings.  Boeing realizes that as fuel costs increase, airlines are reticent to only expend what is absolutely necessary; therefore, Boeing works with its clients (airlines) to determine, based upon their operating style, the most appropriate CI value to use.

Changing CI on The Fly'

Although not standard practice, the CI value can be changed during the flight.  Any change in the CI will reflect on climb, descent and cruise speeds, which will be updated in the CDU and can be monitored via the 'progress' page of the CDU. 


Figure 1: compares the cost index values against climb, cruise, descent and recommended altitudes for the Boeing 757 air frame.  Although these figures do not relate to the Boeing 737-800 NG, they do provide an insight into the difference in calculated CI values for climb, cruise, descent and recommended altitude


Is the Cost Index Modelled in all Avionics Suites

The CI is modelled by the avionics suite, and whether it is functional depends on the suite used.  ProSim737 and Sim Avionics have the CI modelled and functional, as does Project Magenta (PM), Precision Manuals Development Group (PMDG) and I-Fly.  

Airline Cost Index Values

As stated above, the inputted CI value is variable and is rarely used at either of the extreme ranges.  The following airline list of B737-800 carriers is incomplete, but provides guidance to CI values typically used.  Note that the CI is variable and the values below may alter dependent upon airlines operations.  A more detailed list can be found on the AVSIM website (Thanks Dirk (ProSim737 forum) for the link).

  • Air Baltic CI – 28

  • Air Berlin CI – 30

  • Air France CI – 35

  • Air Malta CI – 25

  • Air New Zealand CI – 45

  • Austrian CI – 35

  • Fly GlobesSpan CI – 13-14

  • Fly Niki CI – 35

  • Hamburg International CI – 30

  • KLM CI – 15/30

  • Nord Star CI – 30

  • Norwegian CI – 15

  • QANTAS CI – 40

  • Ryanair CI – 30

  • SAS CI – 45-50

  • South African CI – 50

  • South West CI – 36

  • Thomson Airways CI – 9

  • Ukraine International Airlines CI – 28

  • WestJet CI – 20-25

The CI is an important feature of the avionics suite that should not be dismissed.  Whilst real-world fuel savings are not important during simulator flying, the altered airspeeds that a different CI value generates can have consequences for the distance able to be flown, climb, descent and cruise speeds.

Acronyms

  • CDU – Control Display Unit

  • CI – Cost Index

  • FMC – Flight Management Computer

  • Mmo – Maximum operating speed

  • Vmo – Maximum operating limit speed

B737-800 NG Flight Mode Annunciator (FMA)

oem Flight Mode annunciator (737-800)

Automatic Flight System - Background

The Boeing 737-80 has a relatively sophisticated Automatic Flight System (AFS) consisting of the Autopilot Flight Director System (AFDS) and the Autothrottle (A/T).  


The Boeing 737-800 NG has a relatively sophisticated Automatic Flight System (AFS) consisting of the Autopilot Flight Director System (AFDS) and the Autothrottle (A/T).   The system is as follows:

  • The N1 target speeds and limits are defined by the Flight Management Computer (FMC) which commands airspeeds used by the A/T and AFDS;

  • The A/T and AFDS are operated from the AFDS Mode Control Panel (MCP), and the FMC from the Control Display Unit (CDU); 

  • The MCP provides coordinated control of the Autopilot (A/P), Flight Director (F/D), A/T and altitude alert functions; and,

  • The Flight Mode Annunciator (FMA), located on the Captain and First Officer side of the Primary Flight Display (PFD),  displays the mode status for the AFS.

If you read through the above slowly and carefully it actually does make sense; however, during in-flight operations it can be quite confusing to determine which system is engaged and controlling the aircraft at any particular time.

Reliance on MCP Annunciations

Without appropriate training, there can be a reliance on the various annunciations and lights displayed on the Mode Control Panel (MCP).  While some annunciations are straightforward and only illuminate when a function is on or off (such as the CMD button), others can be confusing, for example VNAV.

Do not reply on the MCP.  Always refer to the FMA to see what mode is controlling the aircraft.

Flight Mode Annunciator (FMA)

All Boeing aircraft are fitted with an FMA of some type and style.  The FMA on the Next Generation is located on the Captain and First Officer side Primary Flight Display, and is continuously displayed.  The FMA indicates what system is controlling the aircraft and what mode is operational.  All flight crews should observe the FMA to determine operational status of the aircraft and not rely on the annunciators on the MCP that may, or may not indicate a selected function.

The FMA is divided into three columns and two rows. The left column relates to the Autothrottle while the center and right hand column display roll and pitch modes respectively.  The two rows provide space for armed and selected annunciations to be displayed.  Selected modes that are operational are always coloured green while armed modes are coloured white. 

Below the two rows are the Autopilot Status alerts which are in larger green-coloured font, and the Control Wheel Steering (CWS) displays which are coloured yellow.  The Autopilot Status alerts are dependent upon whether a particular system has been installed into that aircraft.  For example, Integrated Approach Navigation (IAN), and various autoland capabilities.

When a change to a mode occurs (either by by a flight crew or by the Automatic Flight System), a mode change highlight symbol (green-coloured rectangle) is displayed around the changed mode annunciation.  The rectangle will be displayed for 10 seconds following the change in mode.

Unfortunately, not all avionics suites have the correct timing (10 seconds) and some displays the rectangle for only 2 seconds.  According to the Boeing manual the default time should be 10 seconds.

figure 1: common mode annunciations that the FMA can display.  FMA annunciations may differ between airframes depending upon the software installed to the aircraft (and avionics suite used in your simulation).  G, W and Y indicates the colour of the annunciation (green, white, or yellow). the pitch mode FOR column and CWS display are not populated. 

ERRATUM: ILS, SINGLE CH and IDLE HAVE NOT BEEN INCLUDED WHEN THEY SHOULD HAVE

Important Points:

  • An annunciation that is green-coloured indicates a selected mode.

  • An annunciation that is white-coloured indicates an armed mode.

  • If there is some confusion to what mode is currently flying the aircraft, the FMA should be what you look at - not the MCP.

Video

Boeing 737 ILS CAT IIIa Autoland PFD demonstrating FMA.


B737 Autothrottle (A/T) - Normal and Non-Normal Operations

Mode Control Panel (MCP) showing A/T on/off solenoid switch and speed window.  The MCP shown is the Pro model manufactured by CP Flight in Italy

THIS ARTICLE IS UNDER REVIEW - CHANGES TO FOLLOW.

  • UNTIL UPDATES APPEAR HERE, PLEASE SEE THIS LINK

The Autothrottle (A/T) is part of the Automatic Flight System (AFS) comprising the Autopilot Flight Director System (AFDS) and the autothrottle.  The A/T provides automatic thrust control through all phases of flight. 

The autothrottle functionality is designed to operate in unison with the Autopilot (A/P), Nevertheless, a flight crew will not always adhere to this use, some crews preferring to fly manually or partially select either the autopilot or autothrottle.

A search on aviation forums will uncover a plethora of comments concerning the use of the autothrottle which, combined with autopilot use and non-normal procedures, can be easily be misconstrued.  An interesting discussion can be read on PPRuNe.

This post will examine, in addition to normal A/T operation, some of the non-normal conditions, their advantages and possible drawbacks.  Single engine operation will not be addressed as this is a separate subject.

Additional Information:

Autothrottle (A/T) Use

The autothrottle is engaged whenever the A/T toggle is armed and the speed annunciator is illuminated on the Mode Control Panel (MCP).  Either of these two functions can be selected together or singularly. 

The autothrottle is usually engaged during the takeoff roll by pressing the TO/GA buttons located under the thrust lever handles.  This is done when %N1 stabilises for both engines at around 40%N1.  This will engage the autothrottle in the TO/GA command mode.  The reason the autothrottle is used during takeoff is to simplify thrust procedures during a busy segment of the flight.

FMA Captain-side PFD showing TO/GA annunciated during takeoff roll

Once engaged, the TO/GA command mode will control all thrust outputs to the engines until the mode is exited, either at the designated altitude set on the MCP, or by activating another automaton mode such as Level Change (LVL CHG).  When TO/GA is engaged, the Flight Mode Annunciator (FMA) will announce TO/GA providing a visual cue.

The use of the autothrottle is at the discretion of the pilot flying, however, airline company policy often dictates when the crew can engage and disengage the A/T. 

The Flight Crew Training Manual (FCTM) states:

‘A/T use is recommended during takeoff and climb in either automatic or manual flight, and during all other phases of flight’.

When to Engage / Disengage the Autothrottle

A question commonly asked is: ‘When is the autothrottle disengaged and in what circumstances’  Seemingly, like many aspects of flying the Boeing aircraft, there are several answers depending on who you speak to or what reference you read.

In the FCTM, Boeing recommends the autothrottle be used only when the autopilot is engaged (autopilot and autothrottle coupled).

In general, a flight crew should disengage the autothrottle system at the same time as the autopilot.  This enables complete manual input to the flight controls and follows the method recommended by Boeing.

My preference during an approach is to disconnect the autothottle and autopilot no later than 1500 feet AGL.  This corresponds to the altitude that the aircraft must be in landing configuration, gear down, flaps 30 and within vertical and lateral navigation constraints with landing checks completed.  Disconnecting the autothrottle and autopilot earlier in the approach provides additional time to transition from automated flight to manual flight, and establish a 'feel' for the aircraft before landing. 

It's not uncommon that  flight crew will manually fly the aircraft, especially 'old school' pilots who are very conversant with hand flying.   I know some crews that will fly from 10,000 feet to landing using the Flight Director (FD), ILS, VNAV and LNAV cues on the Primary Flight Display (PFD) for guidance and the information displayed on the Navigation Display (ND) for situational awareness.  Many pilots enjoy hand-flying the aircraft during the approach phase.

Important Point:

  • Whenever hand flying the aircraft with the autothottle not engaged, it's very important to monitor the airspeed.  This is especially so during the final approach, when thrust can easily decay to a speed very close to stall speed.

The Autothrottle is Designed to be Coupled with the Autopilot

The autothrottle is a sophisticated automated system that will continually update thrust based on minor pitch and attitude changes, and operates exceptionally well when coupled with the autopilot.  But, when the autopilot is not selected and the autothrottle selected, its reliability can be questionable.

Some crews believe that if a landing is carried out with the autopilot off and the autothrottle engaged, and a fall in airspeed occurs, such as during the flare, then the autothrottle will apply thrust which has the potential to cause a tail strike.  Likewise, if during the approach there are excessive wind gusts, pitch coupling (discussed below) may occur.

The advantages of using the autothrottle and autopilot together (coupled) are:

(i)      Speed is stabilized;

(ii)     Speed floor protection is maintained;

(iii)    Task loading is reduced; and,

(iv)    Flight crews can concentrate on visual manoeuvring and not have to be overly concerned with wind additives

The disadvantages of using the autothrottle with the autopilot not selected are:

(i)     Additional crew workload and possible loss of situational awareness (due to workload);

(ii)    Potential excessive and unexpected throttle movement caused by pitch and attitude changes;

(iii)   Potential excessive airspeed when landing in windy conditions with gusts;

(iv)   The potential for pitch coupling to occur (discussed below); and,

(v)    A loss of thrust awareness (out of the loop).

Important Point:

  • The autopilot and autothrottle should not be used independent of one another.

737 Next Generation thrust levers

Boeing 737 Design

The design  of the 737 airframe is prone to pitch coupling because of its under wing mounted engines.  The engine position causes the thrust vector to pitch up with increasing thrust and pitch down with a reduction in thrust.

The autothrottle is designed to operate in conjunction with the autopilot, to produce a consistent aircraft pitch under normal flight conditions.  If the autopilot is disengaged but the autothrottle remains engaged, pitch coupling may develop.

Pitch Coupling

Pitch coupling is when the autothrottle system actively attempts to maintain thrust based on the pitch/attitude of the aircraft. It occurs when the autopilot is not engaged and manual inputs (pitch and roll) are used to control the aircraft. 

If the pitch inputs are excessive, the autothrottle will advance or retard thrust in an attempt to maintain the selected MCP speed.   This coupling of pitch to thrust can be potentially hazardous when manually flying an approach, and more so in windy conditions.

Scenario - pitch coupling

For example, imagine you are in level flight with autothrottle engaged and the autopilot not engaged, and a brief wind change causes a reduction in airspeed. The autothrottle will slightly advance the throttles to maintain commanded speed. This in turn will cause the aircraft to pitch slightly upwards, triggering the autothrottle to respond to the subsequent speed loss by increasing thrust, resulting in further upward pitch. The pilot will then correct this by pushing forward on the control column to decease pitch. As airspeed increases, the autothrottle will decrease thrust causing the aircraft to decrease more in pitch.

The outcome is that a coupling between pitch and thrust will occur causing a roll-a-coaster type ride as the aircraft increases and then decreases pitch, based on pilot input and autothrottle thrust control.

A/T ARM solenoid, N1 and speed button.  The N1 and speed button illuminate when either is in active mode.  In the image, the A/T is armed; however, the speed option is not selected (the annunciator is extinguished).  This enables thrust to be controlled manually

Autothrottle Non-Normal Operations (Arm Mode)

The primary function that the A/T ARM mode is to provide minimum speed protection.  A crew can ARM the throttle but not have it linked to a speed.  To configure the autothrottle in ARM mode, the  A/T toggle solenoid on the MCP is set to ARM, but the SPEED button is not selected (the annunciator is not illuminated).

Scenario - speed button not selected during approach

Some flight crews prefer during an approach, to arm the autothrottle, but not have the speed option engaged (speed annunciator extinguished). 

By doing this during a non-precision approach, it enables a Go-Around to be executed more expediently and with less workload  (the pilot flying only has to push the TO/GA buttons on the thrust lever and the autothrottle will engage).

If the approach proceeds smoothly and a Go-Around is not required, the crew will prior to landing, disengage the A/T solenoid switch on the MCP by either manually 'throwing' the toggle or pressing the A/T buttons located on the thrust levers.  Although favoured by some flight crews, this practice is not authorized by all airlines, with some company policies expressly forbidding the ARM A/T technique.

The recommendation by Boeing in the B737 Flight Crew Training Manual (FCTM) states:

‘The A/T ARM mode is not normally recommended because its function can be confusing. The primary feature the A/T ARM mode provides is minimum speed protection in the event the airplane slows to minimum maneuvering speed. Other features normally associated with the A/T, such as gust protection, are not provided’.  (When the A/T is armed and the speed button option not selected).

Autothrottle Speed Protection and Vref in Windy, Gusty and Turbulent Conditions

To provide sufficient wind and gust protection, when using the autothrottle during an approach in windy conditions, the command speed should set to the correct wind additive based on wind speed, direction and gusts (between Vref+5 and Vref +20).  

The use of an additive creates a safety envelope that takes into account potential changes in wind speed and minimises the chance of the autothrottle commanding a speed that falls below Vref.  Remember, that as wind speed varies the autothrottle will command a thrust based on the speed.

During turbulence, the autothrottle will maintain a thrust that is higher than necessary (an average) to maintain command speed (Vref).

Important Points:

  • When the autothrottle is not engaged, or the speed option on the MCP deselected, minimum speed protection is lost.

  • Always add a wind additive to Vref based on wind strength and gusts.  Doing so provides speed protection when the autothrottle is engaged.

Refer to Crosswind Landings Part 2 for additional information on Vref.

A/T disengage button on throttle thrust lever.  This is an OEM throttle from a B737-300 series.  The button is identical to that used in the NG with the exception that the handles are usually white and not grey in colour.  Depressing this button will disengage the autothrottle and disconnect the A/T solenoid switch on the MCP

Manual Override - Engaging the Clutch Assembly

Occasionally, for any number of reasons, the flight crew may need to override the autothrottle. 

The Boeing autothrottle system is fitted with a clutch assembly that enables the flight crew to either advance or retard the thrust levers whilst the autothrottle is engaged.  By moving the thrust levers, the clutch assembly is engaged and the autothrottle goes offline whilst the levers are moved.

The clutch is there to enable the autothrottle to be manually overridden, such as in an emergency or for immediate thrust control.

ProSim737 does not (as at 2018) support manual autothrottle override.

Simulation Nuances

The above information primarily discusses the systems that operate in the real aircraft.  Whether these systems are functional in a simulation, depends on the avionics suite used (Sim Avionics, Project Magenta, etc).

For example, the autothrottle may not maintain the speed selected in the MCP during particular circumstances (for example, turns in high winds). If this occurred in the real world, a crew would manually override the autothrottle.  However, if the avionics suite does not have this functionality, then the next best option is to either:

(i)      Disengage the autothrottle and manually alter thrust; or,

(ii)     Deselect the speed annunciator on the MCP.

Deselecting the speed annunciator will cause the throttle automation to be disengaged; however, the autothrottle will remain in the armed mode.  The second option is a good way to overcome this shortfall of not having manual override.  By deselecting the speed option, the thrust levers can be jiggled forward or aft to adjust the airspeed.  When the speed has been rectified by manual input, the autothrottle can be engaged again by depressing the speed  button.

It's important if the autothrottle is not engaged, or is in the ARM mode, that the crew maintains vigilance on the airspeed of the aircraft.  There have been several incidents in the real world whereby crews have failed to observe airspeed changes.

Manual Flying (no automation engaged)

The benefit of flying with the autothrottle and autopilot not engaged is the ease that the aircraft can be maneuvered.  The crew sets the appropriate %N1 that produces the correct amount of thrust to maintain whatever airspeed is desired; gone are the thrust surges as the autothrottle attempts to maintain airspeed.

Granted, it does take considerable time and patience to become competent at flying manually in a variety of conditions, but the overall enjoyment increases three-fold.

Company Policies

Airline policies often dictate how a flight crew will fly an aircraft, and while some policies are expedient, more often than not they are based on economics (cost savings) for the company in question.

Policies vary concerning autothrottle use.  For example, Ryanair has a policy to disconnect the autothrottle and autopilot simultaneously, as does Kenya Airways.  Air New Zealand and QANTAS have a similar policy, however, define an altitude that disconnection must occur at or before.   If an airline doesn't have a policy, then it's at the discretion of the flight crew who should follow Boeing's recommendation in the FCTM.

Confusion and Second Guessing - Vref with A/T Engaged or Disengaged

There is considerable confusion and second guessing when it comes to determining the Vref to select dependent on whether the autothrottle is engaged or disconnected at landing.  To simplify,

  • If the autothrottle is going to be disconnected before reaching the threshold, the command speed should be adjusted to take into account winds and gusts (as discussed above and refer to Crosswind Landings Part 2).  It's vital to monitor airspeed when the autothrottle is not engaged as during the approach the speed can decay close to stall speed.

  • If the autothrottle is to remain engaged during the landing (as in an autoland precision approach), the command speed should be set to Vref +5.  This provides speed protection by keeping the engine thrust at a level that is commensurate with the Vref command speed.  If wind and gust indicate a higher additive speed, then this should be added to Vref.

Refer to Wind Correction Function (WIND CORR) for information on how to use the Wind Correction function in the CDU.

Final Call

There is little argument that the use of the autothrottle is a major benefit to reduce task loading; however, as with other automated systems, the benefit can come at a cost, which has lead several airlines to introduce company policies prohibiting the use of autothrottle without the use of the autopilot; pitch coupling, excessive vertical speed, and incorrect thrust can lead to hard landings and possible nose wheel collapse, unwanted ground effect, or a crash into terrain.

Ultimately, the decision to use or not use the autothrottle and autopilot as a coupled system is at the discretion of the pilot in command, and depends upon the experience of the crew flying the aircraft, the environmental conditions, and airline company policy.  However,  the recommendation made by Boeing preclude autothrottle use without the autopilot being engaged.

Disclaimer

The content in this post has been proof read for accuracy; however, explaining procedures that are convoluted and often subjective, can be challenging.  Occasionally errors occur. If you observe an error, please contact me so it can be rectified.

Acronyms and Glossary

  • A/P – Autopilot (CMD A CMD B).

  • A/T – Autothrottle.

  • AFDS – Autopilot Flight Director System
.

  • Command Speed - In relation to the Autothrottle, Command Speed is Vref +5 knots.

  • FCTM – Flight Crew Training Manual (Boeing Corporation).

  • FMA – Flight Mode Annunciator.

  • Manual Flight – Full manual flying. A/T and A/P not engaged.

  • MCP – Mode Control Panel.

  • Minimal Speed Protection – Function of the A/T when engaged.  The A/T has a reversion mode which will activate according to the condition causing the reversion (placard limit). (For example, flaps, gear, etc).

  • Pitch Coupling – The coupling of A/T thrust to the pitch of the aircraft.  A/T thrust increases/decreases as aircraft pitch and attitude changes.  Pitch coupling occurs when the A/P is not engaged, but the A/T is enabled.

  • Selected/Designated Speed – The speed that is set in the speed window of the MCP.

  • Take Off/Go Around (TO/GA) – Takeoff Go-around command mode.  This mode is engaged during takeoff roll by depressing one of two buttons beneath the throttle levers.

  • Vref – Landing reference speed.

Updated and Amended 04 July 2019