Rejected Takeoff (RTO) - Review and Procedures
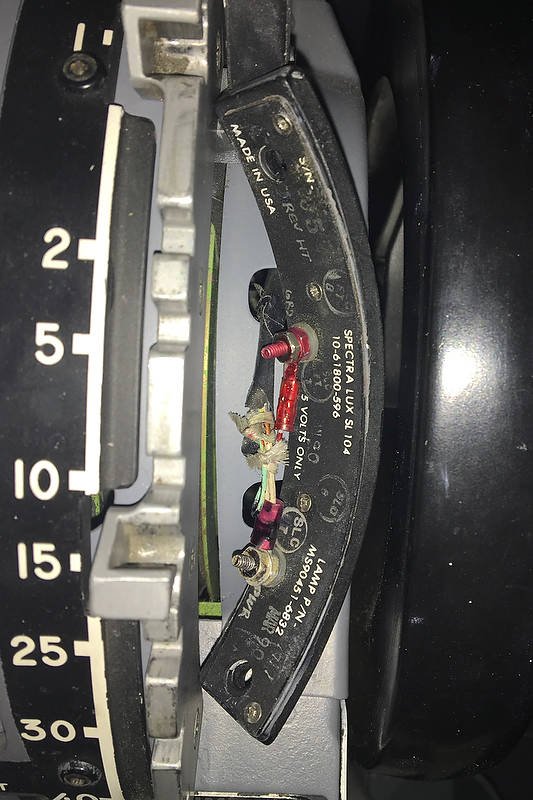
/The Rejected Takeoff is part of the Auto Brake Selector Panel located on the Main Instrument Panel (MIP). RTO can be selected by turning the selector knob to the left from OFF by one click. The knob is from a classic 737-500 knob
A takeoff may be rejected for a variety of reasons, including engine failure, activation of the takeoff warning horn, ATC direction, blown tyres, or system warnings. For whatever reason, Boeing estimates that 1 takeoff in every 2000 will be rejected (Boeing Corporation).
This is an OEM (Original Equipment Manufacture) autobrake assembly that has been converted for use in the simulator. Note that the selector knob is not NG compliant but is from a 500 series airframe. In time this knob will be replaced. (click image to enlarge)
Performed incorrectly, an RTO can be a dangerous procedure; therefore, protocols have been are established that need to be followed.
This is the first of two consecutive posts that will discuss components of the autobrake system. In this post RTO procedures will be explained. In the second post the auto brake will be examined.
Rejected Takeoff (RTO)
The Auto Brake and Rejected Takeoff (RTO) are part of Auto Brake System, the components which are located on center panel of the Main Instrument Panel (MIP). An RTO is when the pilot in command makes the decision to reject the takeoff of the aircraft.
The Boeing Flight Crew Training Manual (FCTM) states:
‘A flight crew should be able to accelerate the aircraft, have an engine failure, abort the takeoff, and stop the aircraft on the remaining runway'; or,
'accelerate the aircraft, have an engine failure, and be able to continue the takeoff utilizing one engine’.
Two important variables of pre-flight planning need to be established for an RTO to be executed safely - V speeds and runway length.
V Speeds and Runway Length
There are three V speeds that are critical to a safe takeoff and climb out: V1, Vr and V2.
V1 is the speed used to make the decision to ‘abort or fly’. Vr is the rotation speed, or the speed used to begin the rotation of the aircraft by smoothly pitching the aircraft to takeoff attitude. V2 is the speed used for the initial climb-out, and is commonly called the takeoff safety speed. The takeoff safety speed ensures a safe envelope for single engine operations.
It stands to reason, that the runway must be long enough to cater towards the V speeds calculated from the weight of the aircraft and outside temperature.
Rejected Takeoff - Conditions and Procedure
In general, the protocol used to execute an RTO, is to:
Abort the takeoff for ‘cautions’ below 80 knots; and,
Between 80 knots and V1 speed, abort only for ‘bells’ (fire warning) and flight control problems.
If a problem occurs below V1 speed, the aircraft should be able to be stopped before reaching the end of the runway. After exceeding V1 speed, the aircraft cannot be safely stopped and the only option is to takeoff, and after reaching a safe minimum altitude and speed, troubleshoot the problem.
Before takeoff, a flight crew will position the auto brake selector knob to RTO. This action will trigger the illumination of the auto brake disarm annunciator, which will illuminate amber for 2 seconds; this is a self-test to indicate that the system is working. After 2 seconds the annunciator will extinguish.
To arm the RTO prior to takeoff, the following conditions must be met:
The auto brake and anti-skid systems must be operational;
The aircraft must be on the ground;
The auto brake selector must be set to RTO;
The forward thrust levers must be in the idle position; and
The wheel speed must be less than 60 knots.
Once armed, the RTO system only becomes operative after the aircraft reaches 80 knots ground speed (some manuals state 90 knots). If an ‘abort’ is indicated below 80 knots, the aircraft will need to be stopped using manual braking power.
The auto brake will remain in the armed mode if the RTO abort was executed prior to 80 knots (the auto brake disarm annunciator does not illuminate).
To engage the RTO the following conditions must be met:
The auto brake must be set to RTO;
The thrust levers must be retarded to idle position;
The aircraft must have reached 80 knots; and,
The autothrottle must be disconnected.
When an RTO is executed and the auto brake system engages, the system will apply 3000 PSI to the brakes to enable the aircraft to stop. Additionally, if the aircraft has reached a wheel speed in excess of 60 knots, and one or two of the reverse thrust levers are engaged, the spoiler panels will extend automatically to the UP position (deploy), and the speed brake lever on the throttle quadrant will move to the UP position.
The auto brake will disengage, if during the RTO either pilot:
Activates the toe brakes;
Turns the selector knob of the auto brake from RTO to off.
If the reversers have been engaged and the speed brake lever is in the UP position, then the lever will abruptly move to the DOWN detente position. When this occurs, the speed brake annunciator will illuminate amber for 2 seconds before extinguishing. Braking will then need to be accomplished manually.
RTO Procedure
Pilot flying calls ‘STOP’, ‘ABANDON’ or ‘ABORT’
Pilot flying closes thrust levers and disengages autothrottle.
Pilot flying verifies automatic RTO braking is occurring, or initiates manual braking if deceleration is not great enough, or autobrake disarm light is illuminated.
Pilot flying raises speedbrake lever.
Pilot flying applies maximum reverse thrust or thrust consistent with runway and environmental conditions.
Once stopped, pilot flying engages parking brake and completes RTO checklist.
Important Point:
Point 4 is important as although the spoilers deploy automatically when the reverse thrust is engaged, the speedbrake lever must be extended manually by the pilot flying (prior to application of reverse thrust). This is to minimise any delay in spoiler extension, as extension is necessary for efficient wheel braking.
What Circumstances Trigger An RTO
Prior to 80 knots, the takeoff should be rejected for any of the following:
Activation of the master caution system;
Unusual noise and vibration;
Slow acceleration;
Takeoff configuration warning;
Tyre failure;
Fire warning;
Engine failure;
Bird strikes;
Windshear warning;
Window failure; and/or,
If the aircraft is unsafe or unable to fly.
After 80 knots and prior to V1, the takeoff should be rejected for any of the following:
Fire warning;
Engine failure;
Windshear warning; and/or,
If the aircraft is unsafe or unable to fly.
After V1 has been reached, takeoff is mandatory.
Important Points:
Important points to remember when performing a Rejected Takeoff are:
Engage the RTO selector knob before takeoff;
Retard throttles to idle;
Disengage the autothrottle (A/T);
Engage one or both reverse thrust levers;
Monitor RTO system performance, being prepared to apply manual braking if the auto brake disarm light annunciates;
Manually raise speed brake lever if not already in the UP position BEFORE engaging reverse thrust; and,
Remember that RTO functionality engages only after the aircraft has reached 80 knots ground speed, and remains armed if the RTO has been executed below 80 knots.
Procedural Variations
A successful RTO is dependent upon the pilot flying making timely decisions and using proper procedures. Whether an RTO is executed fully or partly is at the discretion of the pilot flying (reverse thrust engaged to deploy spoilers).
It should be noted that If the takeoff is rejected before the THR HLD annunciation, the autothrottles should be disengaged as the thrust levers are moved to idle. If the autothrottle is not disengaged, the thrust levers will advance to the selected takeoff thrust position when released. After THR HLD is annunciated, the thrust levers, when retarded, remain in idle.
For procedural consistency, disengage the autothrottles for all rejected takeoffs.
Figure 1 provides a visual reference indicating the distance taken for an aircraft to stop after various variations of the Rejected Takeoff are executed (copyright, Boeing Flight Crew Training Manual FCTM).
figure 1: distance taken for an aircraft to stop after various variations of the Rejected Takeoff are executed (copyright, Boeing Flight Crew Training Manual FCTM)
This post has explained the basics of a Rejected Takeoff. Further information can be found in the Flight Crew Training Manual (FCTM) or Quick Reference Handbook (QRH).
In the next post the autobrake system will be discussed.


