Powering, Wiring and Configuring the 737-300 Throttle Quadrant
/oem 737-300 throttle quadrant. installation of phidget 1064 interface card is to the forward bulkhead
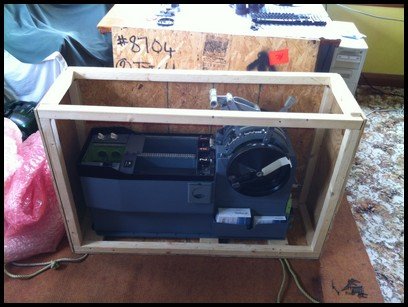
The picture shows the front of the throttle quadrant with the attached 0064 and 0066 phidget cards and the BUO 836X Leo Bodnar card. I thought this to be the best location for attaching the cards rather than having them either sit loose or be mounted on a separate board. The wiring and cards will not be visible when the quadrant is sealed against the front of the main instrument panel (MIP). However, if servicing is required, access to the cards and wiring can easily be achieved via the front of the MIP.
The Phidget cards are required to provide functionality to the trim indicator, motorizing of the trim wheels (via a servo motor), and to allow the deployment of the auto speed brake.
Different Voltages Required
The throttle quadrant requires different voltages to operate correctly. Apart from the obvious USB power through the USB cable connected to the cards, external power is supplied via a standard style computer power source, rated to 400 watts. To reduce the main power, which is 240 volts in Australia, to that required by the phidget cards and integrated back lighting (IBL); I installed a bench top power board kit. This small kit comes unassembled in a box direct from China. Assembling the kit and card isn’t difficult but it does taken considerable time to solder all the terminals in place. The bench top kit allows the power from the computer power source box to be reduced to: 3.3 V, 5 V, +12 V and -12V. Each power selection is protected by a 5 amp in-line fuse. In an attempt to try and maintain neatness I mounted this card directly to the power source box.
Functions on the throttle quadrant that require power are:
Integrated back lighting (IBL – aircraft bulbs) – 5 volts
Main parking brake light – 12 volts
Fire suppression module backlights and handle lights – 5 volts
Speed brake servo. Phidget controlled servo motor - 5 volts & 12 volts
Trim wheels (spin when electric trim is activated from yoke) Phidget controlled servo motor – 12 volts
Lighting on/off switch (TQ IBL only) – 5 volts
Hobbs meter (to indicate length of time TQ has been operational) – 24 volts (12V + 12V)
connecting wires to power distribution board
The other avionics that will be installed into the avionics bay are powered directly via USB (unless real aircraft modules are used)
I wasn’t exactly sure what the amperage draw was from the servo motor (that spins the trim wheels and activates the speed brake). Therefore, to connect the external power through the bench-top power kit, I decided to use 10 amp wire. I have a sneaky suspicion that 10 amp rated wire is overkill for the task, but at least I know it won’t melt.
If you want to view more detailed images, please navigate to the image gallery and select construction
Phidget & Leo Bodnar Card Programming
power distribution board positioned above computer power supply
Most of the buttons and levers located on the throttle are assignable to standard flight simulator controls through the windows joystick controller (or Leo Bodnar card). But, those throttle functions that are controlled by a phidget card, initially require mapping through a registered version of FSUIPC, so that they can be seen within the phidget's interface to allow assignment and configuration. I used a FSUIPC profile to map the functions controlled by phidget cards, which were: the trim indicators, trim wheels and speed brake.
I'll be the first to admit that my knowledge of phidgets is lacking; Until recently I couldn't spell the word. With the help of a very kind person from northern California who is exceptionally knowledgeable on phidgets my worries were soon overturned - at least for the time being. During a two hour telephone hook-up, the correct computer drivers and phidget libraries were installed on the computer and the attached phidget cards on the throttle quadrant were programmed to the required throttle quadrant fields with various FS variances and offsets (after they were mapped in FSUIPC).
As with many software related products, there was a bit of troubleshooting and configuration that needed to be done, but nothing too drastically complicated. It all seems quite easy when you know how.
The throttle now has full functionality with the exception of the automatic deployment of the speed brake on flare and touch down. This requires an additional Phidget card (004 card) which has four relays that can be computer controlled. The relay is needed to activate the squat switch to turn off the servo motor allowing the speed brake to deploy. This additional Phidget card will be installed shortly.

It was quite amusing when we programmed the phidgets to the trim wheel movement. I hadn't expected the movement and was leaning on the trim wheel while discussing the issue on the phone. BANG WHIRL as the trim wheel began to spin at a high number of revolutions. The movement and noise startled me and I almost fell from my perch! The TQ shook madly as the trim wheel rotated (as it isn't yet screwed to a platform) - I can now understand how real world pilots spill their coffee!
Programming the Leo Bodnar card was straightforward; this card follows the standard for windows joystick controllers. Essentially, you just follow the screen prompts and allocate button functions to whatever devices you choose.
One aspect that required careful attention is to check that the flight simulator controls are not duplicated in either the phidgets, Leo Bodnar, yoke, or other joystick controller settings. duplicate settings will cause problems.
Throttle Functionality Includes:
Independent forward and reverse thrust to engine 1/2 throttles
Speed brake arming
Speed brake flight deployment (spoilers)
Speed brake deployment on flare & touch down (requires another Phidget card)
Trim wheel rotation/revolution when trim applied
Trim wheel indicator functional and moving when electric trim is activated from yoke
Park brake and light
Cut off Levers (fuel idle & cutoff)
Flaps
TO/GA button functional (to go around)
A/T disengage functional (auto throttle)
All IBL backlighting functional
The stab trim switches I have had wired in such a way to stop the trim wheels from spinning. Although the spinning trim wheels are accurate to the real aircraft, they can be annoyingly noisy, especially at night when others are trying to sleep. To disengage the trim wheel motor from the spinning trim wheels, I flick the stab trim switch. To activate the them again, I reverse the process.
The horn cut out switch is currently not connected to throttle functionality, however, can be allocated to another flight simulator function if required.
Fire Suppression Panel (FSP)
A communication error with my friend, who was converting this panel to flight simulator use, means a little more work is required to add flight simulator functionality. At the moment I have power running to the handles causing the lamps to be lit all the time, and some of the module buttons to be back lit. To my knowledge, the handles should only light when the backlighting is switched on or when they are activated. I still have the original Boeing circuit boards and solenoid switches, and although I haven't given the matter a lot of thought, I believe that it should be possible to connect a Phidget 004 card, which has relays, to allow activation of APU and fire handles via the original solenoid switches. I'm not quite sure on how to activate the buttons and switches - perhaps FSUIPC offsets and phidget software. Rome wasn't built in day, so more on this later.