Video - Operational Trim Wheels & Indicators

Now that the throttle quadrant is operational, USB hubs working and the Phidgets correctly configured, I thought I’d post a short video clip showing the trim wheel operation.  The wheel spin is controlled by inputs either from the auto pilot or from electric trim switches located on the yoke.  When the wheels spin, there is corresponding movement of the trim wheel indicator tabs; the indicators, which are coloured white show the pitch of the aircraft.

Currently, the trim wheels spin at only one speed (mono-speed adjustable in the Phidget settings).  Later on, when I have time I'll be altering the speed to variable-speed  This will allow the wheels to spin at differing speeds dependent upon whether the aircraft is being controlled manually or by the autopilot.  This configuration requires some extra time with Phidgets and is not essential at the present time.

The trim wheels are connected to a 12 volt DC servo motor.  The motor is mounted inside the throttle quadrant near the actual wheels. To control the power to the servo motor I have used a Phidget advanced servo motor controller.  Double click video to view full screen.


Safety First

The trim wheels have a white line painted on them for a very good reason (not invasion markings for D-Day 1944).  The spinning wheels are dangerous – keep your fingers well away when they are operational!  The white line, when spinning acts as a visual warning to pilots that the wheels are spinning.  It also provides a means with which to calibrate the rotation speed of the trim wheels.  Each wheel also has a pull out handle that can be used to control trim manually.  Like your fingers, if your knee is in front of the handle when the wheels spin expect a solid whack on your knee cap.  I’ve been told by a real world B737 Captain, that there have been several occasions when pilots have suffered injuries to knee caps from being whacked by spinning wheels, after inadvertently leaving the handle extended.  As for me, well when they first "spun" into action the cup of coffee that was resting slightly against the wheel spun across the floor  :)

Stab Trim Switch Cut Out

As you can image, spinning trim wheels can be slightly annoying and very noisy – especially if you’re flying at night and others in the house are attempting to sleep.  Therefore, to stop the trim wheels spinning, I have programmed the trim stabilizer (stab trim) switches on the throttle quadrant to cut the power to the servo motor.  Push the stab trim switches to normal and the wheel spin; push the switch down and spinning stops.  Although the spinning stops, the trim indicator tabs still move.

In a real B737 this switch is used to stop run away trim wheels, so there is a certain amount of authenticity connecting this functionality to this switch.

Trim Tabs – Why Are They Important?

The use of trim tabs (elevator & pitch) significantly reduces pilot’s workload during continuous  flight maneuvers (sustained climb to altitude after takeoff or descent prior to landing), allowing them to focus their attention on other tasks such as traffic avoidance or communication with ATC.

Trim affects the small trimming part of the elevator on jet airliners. Trim (controlled by the trim switch on the yoke) is used all the time after the flying pilot has disabled the autopilot, especially after each time the flaps are lowered or at every change in the airspeed, at the descent, approach and final.   Trim is most used for controlling the attitude at cruising by the autopilot.

Correct trim frees the pilot from exerting constant pressure on the pitch controls for a given airspeed / weight distribution. Typically, when the trim control is rotated forward, the nose is held down; conversely, if the trim wheel is moved back, the tail becomes heavy and the nose is held high.

Trim Tabs - Technical Hype (the basics)

When a trim tab is employed, it is moved into the slipstream opposite to the control surface's desired deflection. For example, in order to trim an elevator to hold the nose down, the elevator's trim tab will actually rise up into the slipstream. The increased pressure on top of the trim tab surface caused by raising it will then deflect the entire elevator slab down slightly, causing the tail to rise and the aircraft's nose to move down. In the case of an aircraft where the deployment of flaps would significantly alter the longitudinal trim, a supplementary trim tab is arranged to simultaneously deploy with the flaps so that pitch attitude is not markedly changed.

Sticky Autothrottle Button - Repaired

oem autothrottle button. note the circular circlip

I noticed soon after the throttle quadrant arrived that the engine number one auto throttle button was a bit sticky.  Depressing the button, it would stay pressed in for a few seconds even though pressure had been released.  The autothrottle buttons are one-way buttons meaning that they are click buttons.  It’s probable that after many hours of service, sweat, dead skin cells and dirt has built up on the inner button behind the spring mechanism; a friend suggested that DNA analysis of the built up debris would probably provide a list of suspect pilots!

Whilst the button was still in place, I attempted to loosen the built up material using a can of pressurized electronic cleaner fluid.  The fluid, I hoped would dislodge any loose material before evaporating.  Unfortunately, this didn’t work in the long run, although once lubricated with the evaporate solvent, the button operated correctly for a short time.

oem autothrottle button removed

Circlip

The button is held in place within the throttle handle by a ½ inch circlip.  Beneath the circlip and button there is a spring mechanism that pushes the button out after being depressed.  Using a pair of circlip pliers, I very carefully removed the circlip making sure that the spring mechanism of the circlip didn’t propel my button out the window and into the garden! 

With the circlip removed, the inner portion of the throttle handle slides out revealing the button and attached wiring.  The button is a modular design (shaped to fit inside the throttle handle) and unfortunately cannot be disassembled further, Therefore, I reassembled the button and sprayed a small amount of silicone spray around the button, allowing the silicone solution to penetrate around the the edge of the button. 

The silicon lubricant (which is non conductive, so there is no issue with power shorting) seems to have solved the problem as the button no longer sticks, however, this is only an interim solution.  I'll search for a replacement button module.  Sometimes the most simple solution will fix your problem.

No doubt I can purchase a new replacement from Boeing for err $800.00....  I think not.  Eventually I'll find a disused button module in my travels.  

Throttle Teething & Calibration Issues - It Was Expected

oem 737-300 throttle quadrant

The throttle quadrant works well and I’m pleased with the result; however, as anticipated there are a few minor teething issues that require fixing.  There is a background humming noise, The engine one autothrottle switch is sticky, and there are some minor issues with the calibration of the throttle reversers and deployment of the speed brake. 

Background Humming Noise

When the phidget software is turned on with FSX there is an annoying background hum.  Initially, I thought this background hum to be the low frequency AC noise, but then realized that everything is DC – so there shouldn’t be any noise.  The cause of the hum is probably related to either of the following issues:

  • When the phidget software is turned on it’s activating power to the servo motor to deploy the speed brakes.  The servo motor is ready and waiting for a command, but as there is no command for movement and the servo motor has power running to it, it’s humming.  If this is the reason, then the installation of the Phidget 004 card will solve this issue. 

A Phidget 004 card has four relays which allow for three situations – on, off and always on.  When connected, the relays will tell the servo motor to switch off“until activated by movement of the speed brake.

  • The power to the throttle quadrant is from a 400 watt computer power source and a bench-top voltage reducing board).  I’ve been told that because all the power requirements are coming from a singular source, then this maybe a cause of noise.  The easiest method to solve this is to use two or three independent power sources.

Speed Brake Calibration - Auto Deployment of Handle

Calibration is always an issue when simulating a complex piece of machinery.  Calibration must take into account the various positions and operational requirements of the speed brake.  The speed brake must be recognised by the flight software in the following positions: off, armed and part/full detent.  It must also be configured to automatically activate (deploy) upon flare and touch down when the landing wheels touch the ground. 

The Boeing Operations Manual states: the thrust reverser can be deployed when either radio altimeter senses less than 10 feet altitude, or when the air/ground safety sensor is in ground mode.  Movement of the reverse thrust levers is mechanically restricted until forward thrust levers are in idle position.

Once touch down in achieved, the mechanical speed brake arm on the throttle quadrant will move automatically to the deployment position (full detent).  This is done by programming a squat switch.  A squat switch is standard on/off relay that tells the brake to either deploy or remain in the non deployment position.

Squat Switch & FSUIPC Programming

To program a squat switch I used a Phidget 0/0/4 card and programmed the F2Phidgets software to read squat switch in the interface.

To ensure that the speed brake was calibrated to FSX correctly I used FSUIPC.  One important aspect of the calibration is to ensure that the speed brake handle matches, more or less, the same movement of the virtual speed brake handle.  To check this you must open the throttle in FSX and observe the virtual movement of the handle while manipulating the real handle.

Using FSUIPC, open the Axis Assignment tab and move the speedbrake handle checking that the arm and detent positions are correct.  Select send to FSUIPC and tick (check) the spoilers in the drop down box.  Finally save the adjustments.

If you have not done so already, it's a good idea to have a FSUIPC profile set up to ensure that your changes are saved to specific aircraft.  For example my FSUIPC profile is called 737 Project.

Reversers

Once a Phidget 0/0/4 card is installed and the card relays calibrated appropriately to the speedbrake, it’s hoped that the calibration of engine 1 and engine 2 reversers through detent position 1 and 2 will be straightforward.

After consulting with others and solving these issues, I'll post an update to this thread (here).  Perhaps the information may benefit someone else doing a similar throttle retrofit.

Update

on 2014-12-23 12:50 by FLAPS 2 APPROACH

The hum is now gone.  The reason was straightforward; there was no commands being issued to the servo motor, so the motor was making a noise (this continual power to the motor eventually lead to its failure).  Once a command was directed to the motor, the noise disappeared.  To stop the motor from being turned on when there was not a command; a phidget relay was connected (on/off).  When the command is issued, the phidget relay opens and when the command is rescinded the relay closes and power to the motor is stopped. 

Reverse Thrust Levers

This also was relatively straightforward to solve. 

My problem lay in the fact that I was trying to program the reverse thrust levers to read three power settings (three detents) as in the real 737 aircraft.  The first detent/notch on the reverse lever opens the clam shells/buckets to redirect air, the second detent/notch provides 50% idle thrust and the third detent/notch applies full reverse thrust. 

The third position is rarely used as it can easily ingest foreign bodies into the engines from a contaminated runway causing engine damage - the exception being in very wet and/or snow conditions, when it is regularly used.

Unfortunately, programming the reverse thrust levers like this is not possible as flight simulator does not have the appropriate logic. 

Using FSUIPC to assign buttons & offsets

Once the problem was understood (with a little help from a real-world 737 pilot and another simmer), FSUIPC was used to program individual thrust to engine 1 and engine 2.  In FSUIPC, you assign a button to each of the reverse thrust levers, and then assign a flight simulation command (throttle set 1 and throttle set 2).  An offset parameter is required for each throttle which is -16384 / 0.  The repeat box must also be checked/ticked.

Real World Throttle Nuisances – they had me baffled for a time

One thing that baffled me was the changing of the FSUIPC button sequences as I activated the reverse thrust levers. As the level travelled through the first detent, each lever would indicate, in the FSUIPC software, the correct button number.  However, as the levers travelled through the second and third detent positions the button number would change and indicate button 4.  Button 4 is assigned to the speed brake lever.  Why was button 4 continually being activated? 

It was then realized that at the forward end of the spee brake handle, where the brake arm recesses into the throttle, there is a small button.  This button had been wired to button 4.  Button 4 is activated when you either raise the brake handle to arm/deploy the speed brake, or when a cam is activated by the reverse thrust levers (the levers travel over the cam as they pass detent two and three position). 

Once the issue was understood, it was a matter of changing the Button 4 assignment.

Speedbrake Calibration

This is far more difficult and challenging than I thought it would be.  I've spent many hours attempting to have the speedbrake operate in the correct manner, but have failed on all counts.  Without going into detail, sometimes it sort of works and at other times it fails.  The 0/0/4 phidget card has been installed and the two relays programmed (squat switch), however, for some reason problems continue. 

This is going to require some in-depth thinking and help from others.  It’s possible that a problem exists with the servo motor.

Continuing the above theme, I've just spent a few hours talking to a friend in the US discussing this issue. It seems that it's highly probable that the servo motor has been burnt out.

The intermittent behaviour and motor humming was most likely caused by the motor beginning to ove heat which eventually caused the motor to fail.  

In the meantime, everything else on the throttle quadrant appears to work correctly, which includes using the actual speedbrake lever to arm, partially open, or fully deploy the spoilers.  The only part that does not"yet work correctly is the automated movement of the speedbrake lever when the squat switch is activated on landing.

Powering, Wiring and Configuring the 737-300 Throttle Quadrant

oem 737-300 throttle quadrant. installation of phidget 1064 interface card is to the forward bulkhead

The picture shows the front of the throttle quadrant with the attached 0064 and 0066 phidget cards and the BUO 836X Leo Bodnar card.  I thought this to be the best location for attaching the cards rather than having them either sit loose or be mounted on a separate board.  The wiring and cards will not be visible when the quadrant is sealed against the front of the main instrument panel (MIP). However, if servicing is required, access to the cards and wiring can easily be achieved via the front of the MIP.

The Phidget cards are required to provide functionality to the trim indicator, motorizing of the trim wheels (via a servo motor), and to allow the deployment of the auto speed brake.

Different Voltages Required

The throttle quadrant requires different voltages to operate correctly.  Apart from the obvious USB power through the USB cable connected to the cards, external power is supplied via a standard style computer power source, rated to 400 watts.  To reduce the main power, which is 240 volts in Australia, to that required by the phidget cards and integrated back lighting (IBL); I installed a bench top power board kit.  This small kit comes unassembled in a box direct from China.  Assembling the kit and card isn’t difficult but it does taken considerable time to solder all the terminals in place.  The bench top kit allows the power from the computer power source box  to be reduced to: 3.3 V, 5 V, +12 V and -12V.  Each power selection is protected by a 5 amp in-line fuse.  In an attempt to try and maintain neatness I mounted this card directly to the power source box. 

Functions on the throttle quadrant that require power are:

  • Integrated back lighting (IBL – aircraft bulbs) – 5 volts

  • Main parking brake light – 12 volts

  • Fire suppression module backlights and handle lights – 5 volts

  • Speed brake servo.  Phidget controlled servo motor - 5 volts & 12 volts

  • Trim wheels (spin when electric trim is activated from yoke) Phidget controlled servo motor – 12 volts

  • Lighting on/off switch (TQ IBL only) – 5 volts

  • Hobbs meter (to indicate length of time TQ has been operational) – 24 volts (12V + 12V)

connecting wires to power distribution board

The other avionics that will be installed into the avionics bay are powered directly via USB (unless real aircraft modules are used)

I wasn’t exactly sure what the amperage draw was from the servo motor (that spins the trim wheels and activates the speed brake).  Therefore, to connect the external power through the bench-top power kit, I decided to use 10 amp wire. I have a sneaky suspicion that 10 amp rated wire is overkill for the task, but at least I know it won’t melt.

If you want to view more detailed images, please navigate to the image gallery and select construction

Phidget & Leo Bodnar Card Programming

power distribution board positioned above computer power supply

Most of the buttons and levers located on the throttle are assignable to standard flight simulator controls through the windows joystick controller (or Leo Bodnar card).  But, those throttle functions that are controlled by a phidget card, initially require mapping through a registered version of FSUIPC, so that they can be seen within the phidget's interface to allow assignment and configuration.  I used a FSUIPC profile to map the functions controlled by phidget cards, which were: the trim indicators, trim wheels and speed brake. 

I'll be the first to admit that my knowledge of phidgets is lacking; Until recently I couldn't spell the word.  With the help of a very kind person from northern California who is exceptionally knowledgeable on phidgets my worries were soon overturned - at least for the time being.  During a two hour telephone hook-up, the correct computer drivers and phidget libraries were installed on the computer and the attached phidget cards on the throttle quadrant were programmed to the required throttle quadrant fields with various FS variances and offsets (after they were mapped in FSUIPC). 

As with many software related products, there was a bit of troubleshooting and configuration that needed to be done, but nothing too drastically complicated.  It all seems quite easy when you know how.

The throttle now has full functionality with the exception of the automatic deployment of the speed brake on flare and touch down.  This requires an additional Phidget card (004 card) which has four relays that can be computer controlled.  The relay is needed to activate the squat switch to turn off the servo motor allowing the speed brake to deploy.  This additional Phidget card will be installed shortly.

It was quite amusing when we programmed the phidgets to the trim wheel movement.  I hadn't expected the movement and was leaning on the trim wheel while discussing the issue on the phone.  BANG WHIRL as the trim wheel began to spin at a high number of revolutions.  The movement and noise startled me and I almost fell from my perch!  The TQ shook madly as the trim wheel rotated (as it isn't yet screwed to a platform) - I can now understand how real world pilots spill their coffee!

Programming the Leo Bodnar card was straightforward; this card follows the standard for windows joystick controllers.  Essentially, you just follow the screen prompts and allocate button functions to whatever devices you choose.

One aspect that required careful attention is to check that the flight simulator controls are not duplicated in either the  phidgets, Leo Bodnar, yoke, or other joystick controller settings.  duplicate settings will cause problems.

Throttle Functionality Includes:

  • Independent forward and reverse thrust to engine 1/2 throttles

  • Speed brake arming

  • Speed brake flight deployment (spoilers)

  • Speed brake deployment on flare & touch down (requires another Phidget card)

  • Trim wheel rotation/revolution when trim applied

  • Trim wheel indicator functional and moving when electric trim is activated from yoke

  • Park brake and light

  • Cut off Levers (fuel idle & cutoff)

  • Flaps

  • TO/GA button functional (to go around)

  • A/T disengage functional (auto throttle)

  • All IBL backlighting functional

The stab trim switches I have had wired in such a way to stop the trim wheels from spinning.  Although the spinning trim wheels are accurate to the real aircraft, they can be annoyingly noisy, especially at night when others are trying to sleep.  To disengage the trim wheel motor from the spinning trim wheels,  I flick the stab trim switch.  To activate the them again, I reverse the process.

The horn cut out switch is currently not connected to throttle functionality, however, can be allocated to another flight simulator function if required.

Fire Suppression Panel (FSP)

A communication error with my friend, who was converting this panel to flight simulator use, means a little more work is required to add flight simulator functionality.  At the moment I have power running to the handles causing the lamps to be lit all the time, and some of the module buttons to be back lit.  To my knowledge, the handles should only light when the backlighting is switched on or when they are activated.  I still have the original Boeing circuit boards and solenoid switches, and although I haven't given the matter a lot of thought, I believe that it should be possible to connect a Phidget 004 card, which has relays, to allow activation of APU and fire handles via the original solenoid switches.  I'm not quite sure on how to activate the buttons and switches - perhaps FSUIPC offsets and phidget software.  Rome wasn't built in day, so more on this later.

B737-300 Throttle Quadrant & Center Pedestal - Arrived at Last

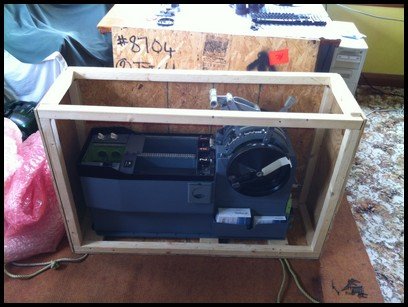
A big orange truck from TNT Express parked outside the house this afternoon and the driver began to offload a large wooden crate that weighed around 80 kilograms.  I could be only one thing – the Boeing throttle quadrant and avionics box (center pedistal) had finally arrived.   

Together, the driver and I manhandled the crate through the hallway of the house to the room in which construction of the simulator is taking place.  Removing a heavy piece of machinery from a wooden crate can be tricky, and the only method was to disassemble the box screw by screw – WOW what beauty!

Initial Thoughts

The throttle and avionics bay is a genuine aircraft part so there wasn’t much to not like; you can’t “immerse” yourself or get a more authentic experience than by using a real aircraft part.  The throttle originally was in use in a Boeing 737-300 with South West livery.  Unfortunately, the guy at the tear down yard didn’t document the tail number of the aircraft it was removed from.  It would have been nice to have a photo of the actual aircraft to place on the Blog.

The first aspect I noticed about the throttle was the build.  It’s a solid piece of engineering built to withstand the neglect of pilot use and now simulator use.  I don’t believe the throttle will ever be damaged from neglect my end – its’ solidly constructed.  The feel when you push the two power levers forward is - well – you just have to be here!  Manoeuvring the flap lever through the various indents is equally rewarding.  Knowing that the throttle was once used in a real aircraft by real pilots adds a completely new dimension to flight simulation.

Retrofitting and Connectivity

During the refurbishment of the throttle, I had decided to not bastardize the throttle to try and replicate the appearance a throttle from a Boeing NG.  Therefore, the throttle remains a 300 series throttle.  It has been repainted only where necessary and decals have been replaced only when they were unreadable.  The internal mechanism of the throttle has been completely striped, cleaned and serviced.  Parts, such as the huge cog wheels and unnecessary internal wiring have been discarded as these are not required for simulation use. 

To allow the throttle to connect correctly with flight simulator, three Phidget cards (0066 & 0064) & a Leo Bodnar card (BUO 836X) have been used.  The cards are connected directly to the front of the throttle casing and will not be visible once the throttle casing is connected to the centre stage of the main instrument panel (MIP). 

All the functions of the throttle operate with the exception of the stab trim switches, which can be linked to another FS function if required.  Trim wheels are functional with the use of a servo motor and the trim spins when electric trim is activated on the yoke.  Back lighting is integrated back lighting (IBL) using genuine Boeing 5 volt bulbs.

oem 737-300 throttle quadrant - initial thoughts: it’s built like a thunderbox

Current Status

At the moment I’ve only taken delivery and am in the process of connecting a Benchmark card to an external power source to allow power to reach the 5 volt lighting bulbs and servo motors.  I have little doubt that there will be teething issues with software as I configure everything for correct functionality, but I believe that this extra effort is worthwhile to be able to use a real throttle instead of a replica.

Center Pedestal

The avionics bay is a two-bay type.  Two-bay types were mainly used on the earlier Boeing classic series jets up to the 200 series, however, a number of 300 series aircraft used them as well as 400 series.  The bay was attached to the throttle when I bought it, so rather than dump it and replicate a NG three-bay; I’ve decided to use it to maintain authenticity.  I may at some stage in the future replace it with three-bay – I’ll see how things develop once I begin to populate the bay with avionics instruments.  One benefit of using a two-bay style is that once Weber seats are fitted to the flight deck there will be more room to squeeze past to get into the seat!

An interesting feature to the unit is the positioning of two oddly shaped aluminium pull downs.  At first, I had no idea what these were used for.  Then it dawned on me – they are retractable coffee cup holders.  What more can you ask for (laughing). 

oem 737-300 fire suppression panel

Fire Suppression Panel (FSP)

The fire suppression module was an afterthought.  A second hand unit was available and I decided to retrofit this with limited functionality to flight simulator.  At the moment IBL works, and when pulled, each fire handle does what it’s supposed to do.  At some stage in the future I may activate the fire bell.  But, at the moment it’s early days with regard to this.  Basically it’s a module that has to be installed into the avionics bay for aesthetics; a TQ without a fire suppression module looks a slightly naked.

More on the actual avionics bay at a later stage when I begin to populate the bay with instruments - much kmore interesting than looking at "naked bay"

Throttle Quadrant & Center Pedestal on the way (finally)

The QANTAS strike in Australia has sure left me stranded - not personally but with freight.  Even though flight operations were only cancelled for a few days, the backlog of freight and essential cargo that has been delayed is staggering. It just proves that Australia really does need another major airline so that Qantas does not hold the nation to ransom.

Throttle Quadrant and Center Pedestal

After almost a month in transit (who said air freight was fast), the 737 throttle quadrant and center pedestal has arrived in Sydney, only to be sitting on the floor of the Qantas warehouse for a week!  My customs forwarder advised me on Friday that Qantas finally has released the freight for dispatch to Melbourne then onwards further south to Hobart.  Arrival time is mid next week (touch wood).

Main Instrument Panel

The main instrument panel, I have been reliably told by Peter Cos of Flight Deck Solutions, has been wired and will be ready for dispatch later next week.  I'll ensure this freight is NOT sent via QANTAS - maybe DHL.

In the interim, whilst waiting for freight to arrive, I've been kept busy setting up the two computers and learning about networking in Windows 7.  After many hours, it seems that many of these matters are now well on their way to be solved.  I've also been spending considerable time researching the various flight models that can be used with Sim Avionics.

It will soon be time to begin the build phase of the project.

Boeing Style 737 Clock

737 cl clock installed to mip. a future project will be wiring the clock for operation. at the moment 5 volts backlighting is connected

Whilst waiting for the Main Instrument Panel (MIP) to arrive from Flight Deck Solutions (there has been a delay in fabrication), I came across this OEM 737 clock for auction on e-bay.  The clock has been removed from an American Fed Ex aircraft and has been serviced to new condition.  The price I paid was very reasonable and my thoughts were it would make a very nice addition to the MIP to replace the stenciled clock or reproduction clock on the First officer side.

I'd like to try and get the clock working with the simulator, and will look at doing this sometime in the future.  At the moment I will contend with the fact that it's a nice looking 737 style clock that adds to the aesthetics of the MIP on the First Officer side.

OEM components are generally inexpensive and often less than the price of reproduction items, and while conversion of an OEM part can be difficult for the technologically challenged, it is not impossible.

If you are seeking realism, then OEM components provide a more tangible feeling to what is in effect a reproduction flightdeck.

737-800 Clock

This clock is not what most Next Generation aircraft have installed.  The Next Generation usually has a digital chronograph.  I am using a chronograph on the Captain-side. This style of clock is more readily observed in a 737 classic airframe. 

I intend to fit this clock to the First Officer side of the MIP.  The Captain side will have a standard style Next Generation chronograph fitted.

Update

on 2016-03-01 12:58 by FLAPS 2 APPROACH

I've received several e-mails asking where I found this clock and how much I paid for it. 

I discovered the clock on e-bay and the price was a tad over $100.00 USD with freight.  The freight paid was most of this amount!  A fair price, in my opinion, for a serviceable 737 style clock.

Boeing 737 Fire Suppression Panel - Arrived

737-300 Fire Suppression Panel

All excitement here!

A short time ago I received an e-mail from a friend, who has found a 737 Fire Suppression Panel (FSP) in a tear down yard.  A bit of negotiation concerning the purchase price and it's now mine.  

oem 737-300 fire suppression panel

The attached photographs are what the unit currently looks like; a little bashed about with damaged labels and chipped paint.  But, overall it is in good condition.  Once it's cleaned up and refurbished it will look almost like new. and, as I've said in earlier posts, there is nothing better than a real aircraft part.

A decision is yet to be made whether the unit will be converted with full functionality or left as is with only bac lighting connected.

Certainly, a fully functioning fire suppression panel would add benefits when simulating single engine operation and / or an engine fire or overheating situation. A fire can be generated in flight simulator from the instructor console in Sim Avionics. A fire can be generated and then the appropriate fire handle can be pulled to extinguish the fire and stop the engine. 

The FSP is not an item you use regularly, if in fact at all.  However, inclusion is mandatory if you are striving to attain a certain degree of authenticity and realism in your flight simulator.

Update

on 2014-07-24 13:03 by FLAPS 2 APPROACH

The 737-300 fire suppression panel shown here has since been sold and replaced with a 737-600 fire suppression panel.  There are subtle differences between the earlier units and Next Generation panels which I did not know about when I purchased the 737-300 CL unit. For example, the Next Generation unit has additional annunciators (Korrys).

The replacement fire suppression panel, which is in better condition, has been converted and has full functionality.  I will discuss the conversion and use of the Fire Suppression Panel in a future post.